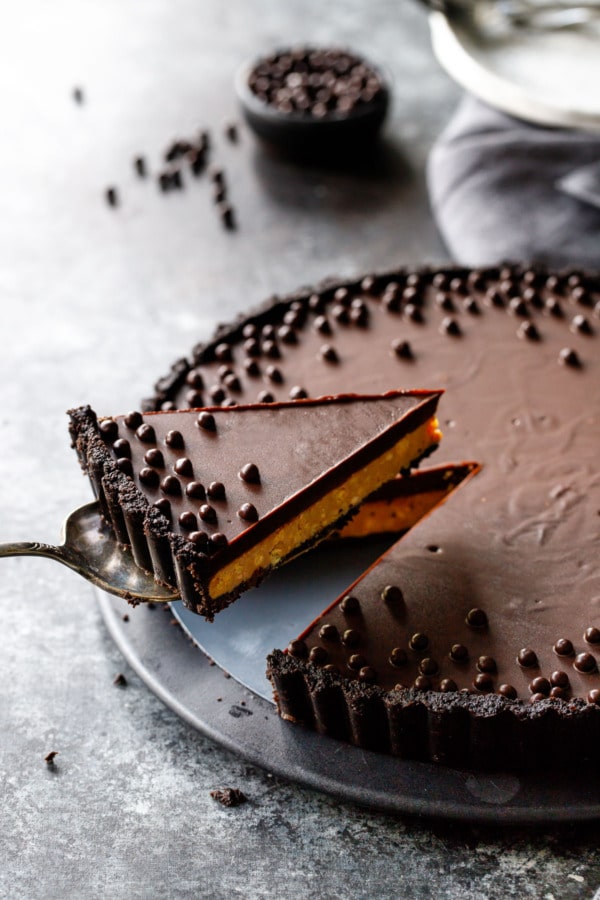
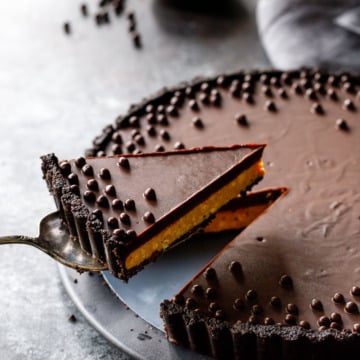
With a crunchy peanut butter filling and creamy chocolate ganache nestled in a sweet and salty chocolate cookie crust, it’s like a giant peanut butter cup, but bigger and so much better.
Sweet and salty, creamy and crunchy, rich and nutty… this tart has a little bit of everything. While it looks downright impressive with its perfectly defined layers, it takes less than 45 minutes of active time to prepare, although you do need to allow for sufficient chill time between layers and before serving (so plan ahead!)
Things have certainly changed since I started blogging.
Back in 2012 or so, it wasn’t uncommon for me to whip something up on the weekend, snap a few photos and have it posted by that very evening.
I don’t know if my standards have changed or what, but now if something turns out perfectly the first time it’s practically a miracle. It’s not unusual for me to have to make something at least 2 or 3 times before it’s deemed post-worthy.
Of course, the difference could be the fact that back then I wasn’t doing many original recipes. It’s much easier to have a first-time success when a recipe is already tried and true; when you are trying and truing it yourself it takes a wee bit more time and effort.
I had high hopes for my first attempt at this tart, which is essentially a giant peanut butter cup with a cookie crust and a delightfully crunchy filling. I made a filling along the lines of a peanut butter buttercream, with a bit of ground toffee for texture and flavor.
It seemed like it was off to a good start, so much so that I started gathering props and setting up the scene with the intention to shoot it that very day.
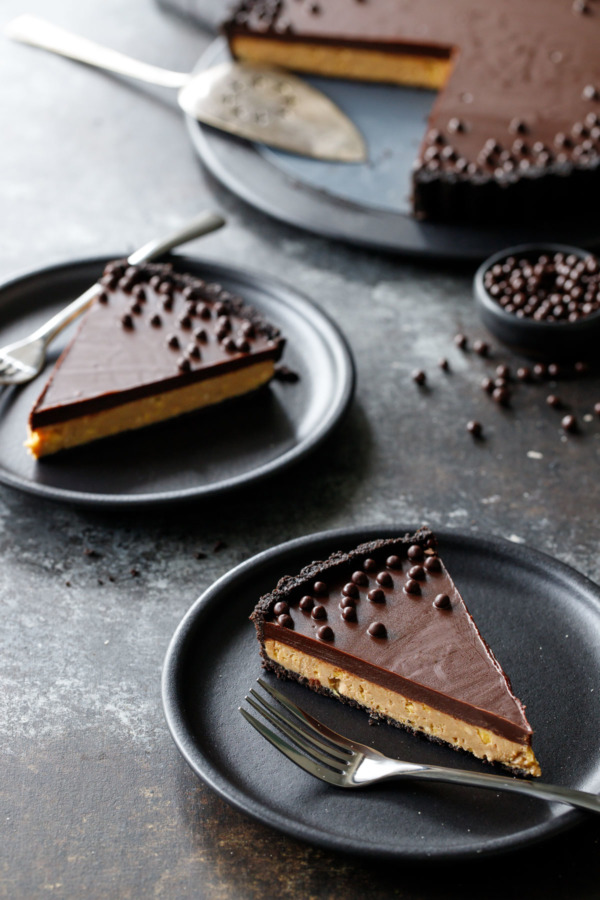
In my attempt to preserve the shiny ganache topping, I didn’t fully chill the tart as I should have. As I sliced into it, the pointy tips of the slices started to droop, and the soft filling started to bulge out the sides under the weight of the ganache on top.
It wasn’t pretty in the least.
I should really know better than to try to shoot my first attempt at any recipe: it’s just a waste of my time.
In this case, it wasn’t just aesthetic reasons that necessitated a do-over. The filling was also far too sweet, and other than adding more powdered sugar, I couldn’t think of a way to make the filling firmer while reducing the sweetness.
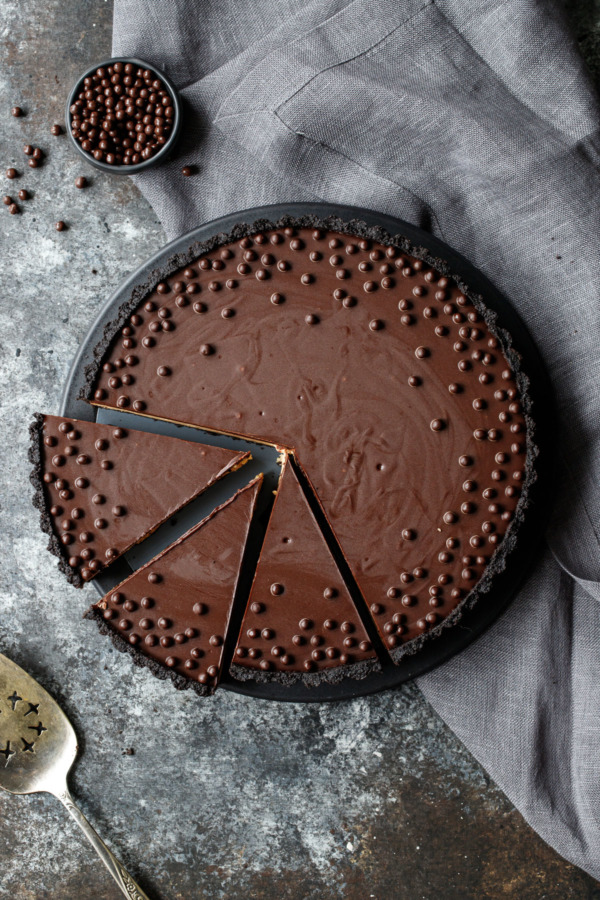
The second time around, not wanting to waste more time and ingredients, I scaled down the filling, trying a few different variations in muffin-tin-sized tarts, mainly to check for overall sweetness and consistency.
The winner was actually the one with the fewest ingredients: with little more than peanut butter and white chocolate (shh, don’t tell Taylor!) and ground up peanut brittle for crunch. The filling doesn’t taste like white chocolate at all, but the white chocolate sets up beautifully when chilled and has a milder, less cloying sweetness than the powdered sugar version.
It’s also much easier to prepare than the buttercream version (which required a mixer) or the raw peanut version (which basically had you making fresh peanut butter from scratch).
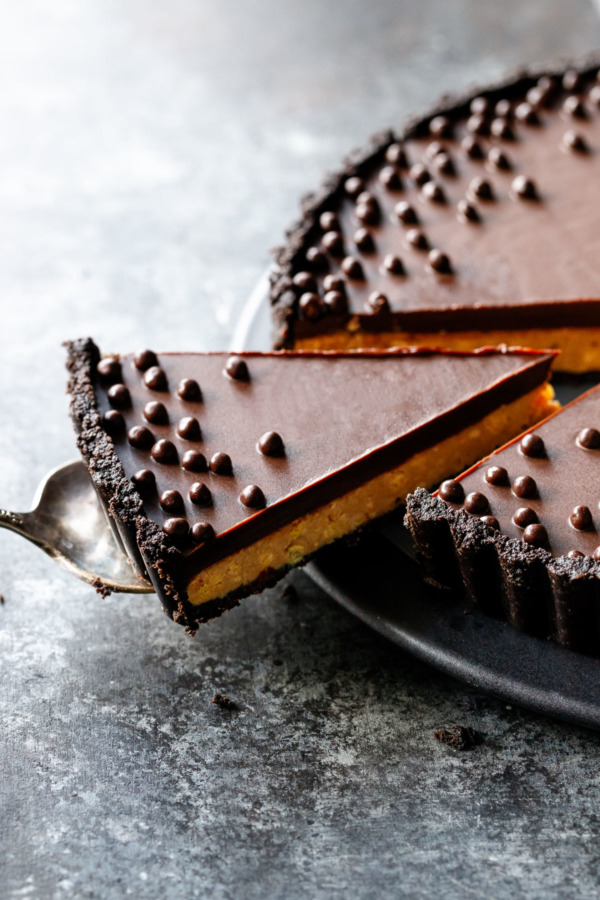
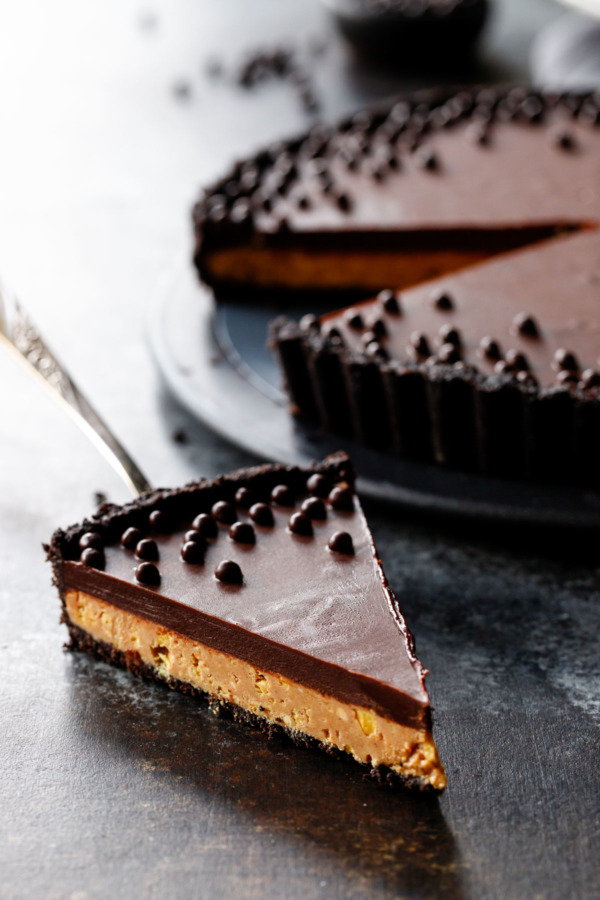
I’m sure there’s a trick for keeping a chilled ganache shiny, but at this point I’m none the wiser. Maybe freezing the filling then letting the ganache cool to room temperature before freezing? Chilling at a slightly warmer temperature, in a wine fridge for example? If you’ve got a trick, please share!
In the end, the final result was perfection in terms of taste and texture, and I wasn’t going to bother to remake it yet again just so it’d be a little bit shinier.
The plain ganache top would be stunning on its own, but I topped my tart with a scattering of dark chocolate crispearls: crispy bits of cereal coated in dark chocolate for some added visual interest.
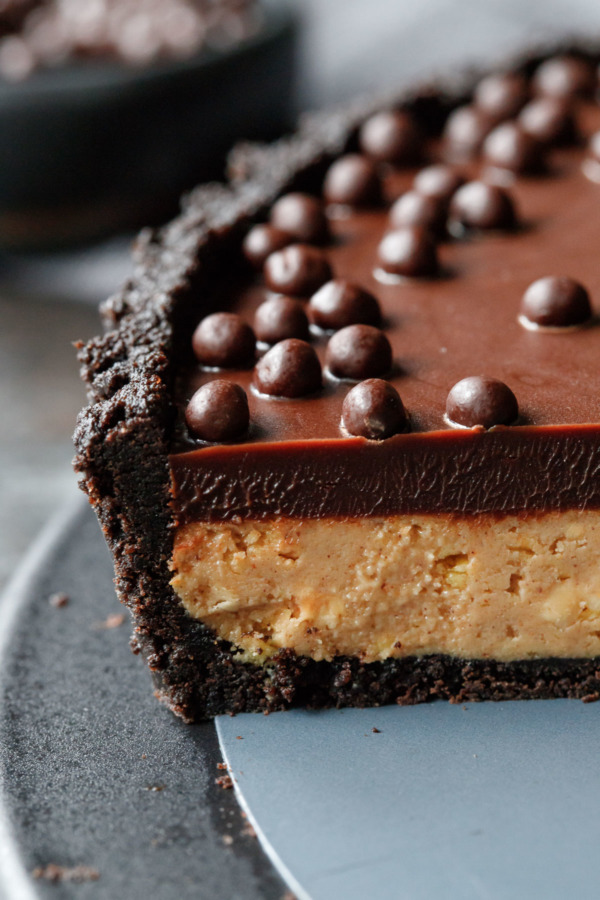
One of my favorite parts of the peanut butter filling is the crunch, which comes from finely chopped peanut brittle folded into the melted white chocolate and peanut butter (props to Bravetart for this idea). I also tried it with a leftover box of English toffee as well, although scraping off the chocolate from the chunks of English toffee is a little tedious for my liking. Peanut brittle is easy enough to find, either in a grocery, candy store or online in bulk.
In my quest for crunch I toyed with the idea of using feuilletine—a crispy, caramelized flakes often used by professional pastry chefs—but it wasn’t something easily purchased in less than commercial-kitchen-quantities and I didn’t really want to make it myself. Still, if you happen to have some or feel up to making it, I think it’d be a great alternative to the peanut brittle here.
Either way, the crunchy bits of caramelized sugar and peanut really make this tart a deligtful textural experience.
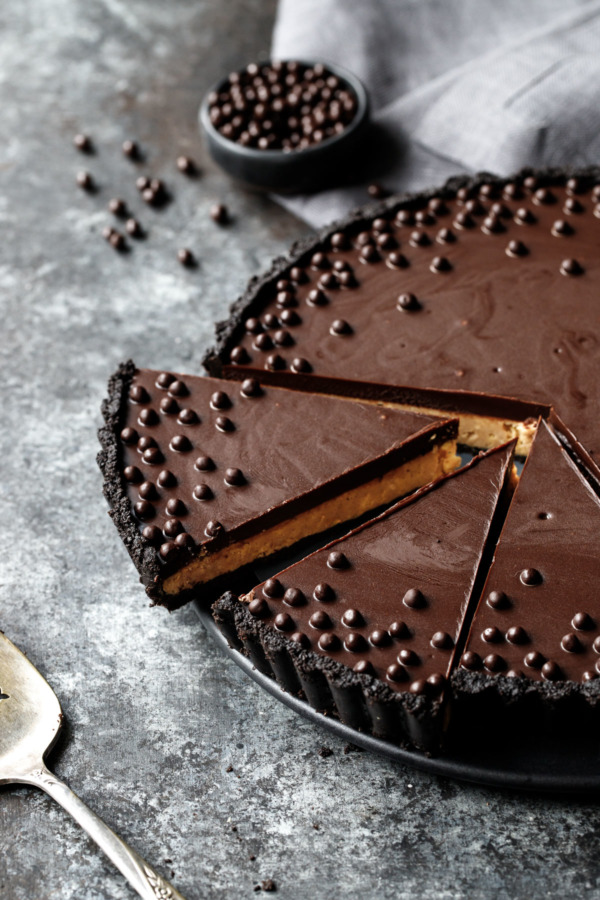
This is not the dessert to bring to a summer cookout where it will be sitting out at warm temperatures for hours. The filling is perfect after about 15 to 20 minutes at room temperature; much more than that and it starts to get too soft.
With that in mind, I recommend to keep the tart chilled until ready to slice and serve. Your ganache won’t be beautifully shiny when it comes out of the refrigerator, but a matte finish is better than a too-soft filling.
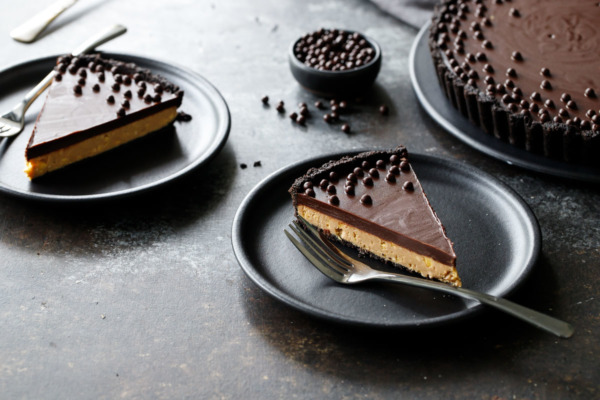
Crunchy Peanut Butter and Chocolate Tart
Yield: 12 servings
Cook Time: 45 mintues
Total Time: 4 hours
Like a giant peanut butter cup in tart form, this easy and impressive tart recipe features a crunchy peanut butter filling and creamy chocolate ganache nestled in a sweet and salty chocolate cookie crust.
Ingredients:
For Crust:
- 6 ounces (about 30) chocolate wafer cookies, finely ground
- 5 tablespoons unsalted butter, cut into pieces
- 1 ounce semisweet or dark chocolate, finely chopped
For Peanut Butter Filling:
- 8 ounces white chocolate, finely chopped
- 2/3 cup (7 ounces) creamy peanut butter
- 4 ounces peanut brittle, coarsely chopped
For Ganache:
- 4 ounces dark or semisweet chocolate (50-70%), finely chopped
- 4 ounces milk chocolate, finely chopped
- 1/2 cup heavy cream
- 1 tablespoon butter, at room temperature, cut into smaller pieces
Directions:
- For crust, pulse cookies in a food processor until finely ground. Transfer to a bowl.
- In a microwave-safe bowl, melt butter and chocolate in a microwave in 30 second bursts on half power until just melted. Stir until smooth. Pour into bowl with cookie crumbs and fold until evenly moistened.
- Dump crumbs into a 9-inch tart pan with removable bottom. Press firmly to pack the crust on the bottom and up the sides of the pan. Use a tart tamper or a flat-bottomed measuring cup to help you compact the crumbs as firmly and evenly as possible.
- Freeze crust for 30 minutes to set.
- In a microwave safe bowl, melt white chocolate and peanut butter in a microwave in 30 second bursts on half power until just melted. Stir until smooth.
- Pulse peanut brittle in a food processor until somewhat finely chopped; there should be some crumbs and some large pieces, but ideally nothing bigger than a grain of pearl couscous. Add to melted white chocolate mixture and stir until evenly incorporated.
- Pour into frozen crust, spreading into an even layer. Return to freezer for another 30 minutes or until fully set.
- To prepare ganache topping, place finely chopped chocolate in a medium heat-proof bowl.
- Warm cream in a small saucepan over medium-low heat until it just begins to bubble around the edges (do not let it boil). Pour over chopped chocolate and let sit for 30 seconds.
- Gently whisk the warm cream and the chocolate, starting in the very center and stirring in a small circle until you have a pocket of shiny ganache. Then slowly expand your strokes in concentric circles until the rest of the cream is incorporated and the chocolate is fully melted. If your chocolate isn’t completely melted, place the bowl on top of a pot of gently simmering water for about 30 seconds just to warm it slightly; continue to slowly stir until chocolate is fully melted.
- Add butter, one piece at a time, slowly whisking until incorporated. You don’t want to whisk too fast or you risk breaking the ganache.
- Once ganache is smooth and butter is fully incorporated, pour ganache over top of frozen peanut butter filling, spreading it into an even layer. Tap the pan a few times on the countertop to remove any air bubbles. Decorate with crispearls or other decorations as desired.
- Refrigerate until ganache is fully set, at least 2 hours or overnight. Keep chilled; let come to room temperature for no more than 15 to 20 minutes prior to slicing and serving. Tart will keep, covered in the refrigerator, for up to 1 week.
Did you make this recipe?
Let us know what you think!
Leave a Comment or share a photo on Instagram with the hashtag #loveandoliveoil.
We are a participant in the Amazon Services LLC Associates Program, an affiliate advertising program designed to provide a means for us to earn fees by linking to Amazon.com and affiliated sites.

0 comments