

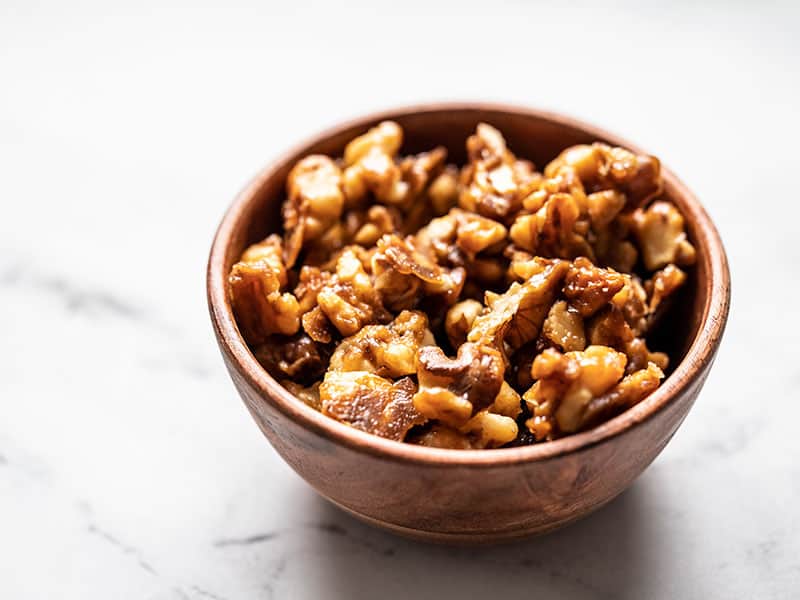
These crunchy little devils are dangerous. They’re addictively sweet, rich, crunchy, and nutty. I made this “small batch” recipe to not only keep myself from eating two cups of candied walnuts at once, but also because walnuts are expensive and I wanted to save the rest of the bag for other non-candied purposes. Sometimes you just need a little “sprankle-sprankle” of candied goodness on your meal and not a mountain of candied walnuts with no dedicated use. A mountain is great if you’re having a party, but not for everyday purposes.

What’s in Candied Walnuts?
The super simple candy coating on these walnuts is just brown sugar, butter, and a pinch of salt. Yep, that’s it! That’s all you need to make that delectably rich toffee coating. This is a dangerous piece of knowledge, use it wisely.
You can also play around with adding some other herbs and spices to your candied walnuts. A pinch or two of cayenne pepper would be amazing with the brown sugar and butter candy coating, as would vanilla, cinnamon, or ginger.
How Do You Use Candied Walnuts?
Candied walnuts are a great topping for several things. Most recently I used the sweet and crunchy nuts to top an Autumn Kale and Apple Salad. They’re also great on top of ice cream or ice cream sundaes, yogurt or yogurt parfaits, a bowl of oatmeal, or even added to granola (after cooking). A small bowl of candied walnuts also makes a great addition to a cheese board (hello holiday entertaining!).
How Long Do Candied Walnuts Last?
As long as it takes you to eat them! Ba-dum-dum. Okay, all bad dad jokes aside, these candied walnuts will last quite a while. All nuts do go rancid eventually, but as long as you cool them completely and then store them in an air-tight container, they should be good for about a month.

Small Batch Candied Walnuts
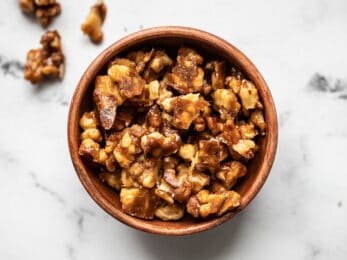
This small batch of crunchy candied walnuts is just the right amount of sweet, crunchy, and nutty topping for salads, desserts, oats, and more.
- 1/2 Tbsp butter ($0.07)
- 2 Tbsp brown sugar ($0.08)
- 1 pinch salt ($0.01)
- 1/2 cup walnuts ($0.60)
-
Add the butter, brown sugar, and a pinch of salt to a small non-stick skillet. Heat over medium until the butter is melted and the brown sugar is just beginning to sizzle around the edges (it should still look grainy).
-
Add the walnuts (chopped or whole) and stir to coat in the brown sugar mixture. Continue to cook and stir over medium heat for 2-4 minutes, or until the brown sugar is fully melted and coating the walnuts (it should look glassy, not grainy).
-
Remove the skillet from the heat immediately, as the sugar can go from melted to burning quickly. Spread the candied nuts out over a sheet of parchment paper, making sure they are in a flat layer and separated as much as possible.
-
Allow the nuts to cool fully (about 10 minutes). The candy coating will fully harden as they cool.
Scroll down for the step by step photos!

How to Make Candied Walnuts – Step by Step Photos
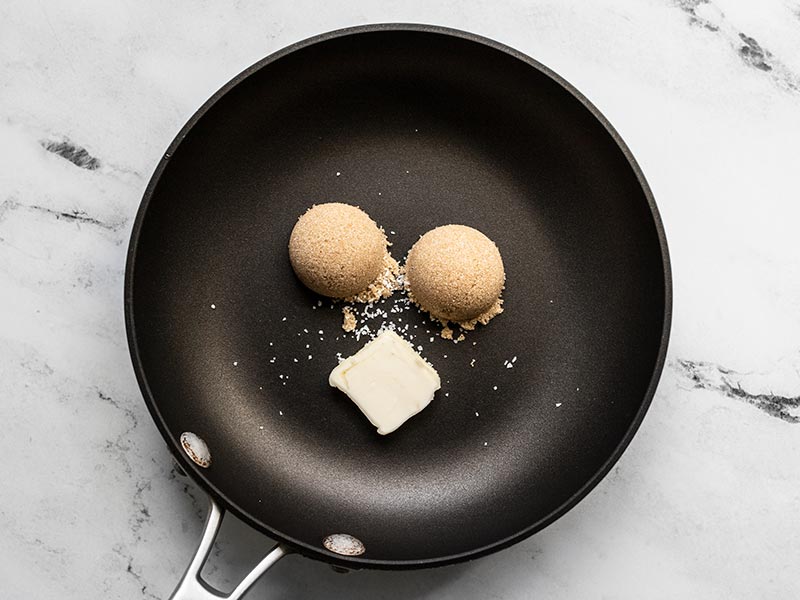
Add 1/2 Tbsp butter, 2 Tbsp brown sugar, and a pinch of salt to a small non-stick skillet.
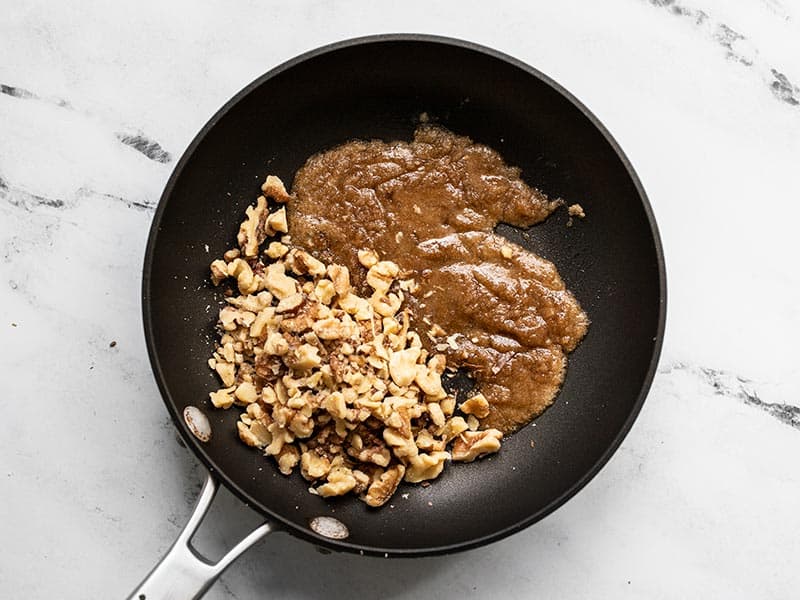
Heat and stir the brown sugar and butter until the butter is melted and the brown sugar is just starting to sizzle around the edges. It should kind of look like grainy lava, like in the photo above. Add a 1/2 cup walnuts (chopped or whole) and stir to coat in the brown sugar mixture. Keep cooking and stirring for 2-3 minutes more, until the brown sugar is fully melted and coating the walnuts (it should look glassy, not grainy).
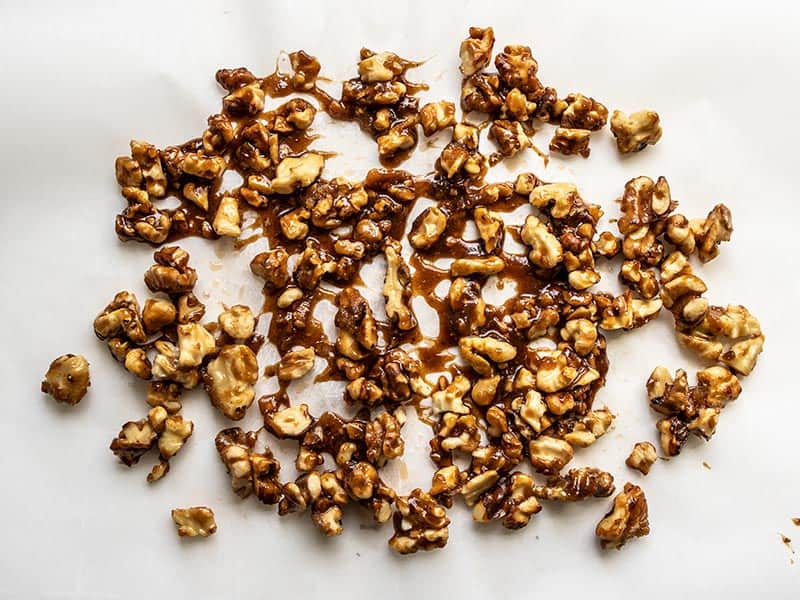
Remove the skillet from the heat immediately because the brown sugar can go from melted to burning quickly. Spread the walnuts out onto a piece of parchment paper, in a single layer, trying to separate them as much as possible. Let the nuts cool completely (about 10 minutes). The candy coating will harden further as they cool.
Enjoy your crunchy candied walnuts on top of salads, yogurt, ice cream, oats, or any of your other favorite foods!
The post Small Batch Crunchy Candied Walnuts appeared first on Budget Bytes.


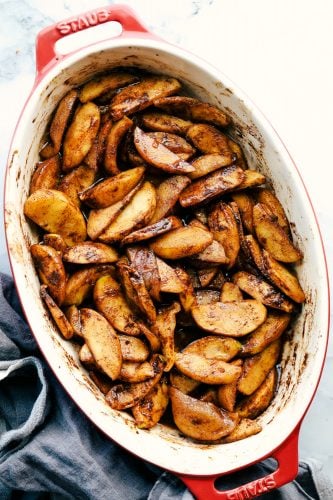
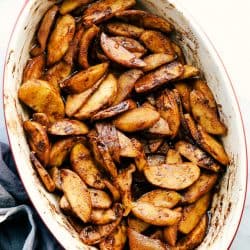
Brown Sugar Cinnamon Baked Apples are crisp apples quartered and mixed with rich brown sugar and cinnamon seasoning then baked to perfection. Add ice cream on top for a decadent fall dessert!
For me, apples are my favorite in the fall. If you love apples as much as we do try this Apple Crumb Muffins, Caramel Toffee Apple Cake or Praline Apple Bundt Cake.

Brown Sugar Cinnamon Baked Apples
During the fall season I am always craving apples. My mind is constantly thinking of how and what can I make with apples this season.
It is something with their crisp, sweet, tart and then savory taste that I just love when biting into an apple.
There are so many types of apples and flavorings within each one.
These baked apples are a savory and sweet treat that are addicting to say the least.
Every tender and then crunchy bite makes me want another bite.
These baked apple slices are just what you need to add to your fall meals this season!
What you need to make baked apple slices
Just a few simple ingredients that will make these apples taste their very best!
When mixing these apples together the fall smell and aroma in the our home changes.
It is a sweet, yet savory smell that remind me so much of cooler temperatures and fall leaves outside.
The ingredients are simple and already in your pantry for easy access.
Just mix together and you have a dessert that can be so versatile this fall!
- Apples: sliced and peeled apples are best for baking
- Brown sugar: I am addicted to brown sugar. Any change I get to add it to any recipe I am all over it. I love the sweetness and taste of it!
- Cinnamon: rich and flavorful cinnamon is a must for apples.
- Lemon juice: this helps the apples from turning brown before baking.
- Butter: just what you need to soften and add more flavoring to the apples while baking.

How you make baked apple slices
Just a few simple steps to make this tried and true dessert come to life.
Mixing it all together in one bowl and baking it in another is easy clean up and makes this dessert easy to say the least.
When baking your home will continue to smell like fall inside and have the warmth from the oven fill your home.
You will be able to start to taste the baked apple slices once it is about done.
You know you will be ready to serve these warm with a nice scoop of vanilla ice cream to top them off with.
Bring fall inside this season with these brown sugar cinnamon baked apples!
- Mix ingredients together: Preheat the oven to 400 degrees. In a medium sized mixing bowl add the sliced apples, brown sugar, cinnamon and lemon juice and mix until incorporated.
- Bake and serve: Place in a 9×13 inch pan or 2 quart casserole dish. Bake for 20-25 minutes until the apples are tender. Stir once in between. Serve with ice cream or as a topping.
Preparing your apples
Apples are easy to work with but you are on a time frame with them in order to keep their color.
Lemon juice does help them from turning brown but eventually they still will continue to have a discoloring if you wait too long.
Start with peeling my apples. If you have an apple peeler that is quick and easy, you can also use a sharp knife to peel with too.
Next, cut your apples into slices. You will want them all about the same size slice so they bake evenly.
I like to use my apple slicer then I get rid of the core and seeds at once. The slices are a little too thick so then I cut those sliced in half.
If you do not have an apple slicer, a sharp knife works best. Simply cut in half and then quarter them into the same thickness. About 1/4 inch slices.
Here are some of my favorite apples to bake with:
- Granny Smith apples: most the time these are the apples I like to bake with. They are not too sweet but have enough to be sweet and savory.
- Golden delicious apples: these apples tend to bruise easily and turn colors quickly. They have a sweetness to them that we love though.
- Fuji apples: enjoy more of a sugary flavoring in these apples. They are a bit sweeter than most.
- Honey Crisp apples: tastes just like they sound. They are crisp and sweet like honey.
- Green apple: these are great for a tart pie or dessert.
How to use your baked apple slices
These brown sugar cinnamon baked apples are the perfect way to end any meal.
There are so many ways of serving them with other meals for a savory treat or adding them on top of a sweet treat.
These apples can be added to the side or on top for a great appetizer, side dish or dessert!
- Top them with some vanilla ice cream for a decadent dessert. This Vanilla Soft Serve Frozen Yogurt is always good!
- Drizzling Homemade Salted Caramel Sauce over top.
- Adding these baked apples on top of the Quick 45 Minute Cinnamon Rolls.
- Use these baked apples in the Apple Pecan Crisp or Best Ever Dutch Apple Pie.
- This Brown Sugar Glazed Pork Chop is great to add baked apples on top of for a savory and sweet meal.
Tips for making baked apple slices
These apples are basic, straight forward and have all the flavor that you will love in every bite.
There are not many changes to these apples because of how simple they are to mix together and bake.
Here are a few tips to help change it up and add in more or less flavoring depending on how much you prefer.
- Substitute the brown sugar for white sugar and honey for a less sweeter dessert.
- If you don’t have time to bake your apples try frying them on the stove top for a quicker way of cooking.
- After mixing all the ingredients together add them to a slow cooker and let the slow cooker finish cooking them for about 2 hours on low or until tender. Stirring them occasionally.
- Mixing your flavors and types of apples is always a fun way to change up this dessert.
- Add a splash of vanilla to the mixture for a sweet and subtle vanilla flavoring.

What to serve with your baked apples
Most the time we just love to eat our baked apples as a side or as a dessert.
You can have more any meal with these baked apples.
To keep it a little bit southern, we like to start with Chicken Fried Steak, Dad’s Famous Mashed Potatoes and finish off with Brown Sugar Cinnamon Baked Apples with a scoop of ice cream on top.
Storing baked apples
For best results making these the day of and even having them baking during dinner time is best.
You will be able to smell the apples, cinnamon and brown sugar mixture blending together and creating an aroma that will last all night long in your warm home.
These are just what you need to finish off any meal that you have prepared.
- Making ahead: if you are planning to have this after dinner for a dessert or a side dish during your meal make ahead of time and store the pan fully covered and place in the refrigerator until ready to warm up. It will last in the refrigerator for 4 to 5 days.
- Refrigerating: Bake and let cool completely then add your baked apples to a ziplock bag or an airtight container in the refrigerator for 4 to 5 days.
- Freezing: these apples don’t do the best frozen because of the change of color and texture but you can still do it if you don’t mind those changes. Store your baked apples in a freezer bag for up to 1 month in the freezer.
- Warming up: when ready to reheat, bake at 350 degrees Fahrenheit for 15 minutes or until your apples are warm or warm them up on the stove top and stirring occasionally. You can also use the microwave, just be careful not over cooking them. They do tend to become mushy when warming up in the microwave.
Here are more apple recipes
- Perfect Apple Pie
- Caramel Apple Cinnamon Rolls
- Cinnamon Apple Bread
- Caramel Apple French Toast Casserole
- Crumb-Topped Apple Coffee Cake

Brown Sugar Cinnamon Baked Apples
Brown Sugar Cinnamon Baked Apples are crisp apples quartered and mixed with rich brown sugar and cinnamon seasoning then baked to perfection
- 6 cups apples (sliced and peeled)
- 1/3 cup brown sugar
- 1 Tablespoon Cinnamon
- 1 Tablespoon lemon juice
- 1/4 cup butter (cubed)
- Preheat the oven to 400 degrees. In a medium sized mixing bowl add the sliced apples, brown sugar, cinnamon and lemon juice and mix until incorporated.
- Place in a 9×13 inch pan or 2 quart casserole dish. Bake for 20-25 minutes until the apples are tender. Stir once in between. Serve with ice cream or as a topping.
This Sweet and Sour Pork is an easy, lighter version of the Asian take-out classic.

If you order sweet and sour pork from a Chinese restaurant, then you might remember that the pork is often heavily fried in oil before tossing with the sauce. In this recipe, the pork is fried in a very small amount of oil. The sauce is a little lighter than the restaurants deliver too.

How to trim Pork Tenderloin:
In this recipe, you want to remove any visible fat on the tenderloin. Once the fat is removed, you’ll remove the silverskin too. The silverskin is the thin shiny membrane attached to the tenderloin. To remove, slip the tip of your knife under the silvery skin and start slicing back and forth with the sharp edge of the blade angled upward, keeping the membrane tight as you are cutting. Continue to slice the skin off in this manner until all the skin is removed. Then your tenderloin is ready to cut into cubes for stir-frying.

How to make Sweet and Sour Pork:
The pork is tossed with a little bit of cornstarch before frying in the oil. Fresh ginger and garlic are added in with the pork and stir fried until fragrant. Green bell pepper and chopped pineapple are added next and cooked until crisp-tender. At this point, your dinner is going to start smelling really, really good!
Next you’ll add the sauce- a simple mixture of cornstarch, water, rice vinegar, sugar, ketchup and soy sauce. You’ll let that sauce boil and simmer for a couple of minutes, just until thickened. That’s it. Dinner is done!

If you are following the Weight Watchers Freestyle SmartPoints program, each serving of this Sweet and Sour pork will count as 7 points. There are four servings in this recipe. If you’re not following a diet, then don’t worry about that. Eat as much as you want, and enjoy it!

I like to serve Sweet and Sour Pork over steamed rice. Then you can spoon a little bit of the extra sauce on top. Now you can enjoy eating Chinese take-out at home!
Here are a few more pork tenderloin recipes you might like to try:
- Hoisin Pork Stir Fry
- Pork Tenderloin with Mango- Lime Salsa
- Family- Style Pork Tacos
- Island- Style Pork Tenderloin
- Maple- Glazed Pork Tenderloin
- Honey- Sesame Pork Tenderloin
- Honey Mustard Pork Tenderloin
- Sweet and Spicy Pork Tenderloin
Sweet and Sour Pork

A perfectly acceptable lightened up version of this popular Chinese take-out dish.
- 1 pound pork tenderloin (trimmed of fat), (cut into 1/2-inch cubes)
- 2 tablespoons cornstarch
- 1/3 cup water
- 1/4 cup rice vinegar
- 1/4 cup granulated white sugar
- 3 tablespoons ketchup
- 2 tablespoons low-sodium soy sauce
- 1 tablespoon canola oil
- 1 tablespoon peeled, minced fresh ginger
- 2 medium garlic cloves, (minced)
- 1 medium green bell pepper, (seeded and cut into 1/2-inch pieces)
- One 8-ounce can pineapple chunks (in juice), (drained and each chunk cut in half)
- steamed rice, for serving ((optional))
- chopped scallions, for garnish ((optional))
-
Combine the pork with 1 tablespoon cornstarch in a medium bowl; toss well to coat and set aside. Whisk together the remaining 1 tablespoon cornstarch, water, vinegar, sugar, ketchup, and soy sauce in a small bowl; set aside.
-
Heat a nonstick wok or large, deep skillet over medium-high heat until a drop of water sizzles. Swirl in the oil, then add the pork. Stir-fry until almost cooked through, 2 to 3 minutes. Add the ginger and garlic. Stir-fry until fragrant, about 30 seconds. Add the bell pepper and pineapple; stir fry until crisp-tender, about 3 minutes. Add the vinegar mixture and cook, stirring constantly, until the mixture boils and thickens and the pork is just cooked through, 1 to 2 minutes.
- Weight Watchers Freestyle SmartPoints per serving (without rice): 7
- This recipe is gluten-free adaptable– just be sure to use brands of ketchup, soy sauce and pineapple that are GF.
The post Sweet and Sour Pork appeared first on Recipe Girl®.
It’s moist, fluffy, pumpkin-spiced, and seriously cozy. Yes, this easy vegan pumpkin bread will change your life (we think).

Fuzzy blankets, wool sweaters and hot cider can’t hold a candle to this one. Yes, this vegan pumpkin bread is the ultimate in cozy. It’s perfectly moist and intensely pumpkin spiced. Even better, it’s light and fluffy: so you get your pumpkin spice fix without it being overly heavy or rich. Yes, it’s a seriously good pumpkin bread that happens to be plant-based too!
What makes the best pumpkin bread?
My sister has been staying with us for the past few weeks; she’s been living in Southeast Asia and is now relocating back to the US. So in the in-between, she’s been living with Alex, Larson and me here in Indianapolis. It’s seriously fun to have aunt Lisa around at this stage in Larson’s life. And it’s given us all the excuses to try out cozy recipes on her! There’s nothing like a loaf of pumpkin bread in the oven to make a house guest feel at home, right?
And when she tasted this one, she said, “This is the best pumpkin bread I’ve ever had!” We hope you’ll think the same. And after making it, reader Rachel said, “Everyone loved it! It was so moist and delicious with a subtle bit of pumpkin and sweetness. It wasn’t overpowering like some recipes/box mixes!”
Here’s what makes this the best vegan pumpkin bread we’ve made:
- It’s light and fluffy. Lots of pumpkin breads are dense and oily. This one won’t leave you with a stomach ache.
- It’s just sweet enough. We’ve used a combination of sugar and maple syrup so that it’s sweet, but not too sweet.
- It’s perfectly spiced. The pumpkin spice level here brings just the right amount of warmth, without overpowering.

Tips for making this vegan pumpkin bread
This pumpkin bread is vegan, so it’s fully plant-based. Vegan baking is not so different from traditional baking: it uses just a few tricks to stand in for dairy and eggs. Here are a few tips for making this bread:
- Use flax eggs. Here we use flax eggs to stand in for traditional eggs. If you’ve never made a flax egg, it’s quick and easy: all you need is ground flax seed and water! You’ll wait 15 minutes for the egg to “gel”: and while you’re doing this, finish prepping the wets and dries.
- Baking pan: This recipe uses a 9-inch loaf pan. You can also make it in an 8-inch pan, you may just have to bake a little longer.
- *Loaf size: Note that we’ve made this pumpkin bread to be a small sized loaf to keep the serving size to a healthy level. Some pumpkin bread recipes use almost double the ingredients for the same pan. Here we’ve kept it deliberately smaller, so there are less calories per serving.

Make your own pumpkin spice
The best part of this vegan pumpkin bread is that it’s perfectly spiced! Here we’ve used our homemade pumpkin pie spice mixture. You can mix up a batch of your own, or feel free to use a store-bought blend. It’s actually perfect for gifts! A loaf of this pumpkin bread with a little container of pumpkin spice would be the most magical gift ever, in our minds! Here’s what’s in pumpkin spice:
- Cinnamon
- Ginger
- Allspice
- Cloves
- Nutmeg

How to store it
What’s the best way to store this vegan pumpkin bread? One nice thing about quick breads is that they keep well at room temperature. (This is also true for our zucchini bread and vegan cornbread.) Typically when it’s around we can’t stay away from it, so it disappears quickly! Here’s what we’d recommend for storage:
- Room temperature (2 to 3 days): Store at room temperature and cover it with a towel. The benefit of this method is that it stays well and tastes basically like it did the day of baking.
- Refrigerated (1 week): Refrigerating your pumpkin bread helps it to stay fresher longer. We prefer letting it come to room temperature before serving.
- Frozen (up to 3 months): To extend the life even further, pop your sliced bread into the freezer in a sealed container. It can last at least 3 months, or maybe more.

This vegan pumpkin bread recipe is…
Vegetarian, vegan, plant-based, and dairy-free.
Print
Easy Vegan Pumpkin Bread
 (No Ratings Yet)
- Author: Sonja Overhiser
 Prep Time: 20 minutes
- Cook Time: 50 minutes
- Total Time: 1 hour 10 minutes
 Yield: 12 slices
Description
It’s moist, fluffy, pumpkin-spiced, and seriously cozy. Yes, this easy vegan pumpkin bread will change your life (we think).
Ingredients
- 2 flax eggs (2 tablespoons ground flax seed + 5 tablespoons water)
- 1 cup pumpkin puree
- 1/4 cup maple syrup
- 1/2 cup neutral oil
- 1 tablespoon vanilla extract
- 1 1/2 cups all-purpose flour
- 1/2 cup sugar
- 2 teaspoons baking powder
- 1 teaspoon baking soda
- 3/4 teaspoon kosher salt
- 1 1/2 tablespoons Pumpkin Pie Spice (purchased or homemade)
- 1/4 cup roasted salted pepitas, for garnish
Instructions
- Preheat the oven to 375 degrees. Grease a 9-inch bread pan with coconut oil or oil.
- Start the flax eggs (let them soak for 15 minutes while you prepare the next ingredients).
- In a bowl, whisk together the pumpkin puree, maple syrup, oil, and vanilla.
- In separate bowl, whisk together the flour, sugar, baking powder, baking soda, kosher salt, and pumpkin pie spice.
- When the flax egg is done, whisk it into the bowl with the liquids. Then slowly mix in the dry ingredients until just combined and smooth (don’t over stir). Pour the batter into the bread pan. Sprinkle with pepitas and pat them down gently.
- Bake 50 minutes, until a toothpick comes out clean. Allow to cool in the pan until room temperature. Run a knife around the edges and invert. Slice into pieces and serve. Stores for about 3 days at room temperature (keep on a cutting board and cover with a towel) or freeze in slices for a few months.
 Category: Bread
 Method: Baked
 Cuisine: American
Keywords: Vegan Pumpkin Bread, Best Pumpkin Bread, Easy Pumpkin Bread, Pumpkin Bread Recipe
More pumpkin recipes?
Gotta make all the pumpkin! Here are a few of our favorite pumpkin recipes we’d recommend:
- Chewy Pumpkin Oatmeal Cookies
- Penne with Pumpkin Pasta Sauce
- Gnocchi Bake with Pumpkin Sauce
- Pumpkin Yogurt Fruit Dip
- Pumpkin Stuffed Shells
- Pumpkin Spice Energy Bars
- Pumpkin Baked Steel Cut Oatmeal
- Pumpkin Pecan Parfaits
- Pumpkin Scones
- Pumpkin Pie Mousse
- Pumpkin Pancakes
A Couple Cooks - Healthy, Whole Food, Vegetarian Recipes
One week into autumn, and I already feel like I’ve overdosed on pumpkin spice lattes. Granted, my tolerance for the intensely sweet, largely over-hyped drink is far lower than the average enthusiast, but it doesn’t help that it’s already been perking up coffee shop menus while summer was still in full swing. Is it just me, or has the #PSL craze died down a bit this time around? Fewer rants, fewer raves; love it or hate it, I fear we may have collectively reached peak pumpkin spice.

I tease about the fervor ever year, but I do still enjoy a strong cuppa myself. The trouble comes when it transforms into other foods and products that should never bear the orange hue. Please, just keep it out of my lip balm, cough drops, and… pet shampoo, at least! Is that really so much to ask?
Still, the overall attraction is undeniable. It’s hard to beat the comfortingly familiar, creamy espresso eye-opener adored worldwide to begin with. Add in an extra dose of sweetness, a touch of nostalgic spice, and the health halo associated with pumpkin itself, to say nothing of the beautiful latte art possibilities, and you’ve got yourself a viral social media hit. When the hype starts to wear a bit thin, though, I have a small tweak that will revive your enthusiasm over the usual brew.
Chai spice, bearing a brighter, bolder palate emphasising ginger, cardamom, and a pinch of black pepper, make a strong argument for skipping the one-note cinnamon seasoning typically on standard order. While the most popular (and some would argue original) purveyor of pumpkin spice lattes doesn’t eve offer a dairy free option, it’s effortless to whip up a big batch of this spicy pumpkin sauce to flavor not only coffee, but drizzle over ice cream, swirl into cheesecake, and dip into with crisp apples all season long.
Happily, you’ll have plenty to play with, as this recipe does make a big batch indeed. Halve quantities if you must, but once you take your first sweet, invigorating sip, you’ll end up just going back in the kitchen to make more later.
Yield: Makes About 4 Cups
Chai-Spiced Pumpkin Sauce

Sweet, spicy, and full of autumnal flavor, this pumpkin spice sauce is an intense, concentrated treat to flavor drinks and desserts all season long. Chai takes the place of the usual pie palate for a brighter, bolder change of pace.
Cook Time 10 minutes
Total Time 10 minutes
Ingredients
- 1 14-Ounce Can (1 1/2 Cups) Full Fat Coconut Milk
- 2 Cups Coconut Sugar or Dark Brown Sugar, Firmly Packed
- 1 14-Ounce Can (1 1/2 Cups) Pumpkin Puree
- 1/2 Cup Chai Spice*
- 1/2 Teaspoon Salt
- 1 Tablespoon Vanilla Extract
Instructions
- Bring coconut milk and sugar to a boil, cook until dissolved. Whisk in remaining ingredients, stirring until smooth.
- Bring back to a boil and immediately turn off the heat. Cool completely before transfer to a glass jar for storage. Keep in the fridge for up to a month.
- For a pumpkin chai latte, mix 3 tablespoons of sauce with 1 or 2 shots brewed espresso and 3/4 cup steamed non-dairy milk (use something specifically labeled as "barista style" for a fuller, creamier latte) in a mug.
Notes
*You can make your own chai spice blend with the following:
- 1/4 Cup Ground Ginger
- 3 Tablespoons Ground Cinnamon
- 1 Tablespoon Ground Cardamom
- 2 Teaspoons Ground Allspice
- 2 Teaspoons Ground Black Pepper
- 1 Teaspoon Ground Anise
Recommended Products
Please note that some of the links above are affiliate links, and at no additional cost to you, I will earn a commission if you decide to make a purchase after clicking through the link. I have experience with all of these companies and I recommend them because they are helpful and useful, not because of the small commissions I make if you decide to buy something through my links.


Nutrition Information:
Yield:
21Serving Size:
1Amount Per Serving: Calories: 110 Total Fat: 4g Saturated Fat: 4g Trans Fat: 0g Unsaturated Fat: 0g Cholesterol: 0mg Sodium: 53mg Carbohydrates: 19g Net Carbohydrates: 0g Fiber: 0g Sugar: 18g Sugar Alcohols: 0g Protein: 0g
All nutritional information presented within this site are intended for informational purposes only. I am not a certified nutritionist and any nutritional information on BitterSweetBlog.com should only be used as a general guideline. This information is provided as a courtesy and there is no guarantee that the information will be completely accurate. Even though I try to provide accurate nutritional information to the best of my ability, these figures should still be considered estimates.
The post Pumpkin Spice and Everything Nice appeared first on BitterSweet.
![Forest Essentials [CPV] WW](data:image/jpeg;base64,/9j/4AAQSkZJRgABAQAAAQABAAD/2wCEAAkGBwgHBgkIBwgKCgkLDRYPDQwMDRsUFRAWIB0iIiAdHx8kKDQsJCYxJx8fLT0tMTU3Ojo6Iys/RD84QzQ5OjcBCgoKDQwNGg8PGjclHyU3Nzc3Nzc3Nzc3Nzc3Nzc3Nzc3Nzc3Nzc3Nzc3Nzc3Nzc3Nzc3Nzc3Nzc3Nzc3Nzc3N//AABEIAHQAlwMBEQACEQEDEQH/xAAbAAACAwEBAQAAAAAAAAAAAAAABQEDBAIGB//EAD0QAAIBAwIDBgMGBAQHAQAAAAECAwAEEQUSEyExBhQiQVFxMmGBFUJScpGhIzNisSUmksEkNDVzotHxFv/EABkBAQADAQEAAAAAAAAAAAAAAAABAgMEBf/EADURAAICAQMBBgQFAwQDAAAAAAABAhEDEiExQQQTIjJRcWGBkaEjM0Kx0VLh8FNiwfEFFDT/2gAMAwEAAhEDEQA/APuNAFAFAFAFAFALNX13T9ICi7m/jSfy4IwXlk/Ko5ms55Iw5LRg5cC+K87Ral4rawh0yA9HvTvlPz2KcD6mstWaflVe5aoLl2dPG0EmzUe0bCXrsThxftzNYzVOp5a+iJT9IjBdPfblNRu/csD/ALVf/wBeVWsj+xGtf0mZhqq5awvrS7A+5MuP/JT/ALVWKzryTUvf+xL09VRXF2jS3mWDWrWXTpGOFkkO6F/aQch9cVpHtFOsi0/sQ8f9O49VgwBU5B6EV1cmZNAFAFAFAFAFAFAFAFAFAFAee1fWLqe+bR9ACvegA3Fw4zHaKfM+rei/rXPkySctGPn9i8YpLVLgzvYwdmrPvUCG81S6mSHvV0xLO7nAJP3VHoPSolFYlq5ZNuTNlpdalaarDY6pJbXC3MbNFLBGYyrLjKlSTy58jUxlOM1GfUrSatEX1teNqt21mEUS2y5Z48hiCwwD5HBrHNjyPJLR1ReMo6VYxTMOljhxSBkhwqNzYEDpWzuGDwrhFOZGDSIIOOv/AC7SRIMERFJB756+dc/ZIx24tfCmXyNk63qSQzCxbTmvRJA0siZX4BgHAPxHn0rozZEnocbKxj1uheIbns/Et5pAlutIYb5LJsl4VP3o888D8J+lZpPD4obx9P4LWp7S5PR2N5Bf2sd1ayrJDIu5GXzFdUJqauJm006ZoqxAUAUAUAUAUAUAUAUAl7S6nPaQxWWnBW1K9bh2wbmE/E5+Sjn+lY5cjjUVyy0Ve74FF08PZi3stNgnNstw7SXOpTDO4jm3PzkbHIHoPbFZOsSUV82X87bHjRQ67o+NQtZIYpxu4ch2unPKty+FuQPqK2pTh4im8WILCZ5r5zoAn1KVBwm1O/kzFEM81TA8R6Zx9TXPctX4e79XwXdV4thmLdt4XUdcmklyoMcGI1BbpyGTg48zUSh/qZH8thdcRLYY7JtwhvboMknD/msfFWSjhd6ZvZ1z1JbkuUS7anAgms5YtRhx/LfCOR8mHI/WtY99HeL1r7keB8qhbYwpq98stvfNGLa67xJazxHvEDnqobPJG9iPQ+iC7yVxfHR8ol+Fboda9qP2Vp7XK8NpAyhInbBlOfhX1YjOPnXRmyd3HUZxjqdCS3uYdJvIdRsWzoupSATJ07tOTjdjyyeTDyNYRmsclOPll9maNOSp8o9aOldpiTQBQBQBQBQBQBQEGgPOaCv2nreoa1J4o0Y2dp6BEPjYfmb+1c2LxzeT5I0nslEeX1nb39rJbXcSywyDDIw61vKKkqZRNrdHlpoZNWuv/wA7b3U7abYqBqFw75eXPNYd3t8R64x61zNan3aey5NF4VqfLOr69vHsYU7O2sHcwoktminVd6r8SmMgeHy5GoySmofhoRSvxGOxthdyNHpkiy2bLHO/EcjgjBIi3D8xPLpXD3feNrG7XPt8DXVp3Y/uLGTbbNbRWyyRorAK55kc8D1HzPrW2bs8vC8aSa/z5mcZpXbFSvNFJEbAmWXJluQJBHw0VjiPLdBk86wwuSru93y/gvT6mkkt9RovIJdRkFzacK11+1jEgWN9yujE7Uc4wVbB9q7pRc3qW016GSdbPg26KtlqzJrW1zckcMpK2e7MOTKo8jnqeprXFoyfidf2KzuPhN97p1td6fPZSRqIZ1YOFGOZ8/fPOtJ44yi4vhlVJp2Yuyl5Nc6WIbs5u7ORracnzZfP6jBqnZ5uUKlyti2RU9uo6rcoFAFAFAFAFAFAYdbuu46ReXY6wwO49wOVZ5ZaYNkxVsp7M2fcdA0+3+8sClz6sRlj+pNRhjpxpEzdyZo1a9XTtMurx/hgiaQj1wKtOWmLZCVujzFvEbDsva6fLbPdX2qI8lxHHOsUjs43OwJPlkCsEtONR6s0buV+gpuVutM0OwsdUshBcwuFs9QgYNwwTlt2Oe7bnIGQ1cuW4Y1GS36NGipybTN9hJbNb2qae8dvC1s0dwzneFUvgMcffPz6ZrHVGkoOlTv/AD1ZLvmQzVolSOSykmEph8Cztu3BuWB6Hl7VWTiqeNu669f7kK+JCzVJrBLi3JR5YtsYnhQ5M4xy3D1DY5E86pKWJSi1utr+Pv8AMvFSplub+01d9cvtMWKBYQiql0qiGMZyZM9Tg8sdOYrvWuOTvJRrb149zJ6XHSmM7TFh2tuIE5W+pQd5QDpxFwrfqNp+lbR8OZrpJWUe8L9D0RrqMzz9gO69sdRgHJLu2juQP6gSjfttrmh4c8l6qzR7wTPQV0mYUAUAUAUAUAUAj7bn/Kmpf9nH7iuftX5Mi+PzIcQ4EMYHTaP7VtHhFXyIu3x/ylqA8iEB9i6g/tWXaPy2Wx+ZCnt2ZO/aPFZ9476CXshEVKGRSvxqee3B+IHl0PWsu0J3HTz0L4+HfBgRVs0F1xzaXWm3fEl0uSVeGSR4miJ54ZWJAzjyrGT0rVdOL4LLfbo+oyh/xG2tpoFiW7u4Zn4kBAyAeUbAcvhIyfIisZrvYpxq2nx+xKel/BG+SSC4jgltVZEgtd0m04O3yT9jVMkoZFGWP9Md/wCAk42n1Zl1R0eUaSj21rFNw3MgKjhAcyDnqcgYq05LUsEaSdP2Cutb3EmsKeDc3Cd8n0wTgXV8GUzTOmdu3I2rGG5Zx55qcm6bVuPV9f8AomPNdT0l4WOtdmHPxsJg3i3cuFk8/PmBzrtk/wATG/8AODJeWR6bNdZkIJ+Xbmzx56fLn/Wtcz/+hezNF+W/cf10mYUAUAUAUAUAUAs7TWzXnZ/ULdBlnt3Cj545VlnjqxyRaDqSYsn1K5l0LRrmxuVgW7aFJJmjDlQ64GAeWd2B9az1yeOLT5otS1NMUmw1a90+4tr24vLhry0uIX4qgLHNG/gIAAADCs9M5Rabu0/qWtJo2XV9d3/ZfTdX069FnIqr3iRow+1cYkBXBJII6DHOrSlKWNTi6ISSk0xTp+nd97P6fqFpbJcahJcmSa+u2yCELc2LcwrYAwBgZrB49WNSSt3yy7lUmmbYwt/e3EujrBZyxRkOI35zcvFsAGMZGNw9Kwku8m5Ytmvv7FrpJS3NGnZujcLaPwFYs7s55BCOh/euTBeVyWN16+xefhpyOZ0S+tYoLSxt5OBKrTx7svMAw+HPUEc+fpiujGo5YKGOK2e/q/Ypbi7bMs0M9v2juNK0a7NlC/CLW20srBsl2TIIQ48uh510OLjmePG6W2xW04apbjPVDcXPaJ109Q0umafIU9OLJyUfov710Tbll8P6V9ykaUN+pXDearx7ErJcxRNJHBHb3EQ4k6gfxZHPVceXTp8xVVLLcXe3H8smo7m6D/iO29w45raWCRk+jO5b+yitV4u0P4IrxjPQV0mYUAUAUAUAUAUBBGRigPN9lQtsb7Q5wCbGcvEGHWFyWQj2OR9K5cG1430NJ71IjUtbu5ZrSHSODG8s88Ra5jLZeIE7AARjdg8/QdKvLI20ohQXUw6ZdfY92ovIXg0rWcTRiVSvdbhxlom9NxJI+eazg9L34f2Ja1LblGmfsvcGZY47lJdPhjPd7CUARI4+AEKOajmefU0l2dt87enQhZFXxGWh6XJpto8FxwZCju0UiJtOG5kY8uZPL0qcOF44NS35E5ansLuyKhzOrKCpjGQfc15f/iknOafob9oeyNN3oU13czyu0K8TJjZQQ8JAARlb6cxXa+ySlOUm1v8AVehksqSSK229nrI3uozte6k6iKPCjfKx58NcDmN2eZ6A1r+RHVN3IjzulsjnSpotCXbrJaO6vm4892y/weIeWzd5YGAM0xtYlU+X1Elr8vCG8GpwTTXgUYhtMB58+AnGSB7DGfet1li7fRGemqF/ZBHmtbjVZlIk1KczgHyjxtQf6QD9az7Om05vqXyc6fQ9BXSZhQBQBQBQBQBQBQHne0tvNZ3Nvr9lG0ktopS5iXrNATzx6leo+tc+ZOLWSPQ0g7Wlmi3stHmkTtBAodmQyrKjMVPhwWC9N23lnGfKrKMPzEVbl5RRe3N1q9/NaBLe606WKKSO1dMd5t35NIrkjDKT09vXNZyk5yaW6LKoqzRbnVdAkNqhbVrBACoDjvUC+WQcbx8+tLnidLdfdDwyV8M1z61BfWxisLyGCduRW6BjZfofOs8vaIzhphJJ/HYmMGn4kY9JtpdNl4pu7MKRhhxc5Fef2bFPs89WuNe5tkkpqqYyudaZgU0y2e7l/F8ES/MsfL2zXpPtWrbEr/YwWPrJ0LL2xvLG1n1y6mhutTiUFSyEw28eRu2KOfTz6nFVlCcIvLJ3L7IlSTelcGzTNZGpO9pdWLEFjGZol4tvIQOYDY/uMeWa1x5u82a/giUNO9mLUbe3uZY+zGkxLDbfzL4xchHGTnZ+Zj+2apNJvuYbLqSn+uR6qNFjRURQqqAAB5CutKkZHVSAoAoAoAoAoAoAoCCMjFAeVuLe57LXUt1YQvcaNMxe4tIxlrZj1eMea+q/UVzOLxPVHg0VTVPk36FY6L/1PR9rpKm1HSQsqKTkqgJwvPqBjpV8cYeaJEnLhiDSYTqmrzz3ghW7mlLNGXeC6tEXkoX8SkAEjkMk9a54x1zbfP3Rduoj+/uQmrRwTQxS2ixLxWdAxQsSFPty5+9Tlmo5FGSuNbkRXh2e5faW8c9pvggtoXLsAVhBGASKjHijOFxST9iJSadNnWnIbmyk71IZd5aN0IAUYJUgACr9mTlj8T+H/BE9nsVaLFMthPpt9GzLbsYFdxkSxY8Jz5+E4PzBq+FPS4S6bCT3tC5r5rSCHs/2fIur2GMRvOw8Fuv4nI5bvRfOs9eld1i3f7E6b8cuBzoulRaVamJGaWWRi80782lc9WP/AK8q3x41BfErKWpjCtSoUAUAUAUAUAUAUAUAUAUB5687NcO6e+0K6bTbxzmQIu6GY/1p0z8xg1g8NPVB0y6n0lucR6rqdnIPtvRWYoMC6sP4qY/L8S/vVXllDzx+hOlPhl8eq6JcTTSG5AeZBG6TBk5DPLBHzNZvN2dtuT59dhomuDVaXmm2lrHDFdxsiDAO/Jpjz9nxQUVLgOM5O2jO2q28IddPs7q6dmLbYoyASf6mwBUR7TjW2JN/Il43+ooey1vVztvrhdNtD1gtW3SuPQv0H0H1q+jNk870r0XP1FxjxuONO0+1022W2soUhiBztUdT6n1PzrohCMFpijNtvdkalLNb2plg4e4EAhwcYJx5e9JtpWgjBFq8jXq2jxR8TvBjYqfuAHxe+4YxWfevVponTtY5HStypNAFAFAFAFAFAFAFAFAFARigIeNH+NFb3GahxT5RNs5WGJfhiQeyiq93D0QtneB6VeiCcUAUBDKGGGAI9DQHPCjznYueucVFIHdSAoAoAoCDQFFpdxXYlMJJEUjRNkY8Q61WM1K6Jao0VYgioBNSCm6uFtreSd1dljXcRGhdj7AczVW6VhFqncAfWrAmgCgIzQFNrdxXSs0LbgrFTyxzrLHljkVxJcXHkurQgM1IJoCM0AZoCi0vIbsSmEk8KVonyMeJetVjJS4Jaoz6rqDWQjWOMO7565wACBnl16jlVMk9PAirLtOu++WwlKbGzgrnODVoS1Kw1RpNXIEGiX9pb/aEc91BG/fpTteQA9a5cM4q031ZeSewvvr9IdK1yN7rbMLxgimTxAHbjHnjrWUsiUZq97LKO6OdSm2668IuZxpTTR99ZX8Mcx+FA2chW8O4D5epqZN95V7bX7hLw/E4vtRWHR9aie72XI1BlReJ4wCy4AHXGP2qXOoSV72Et0V6jEGt+1V+09xx7Z3jgxO4WIGFCcKDjqalq9cvT+ESv0o6vGtpn1uXU76WC4tQO67bhkMScMFWVQcMS2fI5Ix8qNpuTb36EelGm11B4jqh1G44M7WEEmx224Yo2do/N6VPeVqt70g48E7i0UMrzLLssomMbTtE8fhzuXyYn5+lYT4Tu9l1r6epK5ofXk57gpiyJJwEjDdctW+bI+58PL4+ZSK8W4u4bw3otp0WG3vYeCpjlJ8ajkc4GDtz+lYwUoT0tUpKvmi20la5QplubzUNOvtzyCXTdOmhl2EjdcEEE8vQLkfnFNc5wf8AtX3J0pNfE1X+oRz3VstrdCT/AAu4duHJnyXBOPPrWksltJPowls79TiNU0bTdM1njTtHsU3rSTM+5XQeLBPLDBemOWahfhQjk+pHmbRmnS+4mmW96yEXUUtxIlxdPCplJB2blBPhU8l6cj6VWWu4qXW3yStO7R1aObj7OttRvA9g8lwFdJ32uykbEMhALYG/32+dIu9Km9t+odb0U28tv3RbWGSS4jn1Kfh7roxpIFGfHJzYj264qE46aXq+pLT6+g17LIl5bXkMzLIlveMIdk7Pw/CpwrnDYyT/APK27OtSafqUntTR6OCGO3iWKFAiKMACupRS4Mzs1IKGsrRmLNawFickmMZNZ93B8om2dPa27ycR4Imkxt3lATj0zU6Y3dC2SYISjIYkKPksu0Yb39anSvQizlrS2eXivbwtJjbvKAnHpmjiuaJtnZhiIcGJMSc3G0eL39aUiDiS1tpZEklt4nkj+BmQEr7Hyo0n0JtkyW0EkiySQxu6fCzICV9jRxT3aFsGt4H274Y22fDlAdvtUOEXyhbLCoJBIBI6cqtSIKr0AWzvgbkUspIzg461WfFkow9nogunLMzM8tyxmldsZZj7ewH0rPAvBfqWnybo7S2iBEVtCgOchYwM56/rWijFcIrbLGijMfDMamPGNpHLHtVmlVEHM0ENwhjnijlQnO11DD9DUOKfKJuiJLaCSHgyQRPF+BkBX9KaVVULZD2ltJGYpLeFoyclGQEZ9cVGmPFC2WRxRx54aKueu0YzyxVkkuCDupB//9k=)