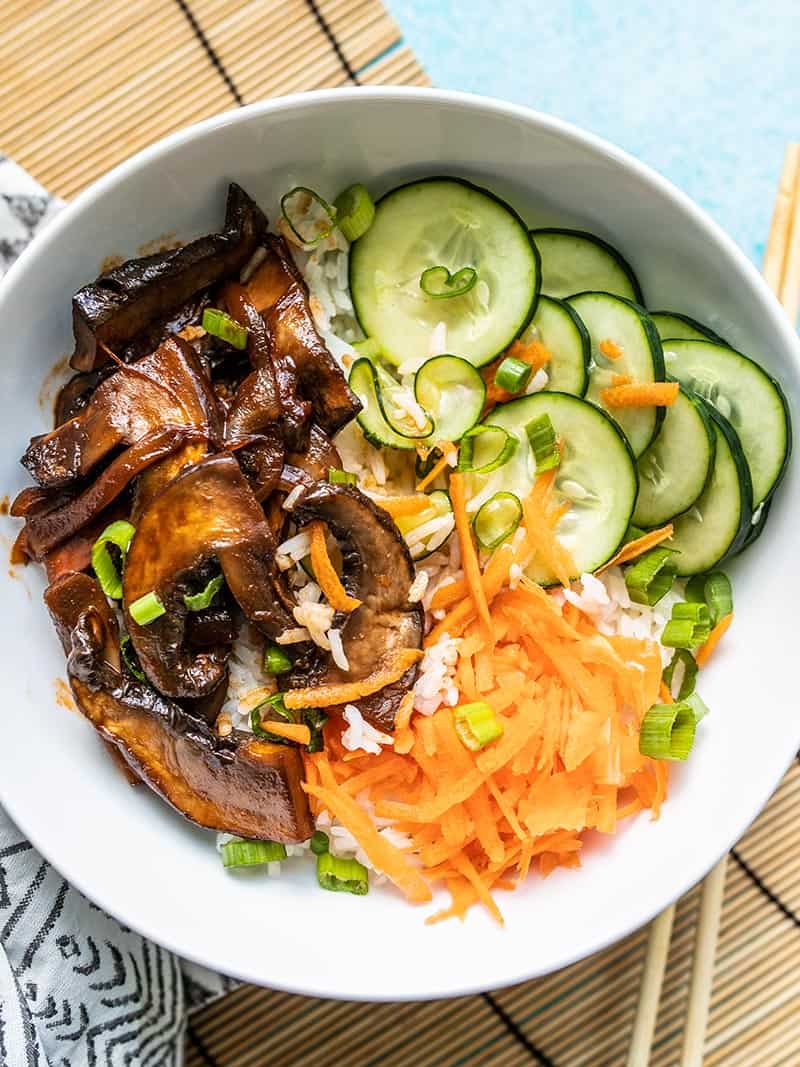
Move over sriracha, gochujang is having a moment in the American food scene, and I’m really happy about it. These Gochujang Mushroom bowls feature sweet and spicy gochujang marinated mushrooms, quick pickled cucumbers, crunchy carrots, and plenty of jasmine rice make a quick, easy, and super flavorful bowl that’s perfect for meal prep. If you’re ready to breathe some new life into your marinades and stir fries, pick up some gochujang. You won’t be sorry.
Gochujang Mushroom Bowls
What is Gochujang?
Gochujang is a Korean chile paste made from fermented soy beans, red chiles, and rice. It has a flavor that is spicy, sweet, and savory. If you’re a spicy food lover, you’re going to love gochujang’s unique flavor. It’s kind of like miso, but spicy! You can use gochujang in marinades, sauces, soups, as a table condiment, or basically anywhere you want to add a little sweet and spicy kick. It’s extremely versatile and once you start using it, you’ll probably start adding it to everything.
I’ve been seeing gochujang in more and more grocery stores lately, so chances are you may not need to make a special trip to an international market to find it! Scroll down to the step by step photos to see a photo of the brand I bought, which I picked up at Kroger.
Do I have to use Gochujang?
This recipe is designed around gochujang, so swapping it out for another type of hot sauce will change the balance of flavors. Instead, you can try using a different type of sauce, like my Homemade Teriyaki Sauce, or if you want spicy, try the sauce I used in my Pork and Peanut Dragon Noodles.
What if I hate mushrooms?
Well then you’re reading the wrong recipe. HA! J/K. Luckily this marinade also works great for tofu, tempeh, or beef. All three should also cook relatively quickly in the skillet just like the portobellos, so swapping them out should be pretty seamless.
Gochcujang Mushroom Bowls
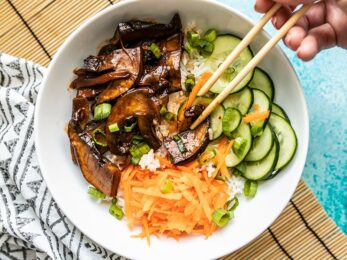
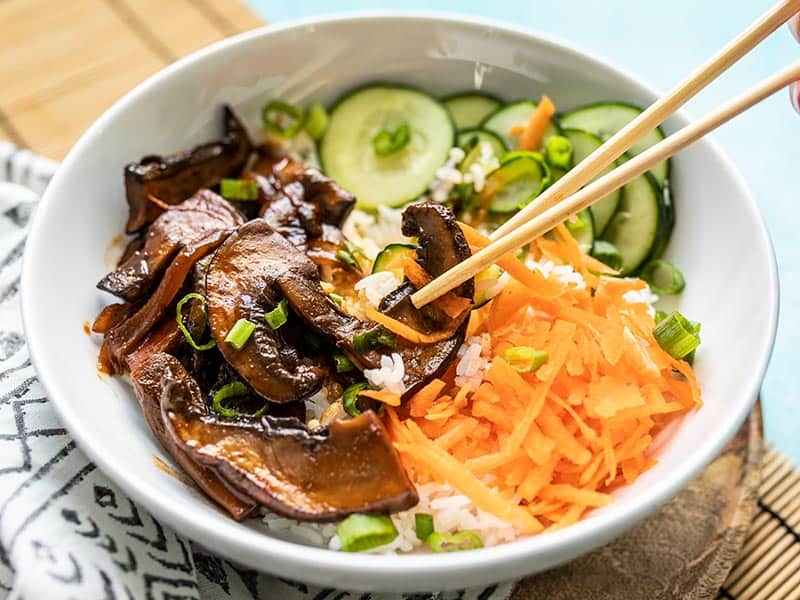
Gochujang Mushroom Bowls feature sweet and spicy marinated mushrooms, quick pickled cucumbers, crunchy carrots, and fragrant jasmine rice.
Quick Pickled Cucumbers
- 3 Tbsp rice vinegar ($0.36)
- 1 Tbsp sugar ($0.06)
- 1/4 tsp salt ($0.02)
- 1 cucumber (about 7-8") ($0.59)
Gochujang Mushrooms
- 1 Tbsp gochujang ($0.23)
- 2 Tbsp soy sauce ($0.12)
- 1 Tbsp water ($0.00)
- 1.5 Tbsp brown sugar ($0.06)
- 1/2 Tbsp rice vinegar ($0.06)
- 2 portobello mushrooms ($4.31)
- 1 small yellow onion ($0.21)
- 1 Tbsp cooking oil ($0.04)
Bowls
- 4 cups cooked jasmine rice ($0.70)
- 1 carrot ($0.11)
- 2 green onions ($0.15)
-
In a medium bowl, stir together the rice vinegar, sugar, and salt for the quick pickled cucumbers. Thinly slice the cucumber, add them to the bowl with the vinegar dressing, and toss to coat. Let the cucumbers marinate, stirring occasionally, as you prepare the rest of the dish. They should soften and release water as they marinate.
-
Prepare the marinade for the mushrooms. In a medium bowl stir together the gochujang, soy sauce, water, brown sugar, and rice vinegar. Stir until the gochujang and brown sugar are dissolved.
-
Clean each portobello mushroom to remove any dirt or debris. Cut each cap in half, then slice crosswise into thin strips. Place the mushroom strips into a shallow dish and pour the gochujang marinade over top. Gently stir the mushrooms to coat in the marinade, taking care not to break them. Let the mushrooms marinade for about 10 minutes, stirring occasionally.
-
While the mushrooms are marinating, shred the carrot using a cheese grater. Thinly slice the yellow onion and slice the green onions.
-
Add the cooking oil to a large skillet and heat over medium. Once hot, add the sliced yellow onion and sauté for about two minutes, or just until the onion begins to soften.
-
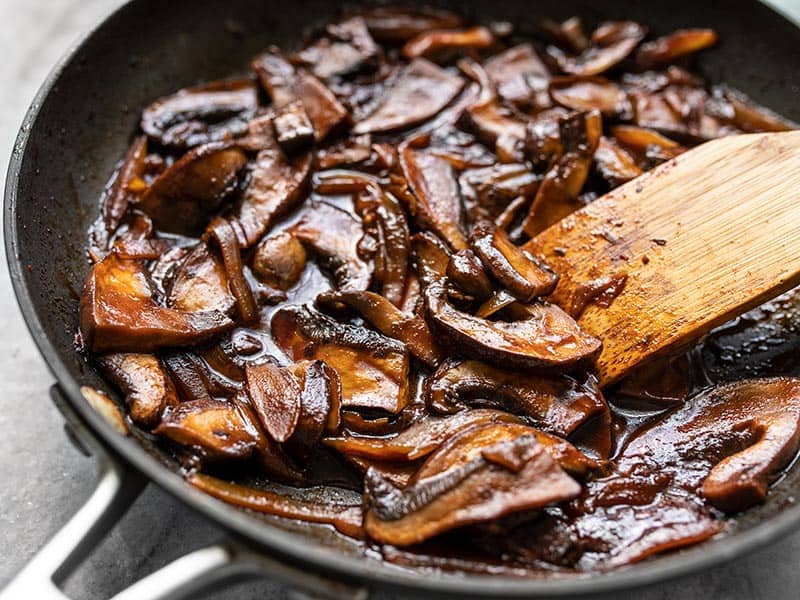
Add the marinade mushrooms and all of the gochujang marinade to the skillet. Continue to cook the mushrooms and onion over medium until the mushrooms have softened and the liquid in the skillet reduces to a slightly thickened sauce (about 8 minutes).
-
To build the bowls add about 1 cup cooked rice to each bowl then top with 1/4 of the gochujang mushrooms, 1/4 of the pickled cucumbers, and 1/4 of the shredded carrot. Sprinkle sliced green onions over top, then serve.
These bowls are actually a loose vegetarian interpretation of a Bulgogi bowl, but I felt I strayed too much from actual bulgogi to call them that. But if you’re a fan of bulgogi bowls, you might like these Gochujang Mushroom Bowls!
Step by Step Photos
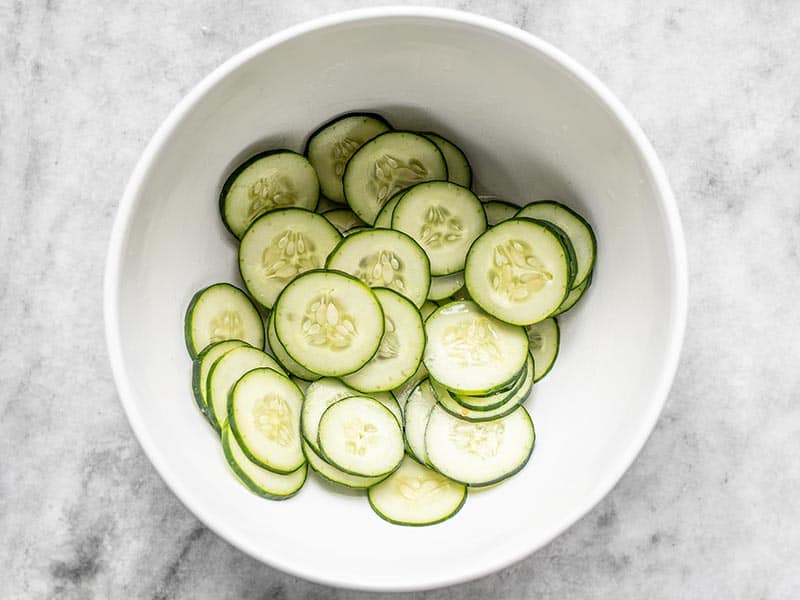
Begin with the quick pickled cucumbers so they have some time to marinate and soften. In a medium bowl, stir together 3 Tbsp rice vinegar, 1 Tbsp sugar, and 1/4 tsp salt. Thinly slice a cucumber then toss the cucumbers in the vinegar dressing. Let them marinate, stirring occasionally, while you prepare the rest of the recipe. They will soften and release water as they marinate.
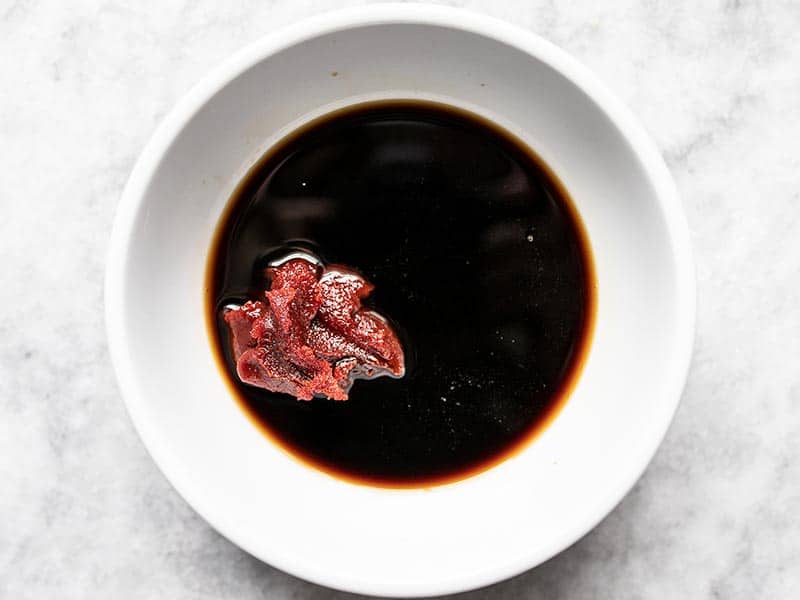
Next, make the gochujang marinade. Stir together 1 Tbsp gochujang, 3 Tbsp soy sauce, 1 Tbsp water, 1.5 Tbsp brown sugar, and 1/2 Tbsp rice vinegar until the gochujang and brown sugar are dissolved.
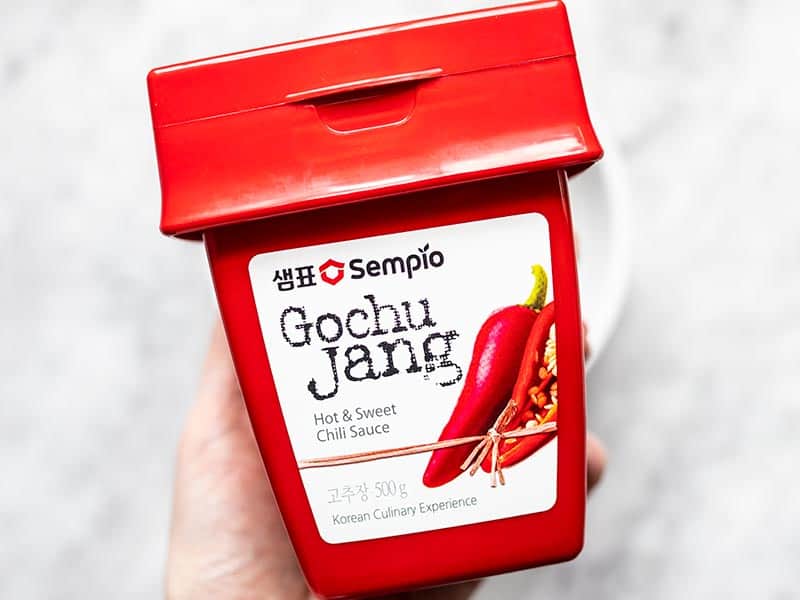
This is the gochujang that I bought and I was able to find this at Kroger. In fact, they had at least three brands, so hopefully you’ll be able to find some at your grocery store as well.
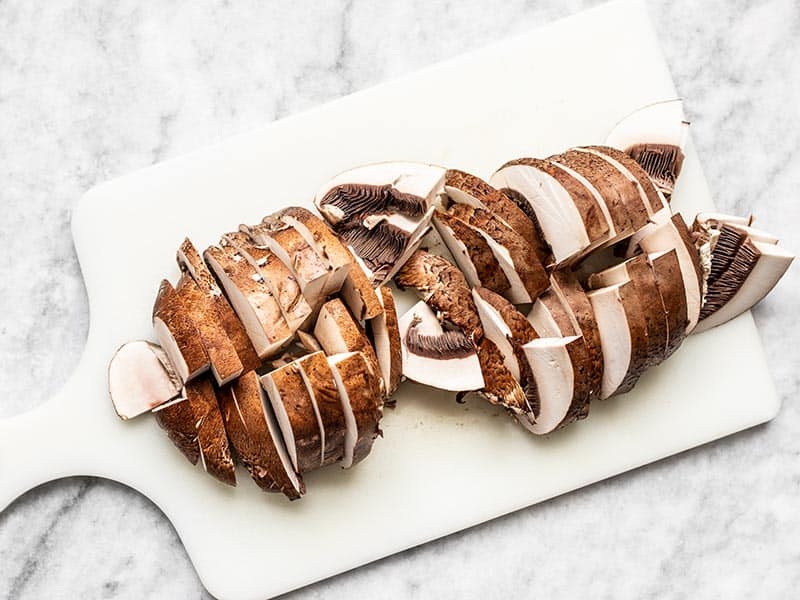
Clean any dirt or debris off of two portobello mushrooms. Cut each one in half, then slice crosswise into thin strips.
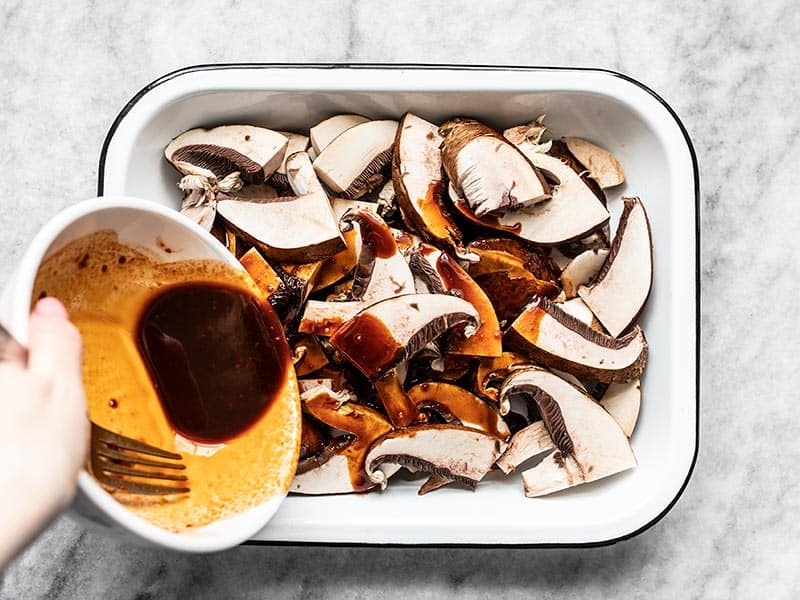
Place the mushroom slices in a shallow dish and pour the gochujang marinade over top. Stir carefully to coat the mushrooms in the marinade.
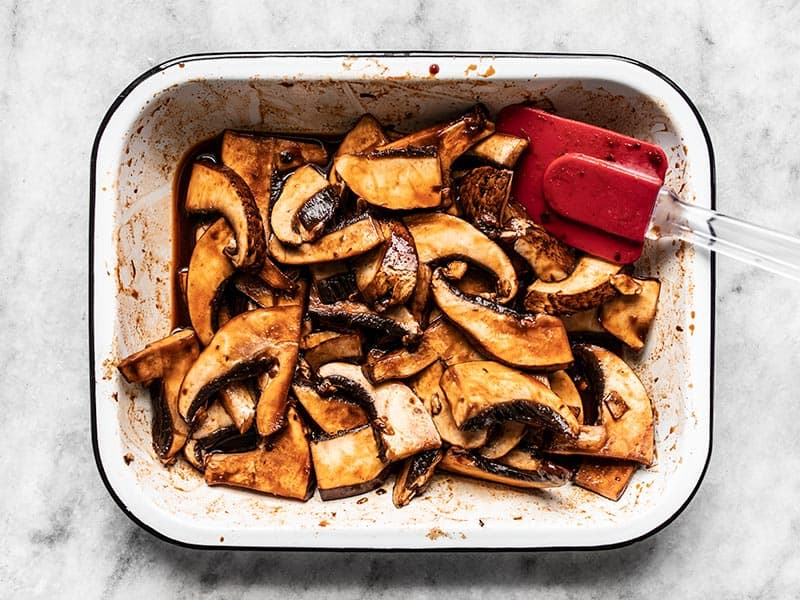
Let them marinate for about 10 minutes, stirring occasionally.
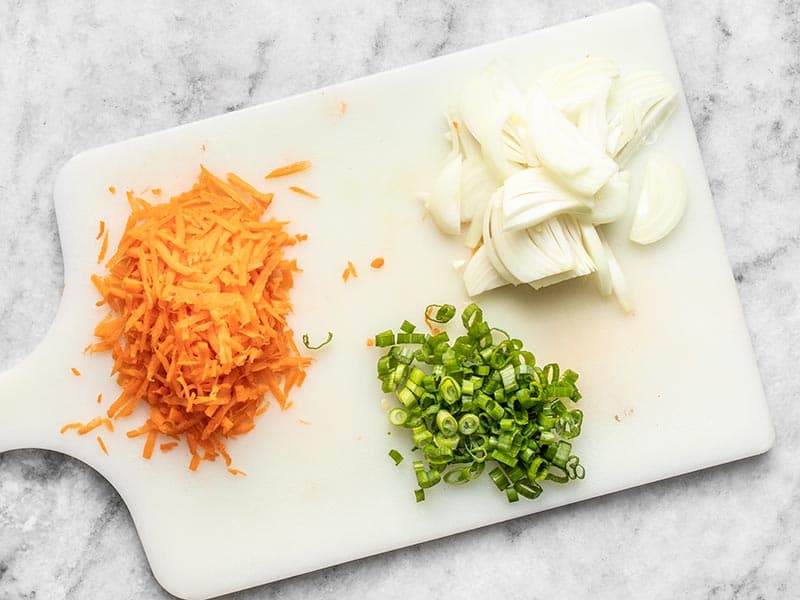
While the mushrooms are marinating, prepare the rest of the ingredients. Shred one carrot (I used a cheese grater), thinly slice one small yellow onion, and slice two green onions.
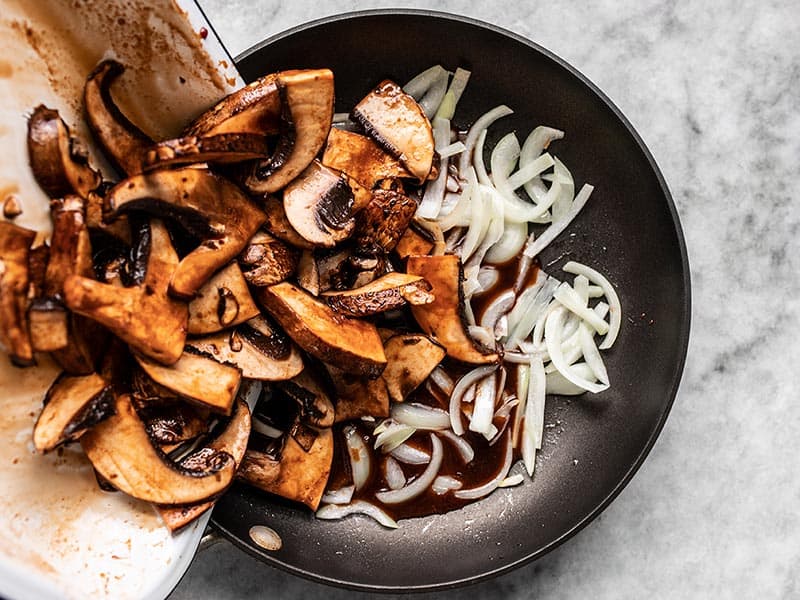
Heat 1 Tbsp cooking oil in a large skillet over medium. Once hot, add the sliced yellow onion and sauté for about two minutes, or just until the onions begin to soften, then add the marinated mushrooms and ALL of the marinade from the dish.
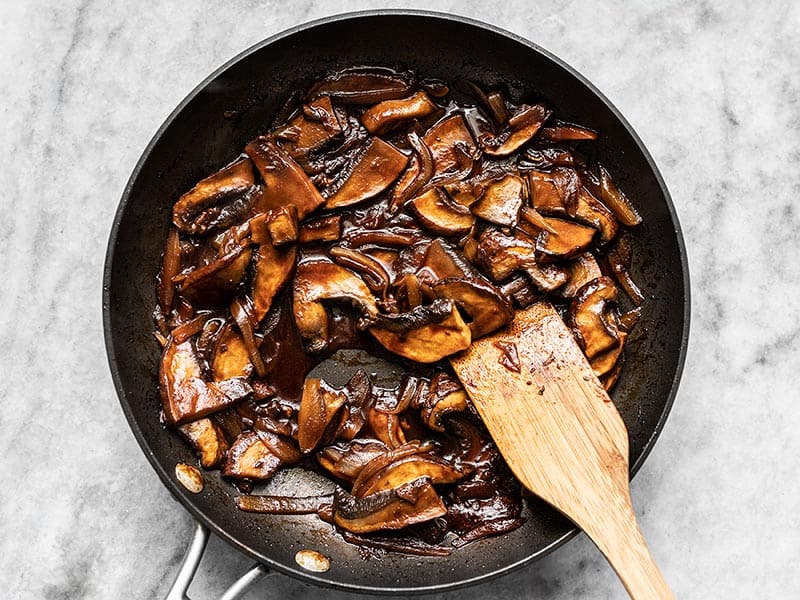
Continue to cook the mushrooms and onions over medium until the mushrooms are fully softened and the liquid in the skillet has reduced to a slightly thickened sauce (about 8 minutes).
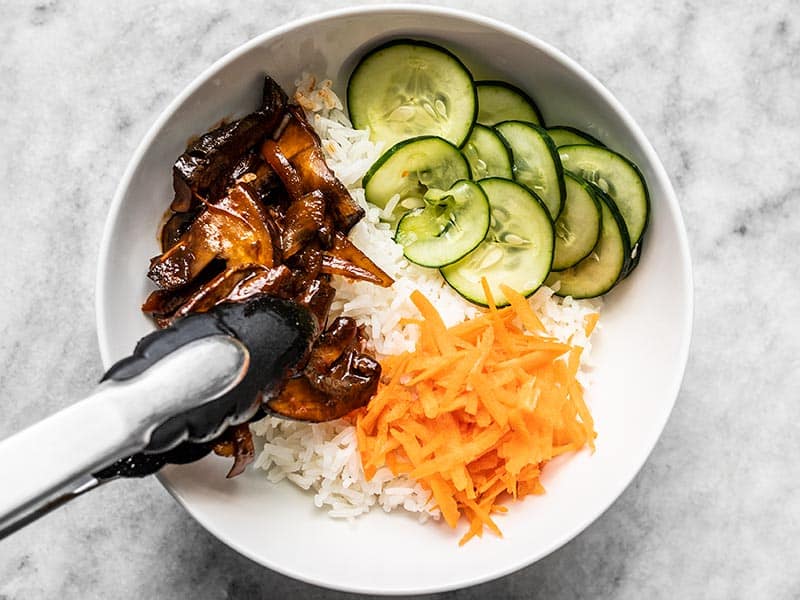
To build the Gochujang Mushroom Bowls, start with 1 cup cooked jasmine rice, then top with 1/4 of the gochujang mushrooms, 1/4 of the quick pickled cucumbers, and 1/4 of the shredded carrots.
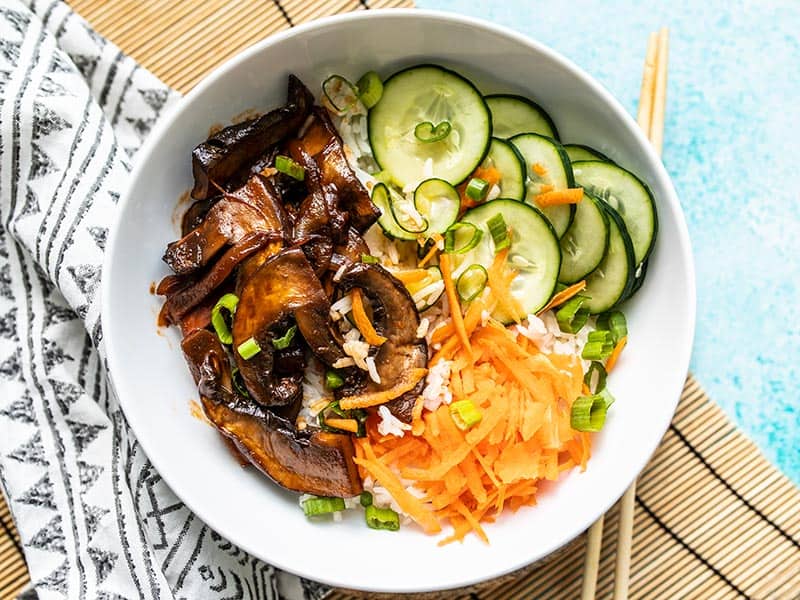
Top with a few sliced green onions, then serve!
The post Gochujang Mushroom Bowls appeared first on Budget Bytes.

Happy Sunday, Friends! I hope this weekend has been full of joy and love and rest for you. We did a lot of the opposite this weekend, as we partook in the madness that is March college basketball. My husband (an Auburn fan) and myself (a UK fan) will have to duke it out later this afternoon as our teams play each other in the Elite Eight match, so pray for us. For your lazy-day entertainment, I’ve rounded up a list of things I’ve been reading, eating, and shopping for, plus I’m sharing the how-to on this seriously adorable lemon lavender icebox cake. Grab a fork and let’s dive in!
What I’m Reading:
- I relate to this article on “crispy-gone-soggy” foods (think soggy nachos, leftover General Tso’s carryout, etc) on so many levels. It’s an opinion piece from Bon Appetit that is entirely funny and delicious on so many levels. Check it out for a casual laugh and stomach rumble.
- Food52’s annual cookbook tournament has just wound down, and I am so thrilled to pick up copies of the winning books. Basically they’ve picked some of the most eye-catching cookbooks from the year go head-to-head in a bracket-style throw down. The judges are mostly renowned chefs who whittle the list of best cookbooks down from 16 to 1. Read about the finalists (and the winner!) here.
- I’m just wrapping up “Everybody, Always” by Bob Goff. It’s a heartwarming, inspiring, and, at times, difficult read, but there’s so much truth in it that I love it. Loving people can be really hard, but Bob breaks this lifelong pursuit down to just loving the person in front of you, one day at a time. Such a good read.
What I’m Eating:
- With warmer weather and bathing suit season on the horizon, we’ve been trying to include lots of salads and veggies in the dinnertime lineup. This bulgur salad with cucumbers, dill, chickpeas, and peppers is anything but basic, and it’s probably my favorite dish I’ve prepared in months. Serve with grilled chicken or fish if you’re cooking for a meatatarian, otherwise, this salad needs no other sidekick.
- Ok, so I must not be really concerned about that summer body, because we’re still totally making burgers. These ones are smashed thin like the ones you might get at a greasy diner, and they are outrageous delicious. We top ours with grilled red onion and serve with skillet hash browns. My mouth is actually watering.
- I love how easily a pork tenderloin will serve my family of four, but I’m always getting stuck in the savory herb-crusted rut. This recipe from Tyler Florence boasts a chimichurri sauce that is to die for and makes the whole dish feel fresh and exciting. Serve with rice, beans, and grilled veggies.
What I’m Shopping For:
- The Madewell spring collection has me longing for non-maternity wear. The bright colors, flowy materials, and simple retro patterns are 100% my ballgame.
- I just ordered this bathing suit coverup both for now and post-baby. When I’m chasing after two kiddos at the pool, I don’t want to worry what is falling out of the backside of my suit, and this coverup is the light and airy ticket I’ve been looking for. Plus, the side tie means that I can wear it as my body transitions in the coming months!
- The springy dishes and serveware at Sur La Table have me itching to throw a garden party. I’m dying over the new cast iron colors and floral china. Check it out here.
What I’m Baking:
Lemon lavender icebox cake. Isn’t she a beaut? I love how dainty and fancy this sweet make-ahead dessert feels, and I love the ease with which I’m able to prepare it. Made with a fluffy and citrusy lemon cake, a lavender-infused whipped filling, and sweet raspberry preserves, this cake is the springy layered treat your tables have been begging for.
I made this lemon lavender icebox cake in partnership with my friends at Kerrygold. Their unsalted butter keeps the lemon cake moist in spite of the cake’s time spent in the icebox, and it adds a subtle richness to every bite. I love having a go-to butter brand to suit my favorite decadent desserts, and this little freezer-friendly cake is no exception.
To make this lemon lavender icebox cake, we start by baking the cake. This cake whips up easily with butter, sugar, eggs, and the usual suspect dry ingredients. The juice of the lemons adds tang and acidity to this cake while the zest adds a fragrant, lemony taste to every bite. We bake the batter in a half sheet pan and allow it to cool completely before we throw it all together.
The filling for this lemon lavender cake is basically a bulked-up whipped cream. We add in a little cream cheese to the mixture to stabilize the airy whipped cream which gets its flavor from an infusion of dried lavender. I purchased a small bag of dried culinary lavender on Amazon, but some of you big city folks may be able to find it in your grocery stores.
To assemble this lemon lavender cake, we invert the cooled cake out of the pan and cut it into three equal-sized rectangles. I use a big ruler for precision, but you can wing it if that’s more your speed. Spread a thin layer of prepared raspberry preserves all over each piece of cake and then begin stacking! Place your first piece of raspberry-coated cake on a small, freezer friendly platter. Dollop 1/3 of the infused whipped cream on top and gently spread to a flat layer. Stack a second piece of cake and repeat this process again. Take care to spread the whipped cream as flat and evenly as possible to maintain a more stable cake. Some of the whipped cream may barely squish out the sides of the cake as you stack it, but don’t worry. Just be careful to not press down hard on the cake and remember it will all firm up in the freezer.
Leave the lemon lavender icebox cake in the freezer overnight, and, once frozen, feel free to trim up the edges to form neat rectangle slices. I cut 1/2″ pieces for serving, but you could also cut squares or wedges if you please! Just be sure to show off all those fancy layers, because, DANG, they are beautiful.
Many thanks to Kerrygold for sponsoring this delightful spring treat. It’s an honor to partner with a brand that I trust and adore so much, and I hope you all will welcome them to your kitchens as well. Enjoy this Sunday, enjoy some time spent baking, and GO CATS.
If you like this lemon lavender icebox cake you should check out:
Lavender Vanilla Bean Sugar Cookies
Lemon Lavender Icebox Cake

This lemon lavender icebox cake is a chilled springtime treat with lemon cake layers, lavender whipped cream, and sweet raspberry preserves.
- Author: Kate Wood
- Prep Time: 30
- Cook Time: 15
- Total Time: 420
- Yield: 12
- Category: Dessert
Ingredients
For the cake:
- 1 cup (230 gm) unsalted butter, at room temperature (I use Kerrygold)
- 1-1/3 cups (265 gm) sugar
- 3 large egg whites
- 1 teaspoon vanilla
- ¾ cup (180 gm) milk
- 3 tablespoons lemon juice
- 1-1/2 tablespoons lemon zest
- 2 cups (270 gm) all-purpose flour
- ¼ teaspoon baking soda
- 1-1/2 teaspoons baking powder
- ¾ teaspoon salt
For the cream:
- 2 cups heavy whipping cream
- 2 tablespoons dried culinary lavender
- 4 ounces (110 gm) regular cream cheese, at room temperature
- 1/3 cup (65 gm) sugar
- 1/2 teaspoon vanilla bean paste or vanilla extract
- Lavender food coloring, if desired.
- 1 cup raspberry preserves
Instructions
To prepare the cake:
- Preheat the oven to 350 degrees and spray a half sheet pan (18″ x 13″ x 1″) with baking spray. Line the bottom with a rectangle of parchment paper and set aside.
- In a large bowl or the bowl of a stand mixer, cream together the butter and sugar on medium speed until fluffy, about 2 minutes. Scrape the sides of the bowl and add the egg whites and vanilla and mix to combine. Scrape the sides of the bowl and add half of the milk plus the lemon juice and zest. Mix until combined and then add about half of the flour as well as the baking soda, baking powder, and salt. Scrape the sides of the bowl and add the remaining milk followed by the remaining flour. Mix on low only until combined and scrape the sides of the bowl. Fold in any unincorporated bits and spread the batter into the prepared pan. Bake in the oven for about 13 minutes or until a toothpick inserted comes out clean. Set aside to cool completely.
To prepare the cream:
- Combine the whipping cream and lavender in a bowl and cover with plastic wrap. Allow to rest in the fridge overnight or at least 6 hours. When ready to prepare the cream, cream the cream cheese and sugar on medium speed in a large bowl until combined, about 30 seconds. Slowly drizzle in the cream while the mixer is on low to incorporate. Add the vanilla extract and continue beating on medium speed until the mixture has thickened and stiff peaks form. Add a smidge of light purple or lavender food coloring if desired. Set in the fridge until ready to use.
To assemble the cake:
- Invert the cake out of the pan and cut along the long edge into three equal pieces. You’ll wind up with 3 rectangles of cake about 5-1/2” x 12-1//2” in size. Spread 1/3 of the preserves on each piece of cake in a thin even layer. Place on piece of the jammy cake on a serving dish and spread 1/3 of the lavender whipped cream on top. Smooth to flatten the whipped cream without overworking the cream and then top with another jammy piece of cake. Repeat this process once more finishing with the remaining layer of cake and lavender whipped cream on top. Place in the freezer to firm up the top quickly, about an hour, and then cover gently with plastic wrap and continue freezing for another 6 hours. You can clean up the edges of the cake by cutting through the frozen layers to even them up, if desired. Otherwise, slice ½” wedges for serving and top with fresh raspberries, if desired.

On Friday I wrapped up my very short but incredibly meaningful two-week rotation at the John Theurer Cancer Center in Hackensack, New Jersey. The commute wouldn’t have made it sustainable for me to stay any longer, but I wish I could have. I valued pretty much every moment of the experience.
One of the things I was told about the dietetic internship before starting was that I’d probably be surprised by what I loved and what I didn’t. Having had some counseling experience before starting my rotations, I wasn’t sure how much this would apply to me, but it has. Not across the board, of course: there are some rotations I’ve suspected wouldn’t be for me, which turned out to be true. And I’m reasonably sure that I’ll love my GI rotation, which starts tomorrow.
I could never have guessed how much I would love working with seniors, though—a passion that emerged only as I was completing my rotation in long-term care. And while I thought oncology would be meaningful to me for personal reasons—having watched a loved one go through chemo and radiation therapy years ago—I didn’t expect to enjoy the work in as many ways as I did.
It was intellectually stimulating and deeply interesting. I loved observing how teams of practitioners—doctors, nurses, social workers, researchers, and dietitians—came together in patient care, especially when handling a complex case. Most of all, I loved getting to know the patients and their families.
The big downside of this rotation, my commute aside, was feeling crummy for most of it: both the cold I started with and the seasonal allergies and fatigue that plagued me for the rest of my time at JCTT. I was so tired after my last day that I fell fast asleep on my commute home. It was an easy rotation insofar as my engagement goes, but it was difficult physically.
Over the years I’ve gotten good at recognizing traces of body judgment or body dysmorphia in how I relate to my appearance and shape. In recent years I’ve become aware of a related tendency, which is to feel easily exasperated and frustrated with my body when it’s not at “peak performance.” I’ve always been prone to stress, digestive troubles, allergies, and picking up bugs, which makes it easy to judge. And since I’m not twenty-five anymore, peak performance looks quite different than it used to. My energy reserves get depleted a lot quicker than they did even five years ago.
I have a ways to go with accepting my body’s energetic limits. I know my boundaries, but I resent them; there’s always a part of me that wishes I could do more. Illness can feel oddly triggering, the way fluctuations of the scale used to. Working in the health/wellness space, where boundless energy is often presented as an ideal, doesn’t always help.
I’ve developed a lot of strong muscles when it comes to avoiding self-comparison about the way I eat. It’s important for me to exercise that same strength in resisting the temptation to compare my health and stamina to other people’s. My body is its own quirky, lovable entity. Sometimes I wish I’d given it an easier time when I was younger, rather than pushing its limits with overwork and self-starvation. I often wish it weren’t as sensitive and responsive to triggers as it is.
But if my time at JCTT has reminded me of anything, it’s the supreme importance of meeting our bodies where they are, both in sickness and in health. I’ll continue to encounter physical challenges as my life goes on. Some will be irksome, others more serious. In those times body respect and self-care will matter more than ever. I can cultivate those capacities right now, by choosing not to dwell on the fact that I’ve been strung out. Instead, I can rest and give thanks to my body for getting me through another rotation, which is exactly what I’ve been up to today.
Giving thanks for this body of mine, and celebrating your bodies, too. Happy Sunday. Here are some recipes and reads.
Recipes
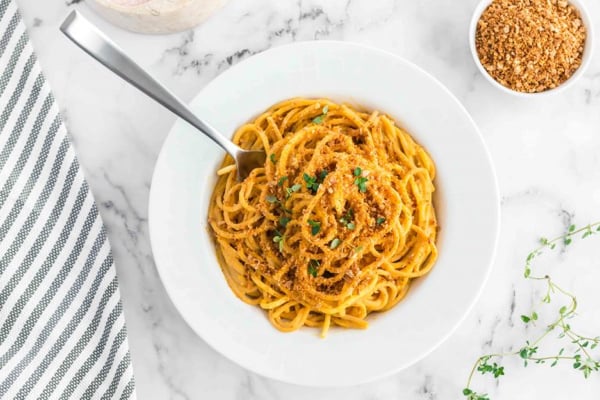
Dreena Burton’s recipes are always no-fail, and I love the looks of her new sweet potato pasta sauce.
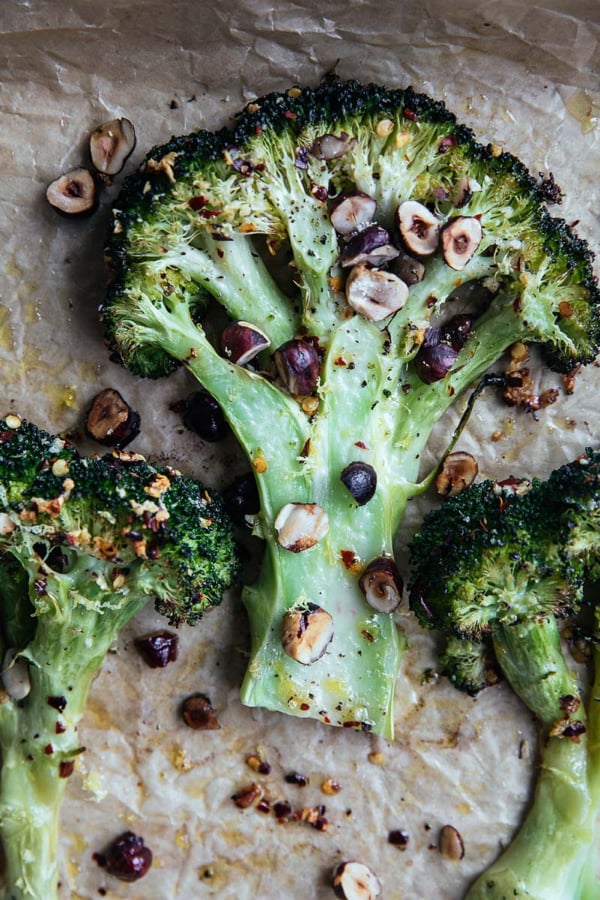
A simple recipe for spicy, garlicky broccoli steaks.
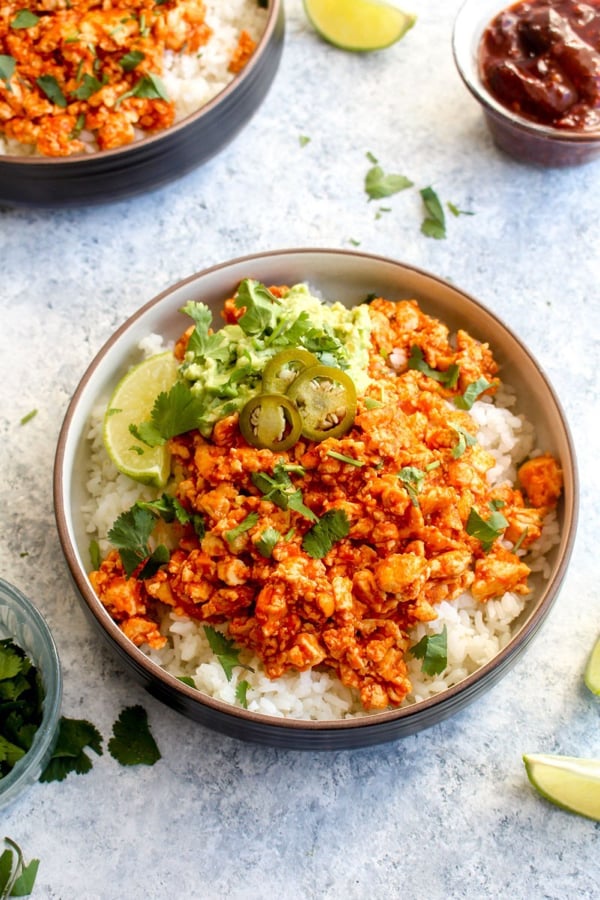
Laurel’s chipotle sofritas bowls look so colorful and tasty—not to mention they’re packed with plant protein.
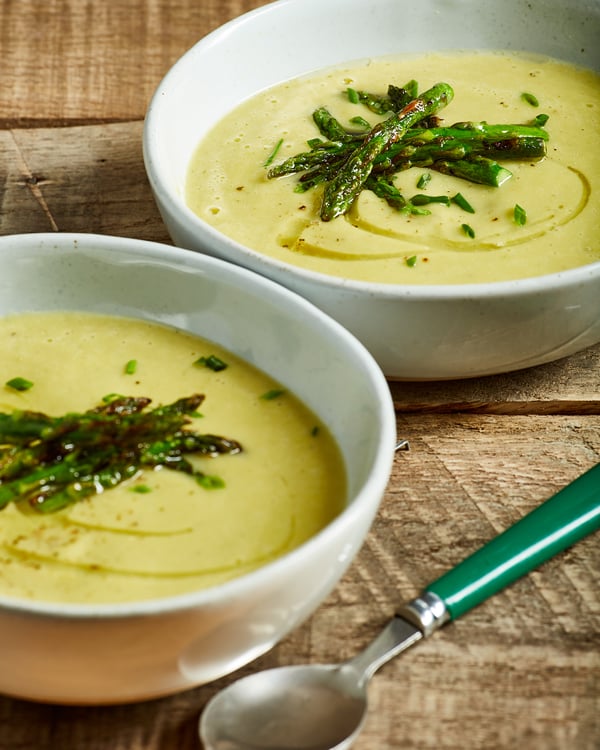
Isa’s garlicky white bean and asparagus soup is on my spring cooking list.

I think I’m going to celebrate getting to my final community rotation by making Kathy’s irresistable glazed donuts.
Reads
1. I’m guessing that a lot of you are familiar with the basic lifestyle patterns observed in the world’s so-called blue zones, but if you’re not, here’s a good recap.
2. The New York Times examines the link between pain perception and anxiety.
3. If I’ve ever appreciated simple and intuitive recipes and cooking, it’s been throughout the last eight months. But I do like to have my hand held by a cookbook author, too—especially if it means I’m less likely to mess something up—and I could understand some of JJ Goode’s case for long recipes. Even if I’m unlikely to re-enter that mode anytime soon.
4. Many religions ask for periods of abstinence or other special considerations around food. This topic can be under-discussed in our dialog about eating disorders, though in the last couple years I’ve seen many more personal testimonials about having an eating disorder during Ramadan. Likewise, I love Kimberly Robins reflections on reconciling eating disorder recovery with kashrut, or Jewish dietary law.
5. Undark takes a look at the difficulties associated with patient-matching, or matching patients with their appropriate medical records.
I had a delicious and lightly sweetened treat to share last week, but my rotation took priority in the last seven days. The good news is that I’ll have it ready to share with you tomorrow. Till then, be well.
xo
The post Weekend Reading, 3.31.19 appeared first on The Full Helping.
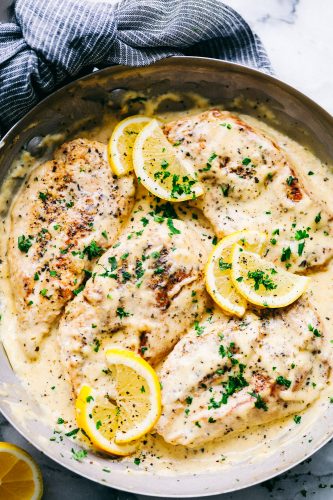
Creamy Lemon Parmesan Chicken is an incredible restaurant quality meal you can make under 30 minutes. Tender and juicy chicken is drowning in a creamy lemon parmesan sauce and is a meal the family will go crazy for!
Our family loves a good creamy chicken dinner! Creamy Parmesan Garlic Mushroom Chicken, Creamy Tuscan Chicken, or Creamy Chicken Marsala are just a few of the favorites on the blog!
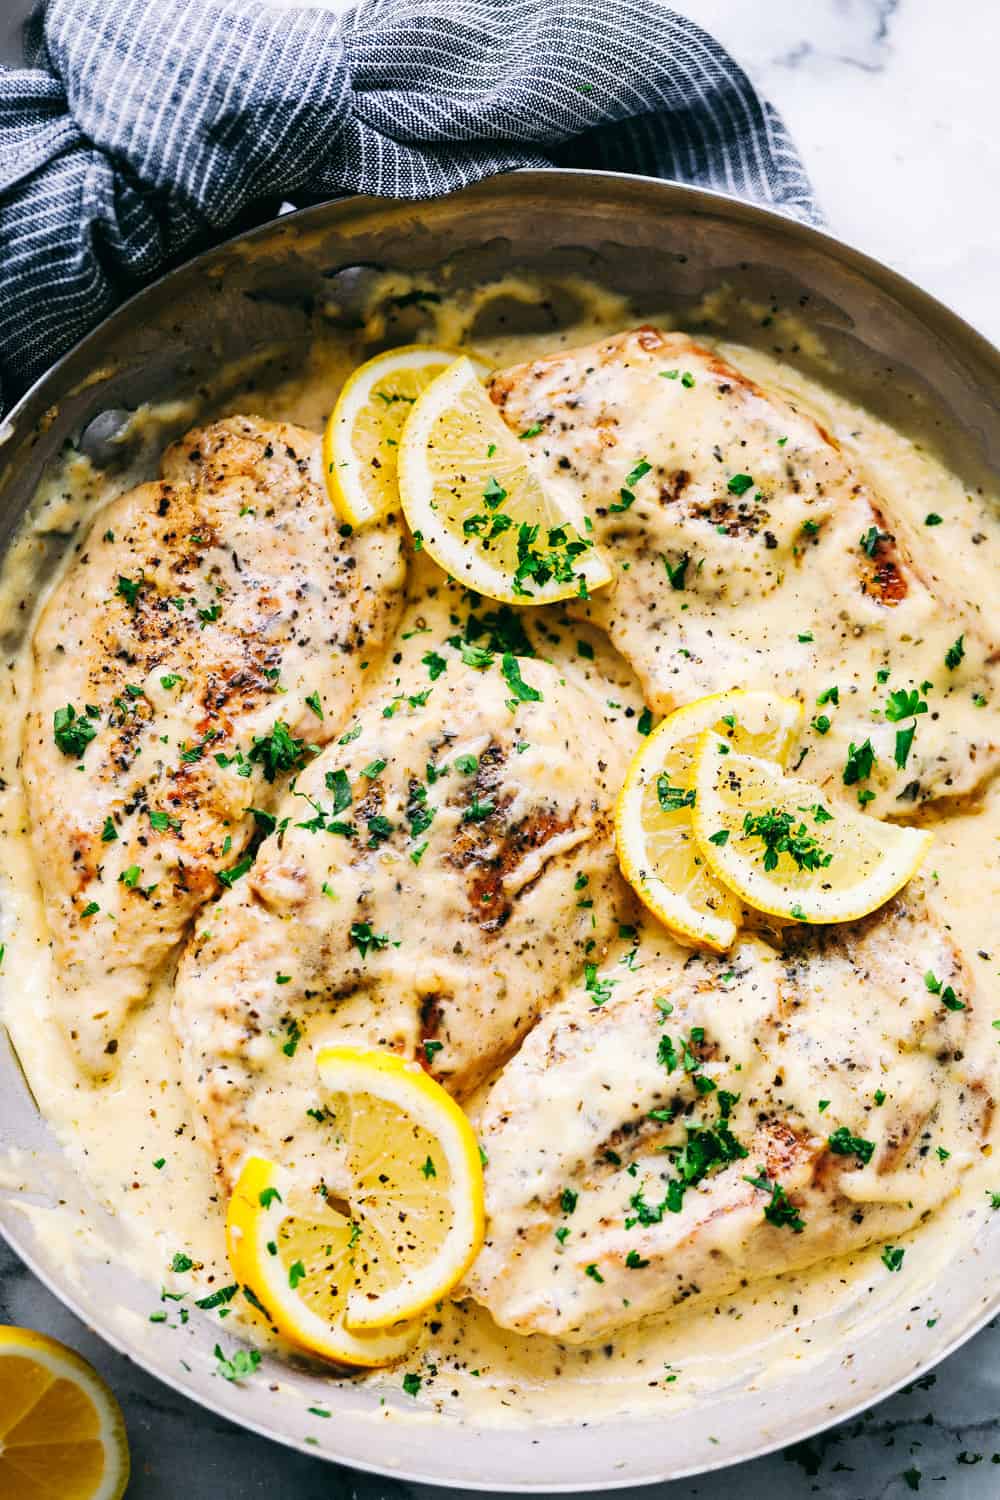
Creamy Lemon Parmesan Chicken
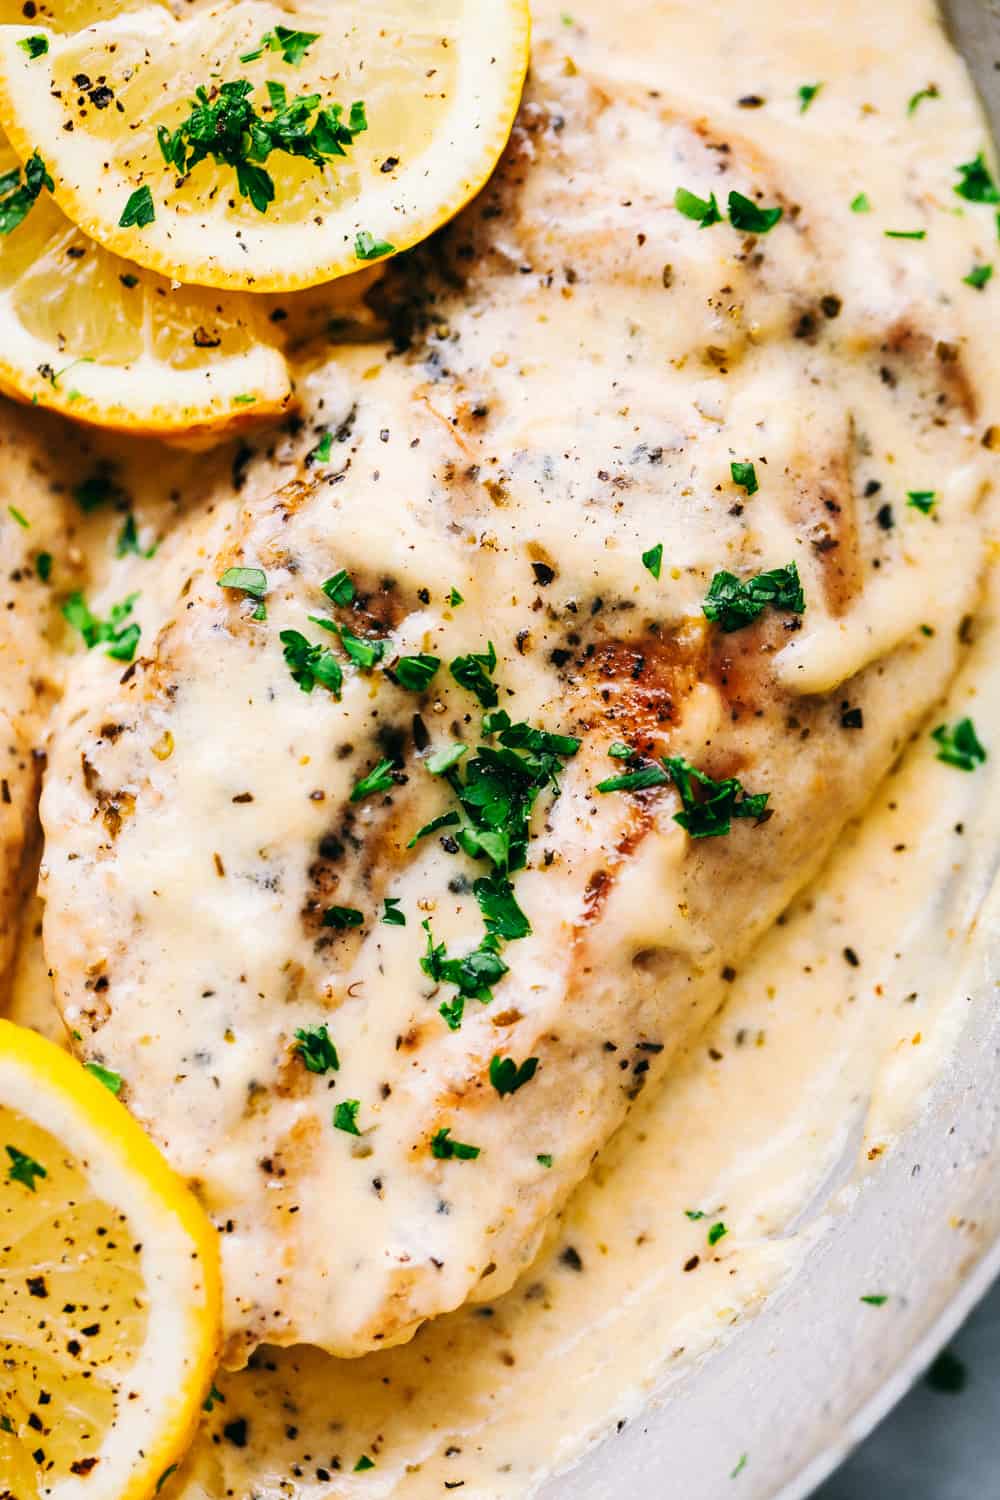
Creamy, dreamy and everything your family is looking forward to while sitting around the table together. This chicken is AMAZING and will have your family begging for more. Every bite is tender chicken with a sweet and savory flavor that melts in your mouth with every bite. My boys were adding seconds to their plate and my girls were asking for more creamy sauce on top of their chicken. It is a great combination that leaves you wanting more. It is light and tasty with minimal work to fix this dinner for your family. This is now my go-to meal that works well for our family.
You will want to double this recipe and just so you have some for leftovers the next day. It is that Good!! It tastes even better warmed up and still loved by all in our family. Left overs are always a huge hit for lunches or snacks after school at our house. It is nice to have something that can warm up quick and still taste delicious the second time it is re-heated. This Creamy Lemon Parmesan Chicken is a huge hit and my kids beg for it each week!
How do you make Creamy Lemon Parmesan Chicken?
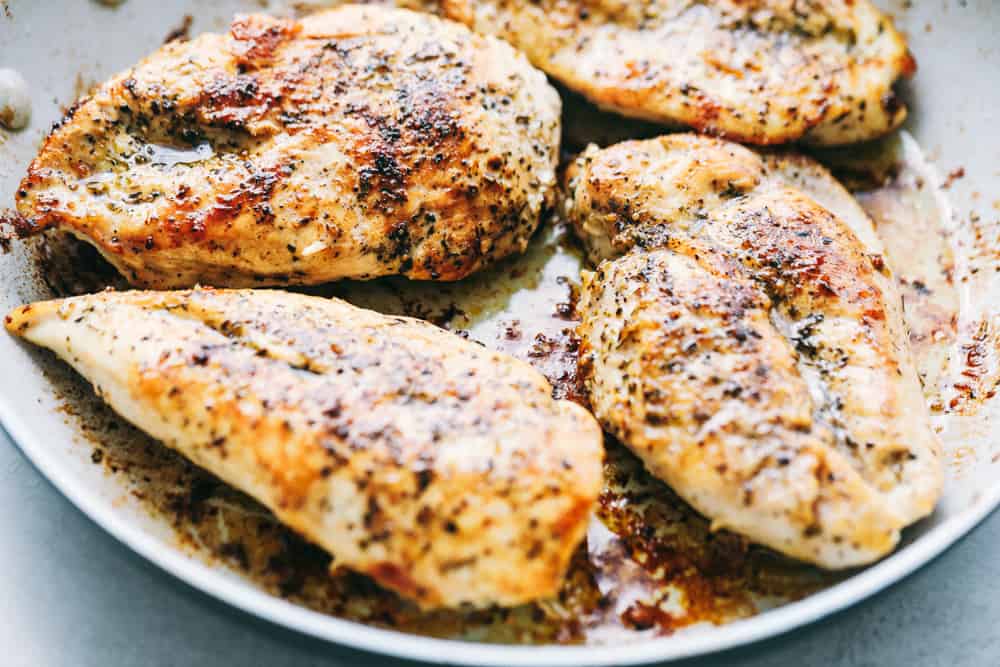
- In a large skillet add olive oil and cook the chicken on medium high heat for 3-5 minutes on each side or until brown on each side and cooked until no longer pink in center. Remove chicken and set aside on a plate.
- Add the heavy cream, chicken broth, juice from one lemon, garlic powder, italian seasoning, and parmesan cheese. Whisk in the cornstarch and let simmer for 1-2 minutes over medium high heat until it starts to thicken. Add the chicken back to the pan and serve over pasta if desired.
What Temperature Do You Cook Chicken To?
A meat or instant-read thermometer is your best bet for determining the temperature of your chicken, and if you’re cooking a whole bird, it should be inserted into the thickest part of the thigh but not touching bone. 165 degrees Fahrenheit is the safe internal temperature for both the white meat and dark meat.
What Do You Serve with Creamy Lemon Parmesan Chicken?
- Side Salad
- Asparagus
- Broccoli
- Green Beans
- Rice
- Noodles: Linguine or angel hair are my favorite
What Kind of Parmesan Cheese is Best?
This is always a great question! I love to use finely grated (powdered looking) parmesan cheese for this creamy sauce. It is easy to blend with the whisk and it makes a thick, rich and creamy sauce that tastes perfect every time. You are welcome to use shredded parmesan cheese if you prefer. Shredded parmesan cheese will be cheesier and not as thick but still have the delicious flavor.
Want More Creamy Chicken Recipes? Here are some to try!
- Creamy Chicken Noodle Casserole
- Skillet Creamy Chicken Mushroom Florentine
- Easy Creamy Herb Chicken
- Creamy Balsamic Mushroom Bacon Chicken
Do You Love Lemon Chicken Recipes?! Try these!
- Slow Cooker Lemon Chicken Piccata
- Easy Greek Lemon Chicken
- Creamy Lemon Chicken Piccata
- Lemon Garlic Butter Herb Chicken with Asparagus
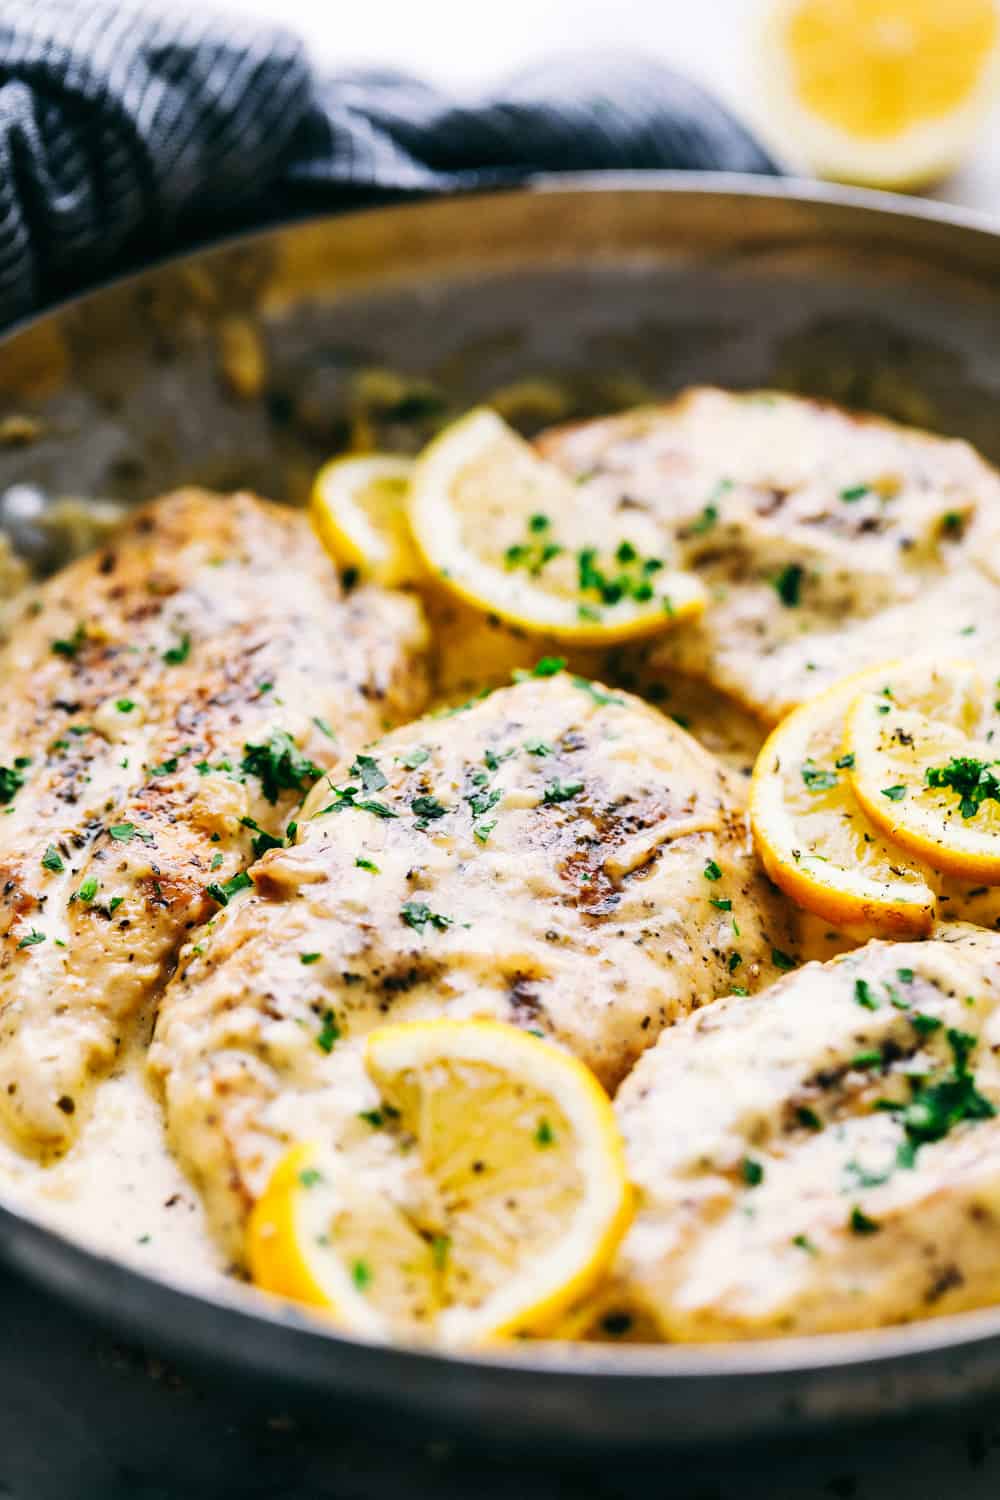
Creamy Lemon Parmesan Chicken

Creamy Lemon Parmesan Chicken is an incredible restaurant quality meal you can make under 30 minutes. Tender and juicy chicken is drowning in a creamy lemon parmesan sauce and is a meal the family will go crazy for!
- 4 Boneless (skinless Chicken Breasts)
- 2 Tablespoons olive oil
- 3 garlic cloves (minced)
- 1 cup heavy cream
- ½ cup chicken broth
- Juice from one lemon (about 1/4 cup)
- 1 teaspoon garlic powder
- 1 teaspoon Italian seasoning
- ½ cup parmesan cheese
- 1 Tablespoon cornstarch
- In a large skillet add olive oil and cook the chicken on medium high heat for 3-5 minutes on each side or until brown on each side and cooked until no longer pink in center. Remove chicken and set aside on a plate.
- Add the heavy cream, chicken broth, juice from one lemon, garlic powder, italian seasoning, and parmesan cheese. Whisk in the cornstarch and let simmer for 1-2 minutes over medium high heat until it starts to thicken. Add the chicken back to the pan and serve over pasta if desired.
A free 7-day flexible weight loss meal plan including breakfast, lunch and dinner and a shopping list. All recipes include calories and Weight Watchers Freestyle™ SmartPoints®.

Hi guys! Spring is in the air, can you feel it? Bring on the farmers markets! I will be doing a book signing next Sunday April 7th, hosted by Le Creuset at Woodbury Common Premium Outlets, from 2 PM – 3:30 PM. The address if Le Creuset 869 Adirondack Way, Central Valley, New York 10917. If you are in the area stop by and say hi! I will also have book signings at their Mohegan Sun loaction April 13th and their Wrentham location April 14th. Save the date!
If you’re new to my meal plans, I’ve been sharing these free, 7-day flexible healthy meal plans (you can see my previous meal plans here) that are meant as a guide, with plenty of wiggle room for you to add more food, coffee, beverages, fruits, snacks, dessert, wine, etc or swap recipes out for meals you prefer, you can search for recipes by course in the index. You should aim for around 1500 calories* per day.
There’s also a precise, organized grocery list that will make grocery shopping so much easier and much less stressful. Save you money and time. You’ll dine out less often, waste less food and you’ll have everything you need on hand to help keep you on track.
Lastly, if you’re on Facebook join my Skinnytaste Facebook Community where everyone’s sharing photos of recipes they are making, you can join here. I’m loving all the ideas everyone’s sharing! If you wish to get on the email list, you can subscribe here so you never miss a meal plan!
Also, if you don’t have the Skinnytaste Meal Planner, now would be a great time to get one to get organized for 2019! There was a print error last year, but it’s perfect now! You can order it here!
THE DETAILS:
Breakfast and lunch Monday-Friday, are designed to serve 1 while dinners and all meals on Saturday and Sunday are designed to serve a family of 4. Some recipes make enough leftovers for two nights or lunch the next day. While we truly believe there is no one size fits all meal plan, we did our best to come up with something that appeals to a wide range of individuals. Everything is Weight Watchers friendly, I included the updated Weight Watcher Freestyle Points for your convenience, feel free to swap out any recipes you wish or just use this for inspiration!
The grocery list is comprehensive and includes everything you need to make all meals on the plan. I’ve even included brand recommendations of products I love and use often. Cross check your cabinets because many condiments you’ll notice I use often, so you may already have a lot of them.
And last, but certainly not least, this meal plan is flexible and realistic. There’s plenty of wiggle room for cocktails, healthy snacks, dessert and dinner out. And if necessary, you can move some things around to make it work with your schedule. Please let me know if you’re using these plans, this will help me decide if I should continue sharing them!
MONDAY (4/1)
B: Freezer Breakfast Burritos* (4)
L: Cobb Salad in a Jar with Buttermilk Ranch* (5)
D: Heather’s Buddha Bowl (7)
Totals: Freestyle™ SP 16, Calories 1,001**
TUESDAY (4/2)
B: Freezer Breakfast Burritos (4)
L: Cobb Salad in a Jar with Buttermilk Ranch (5)
D: Grilled Chicken Tacos with Lettuce Slaw, Avocado and Cotija (8)
Totals: Freestyle™ SP 17, Calories 955**
WEDNESDAY (4/3)
B: Freezer Breakfast Burritos (4)
L: Chicken Club Lettuce Wrap Sandwich (5)
D: Orecchiette Pasta with Chicken Sausage and Broccoli (8)
Totals: Freestyle™ SP 17, Calories 819**
THURSDAY (4/4)
B: Freezer Breakfast Burritos (4)
L: Chickpea Avocado Salad (3) and an apple (0)
D: LEFTOVER Orecchiette Pasta with Chicken Sausage and Broccoli (8)
Totals: Freestyle™ SP 15, Calories 882**
FRIDAY (4/5)
B: Greek Yogurt with Berries, Nuts and Honey (5)
L: Chickpea Avocado Salad (3) and an apple (0)
D: Maple Soy Glazed Salmon (3) with Asian Edamame Fried Rice (4)
Totals: Freestyle™ SP 15, Calories 1,083**
SATURDAY (4/6)
B: Czech Crepes with Berries and Cream (4)
L: Grilled Chicken Salad with Strawberries and Spinach (5)
D: DINNER OUT!
Totals: Freestyle™ SP 9, Calories 511**
SUNDAY (4/7)
B: Asparagus-Pancetta Potato Hash (4)
L: Thai Chicken Peanut Lettuce Tacos (6)
D: Cheese Stuffed Turkey Meatloaf (7) with 1 cup sautéed green beans (0)
Totals: Freestyle™ SP 17, Calories 801**
*Freeze any leftover burritos you/your family won’t eat. Prep Cobb Salad Sunday night, if desired
**This is just a guide, women should aim for around 1500 calories per day. Here’s a helpful calculator to estimate
your calorie needs. I’ve left plenty of wiggle room for you to add more food such as coffee, beverages, fruits,
snacks, dessert, wine, etc.
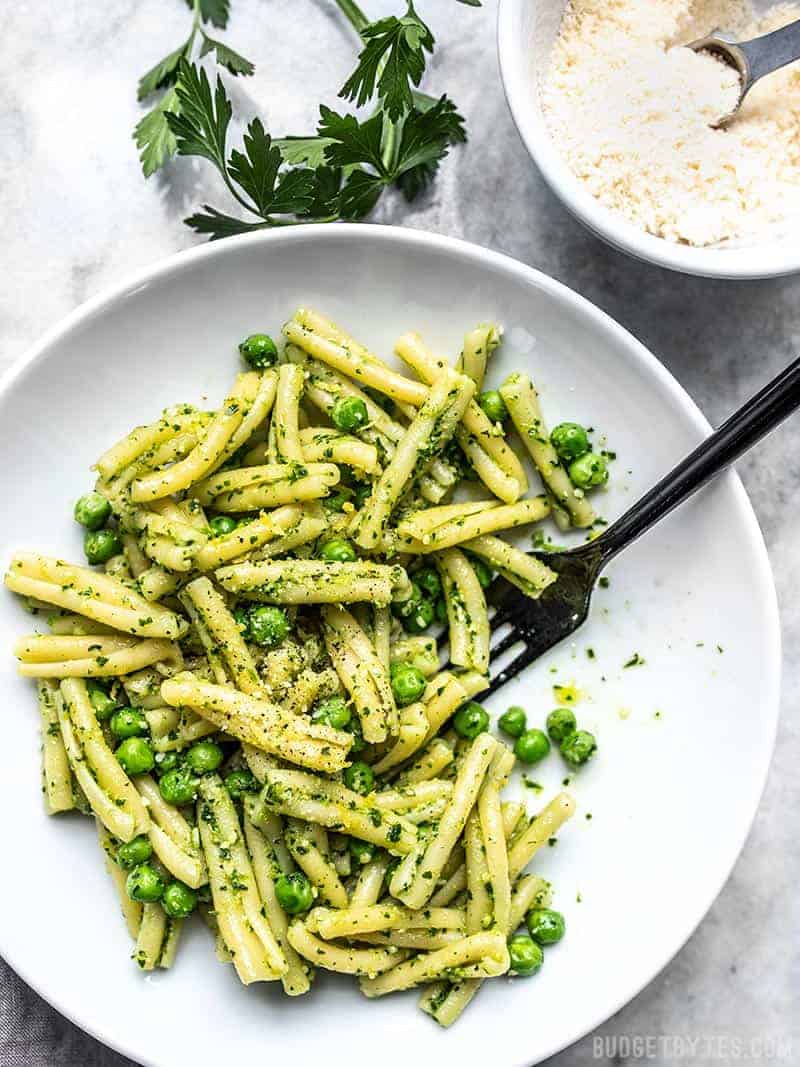
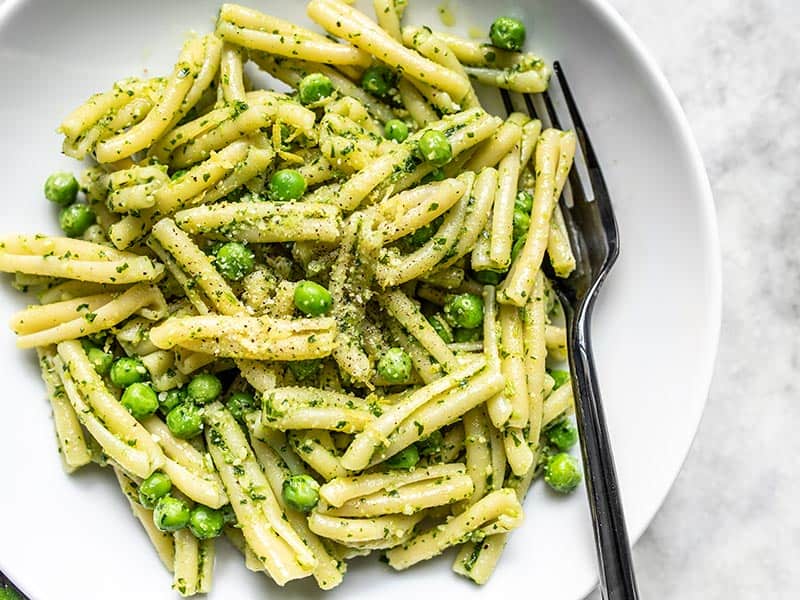
SPRING IS HEEERRRRREE! (Read that in Oprah’s excited yelling voice). As soon as that sun starts to shine and the days get a little longer I feel every cell in my body wake up and I instantly start craving super fresh flavors. This Parsley Pesto Pasta with Peas is a great “transitional” recipe to take you from cold grey winter days into the sunny days of spring. It tastes super bright and fresh, but doesn’t require a lot of really seasonal ingredients, which is nice because sometimes my brain is already screaming spring before the fresh produce hits the markets. :P
Parsley Pesto Pasta with Peas
Parsley Pesto, a Budget-Friendly Alternative
I looooove making pesto with parsley because it’s a fraction of the cost of fresh basil. It has a super fresh, almost grassy flavor that I love. But if you’re not into parsley as much as I am (I admit, I LOVE parsley), you can use it in combination with other herbs to bulk up the pesto and bring the overall cost down. I also made my parsley pesto nut-free to reduce the cost even further, but you can add some walnuts, pine nuts, or sunflower seeds if you prefer a nutty pesto.
Other Pasta Add-Ins
In true Budget Bytes form, I kept this pasta dish super simple, but I have plenty of ideas for other add-ins if you want to take this up a notch. Asparagus and artichokes are also in season in the spring and would make a great addition, as would sun dried tomatoes, or even fresh grape tomatoes. You could even chop up some spinach and stir that right in, or purée it in with your pesto for even more bulk.
What Type of Parmesan is Best for Pesto
There is absolutely no question that Parmesan grated from a block is 100% better than the kind that comes grated in a bottle, but hey, that’s just not within everyone’s budget. I made my parsley pesto with the grated kind because I wanted to know that this dish was good even with the most widely available form of Parmesan. And yes, yes it is still very good!
Is Your Olive Oil Fresh?
Olive oil can go bad and bad olive oil will absolutely ruin a dish like this. Olive oil should never taste or smell sharp or bitter. So give your olive oil a little taste before you begin, just to make sure. If the oil does not taste smooth, it has probably gone rancid (the fat molecules have oxidized). Here’s a great little article about How to Tell if Your Food Is Rancid from Epicurious, if you want to read more.
How to Serve Parsley Pesto Pasta with Peas
Peas have a surprising amount of protein, so this dish makes a really great main dish on its own, especially if you add any of the add-ins suggested above. But I also think this pasta is the perfect side for burgers or any other grilled meat if you’re having a cook-out and enjoying the spring or summer weather. Super fresh!
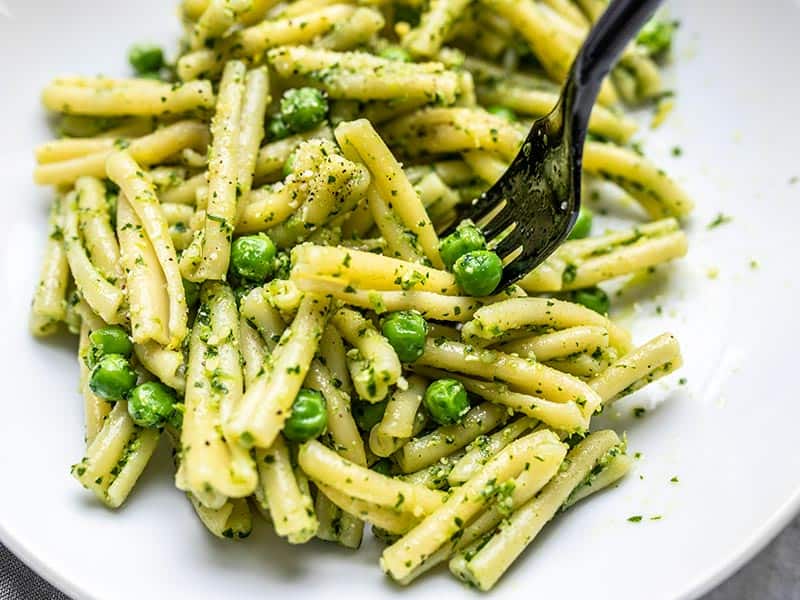
Parsley Pesto Pasta with Peas
Parsley Pesto Pasta with Peas has super bright and fresh flavors perfect for spring and summer. Serve as a main dish or a side with your grilled food.
- 1 bunch flat leaf Italian Parsley (about 2-3 cups, loosely packed) ($0.89)
- 1 fresh lemon ($0.43)
- 1/2 cup grated or shredded Parmesan ($0.88)
- 2 cloves garlic ($0.16)
- salt and pepper ($0.05)
- 1/4 cup olive oil ($0.52)
- 1 lb. pasta* ($1.99)
- 1 cup frozen peas ($0.38)
-
Rinse the parsley well to remove any dirt or debris, then pat it dry with a clean, lint-free towel. Cut off the ends of the parsley stems and place the rest, leaves and stems, in the bowl of a food processor.
-
Zest and juice the lemon. Add half of the zest and about 2 Tbsp of the juice to the food processor, along with the Parmesan, garlic cloves (peeled), and some freshly cracked pepper (about 15 cranks of a pepper mill).
-
Pulse the mixture until everything is finely minced and combined. Begin to add the olive oil in a thin stream through the chute of the processor as it blend the mixture together. Once the oil has been incorporated, add salt to taste. I added about 1/4 tsp salt.
-
Bring a pot of water to a boil for the pasta. Once boiling, add the pasta and continue to boil until the pasta is al dente. At the very end of the cook time, add the frozen peas and stir to combine. Let the peas sit in the hot water with the pasta for about a minute, then drain the pasta and peas in a colander.
-
Allow the pasta to cool just to the point where it is no longer steaming heavily. Transfer the drained pasta to a bowl and add the parsley pesto. Stir to combine, then serve warm. Add a pinch of the remaining lemon zest over top of each serving.
*I used casarecce pasta, but any short shaped pasta with texture would work great. You want to make sure to use something with texture so there is something to grab all the parsley pesto.
Step by Step Photos
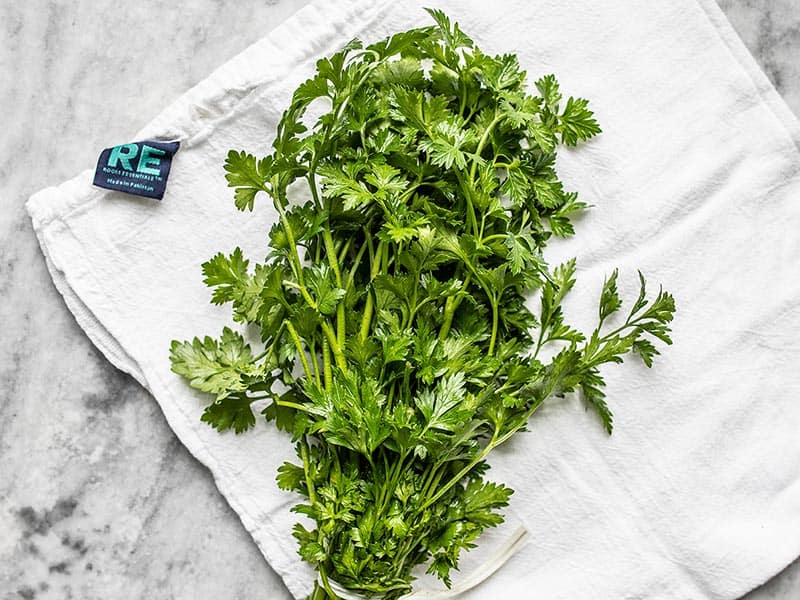
Begin by rinsing the parsley well to remove any dirt or debris. Sandy pesto is NOT fun (or good). Pat the parsley dry with a lint-free towel because watery pesto is also not good. Parsley stems are totally fine to eat and include in the pesto, so just cut off the ends and put everything else into a food processor.
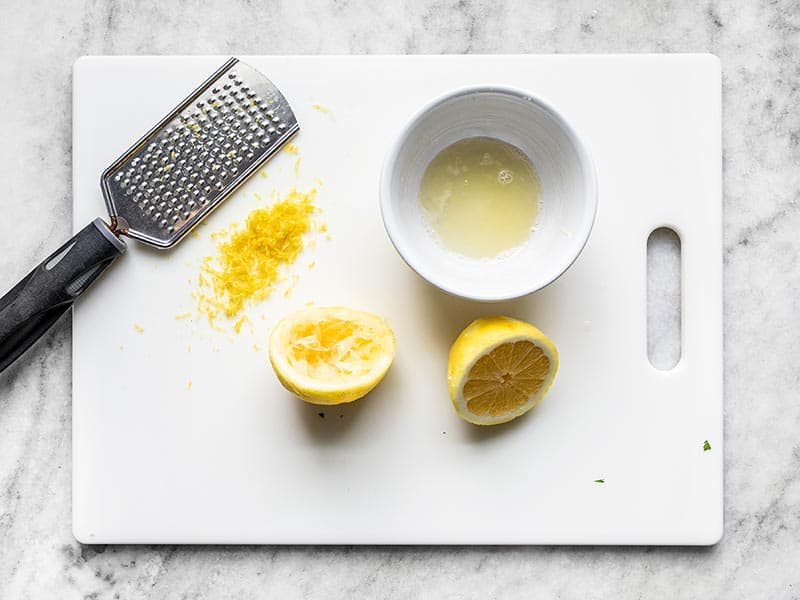
Zest and juice one fresh lemon. This is the perfect use for any frozen whole lemons, if you have them stashed in your freezer!
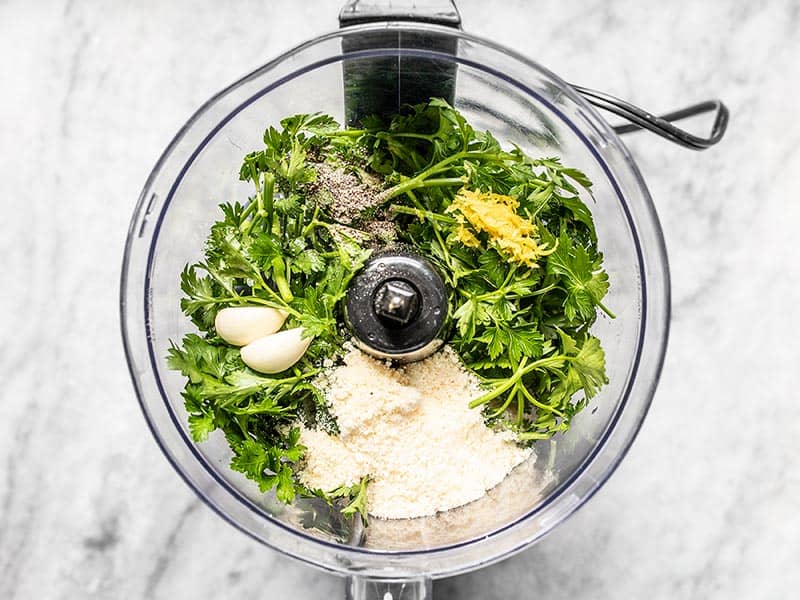
Add about half of the lemon zest, 2 Tbsp of the lemon juice, 1/2 cup grated Parmesan, 2 cloves of garlic (peeeled), and some freshly cracked pepper (about 15 cranks of a pepper mill).
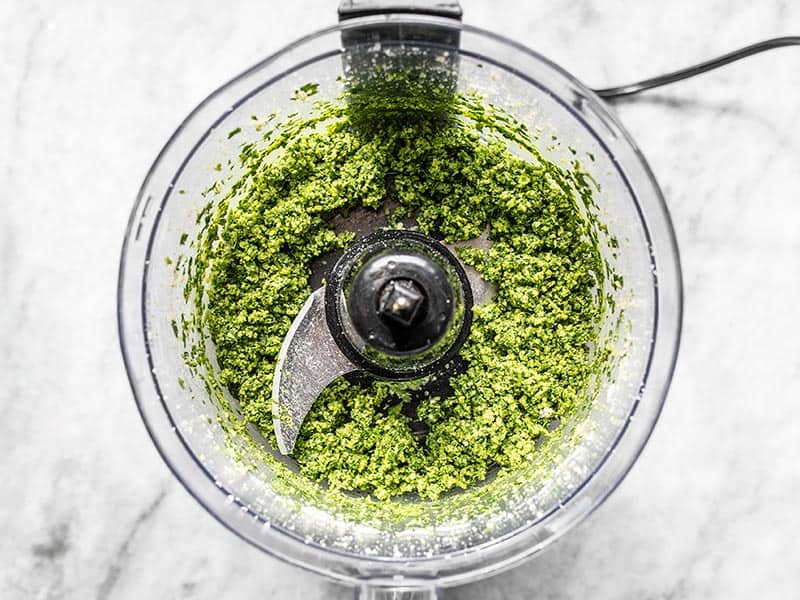
Pulse these ingredients together until they are minced and well combined.
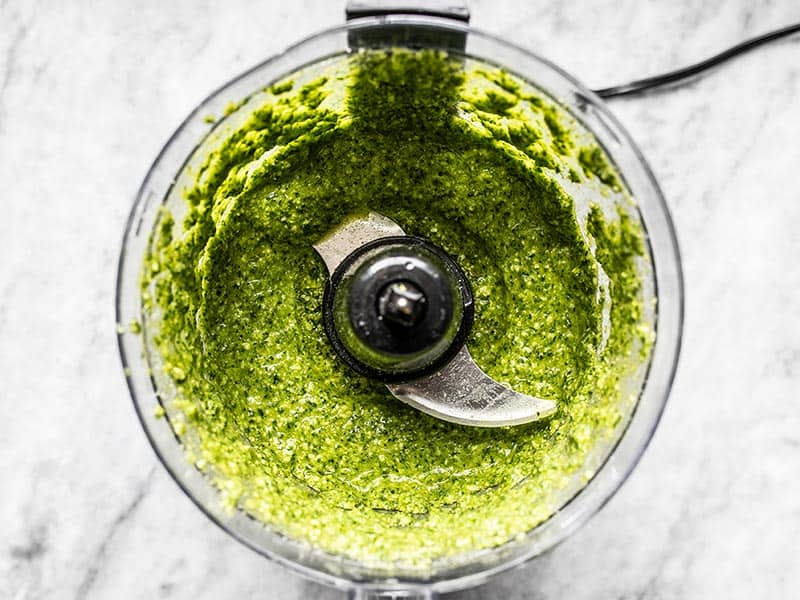
Then slowly start to add 1/4 cup olive oil through the chute in the food processor as the ingredients are processing. Once done it should be a bright green saucy consistency.
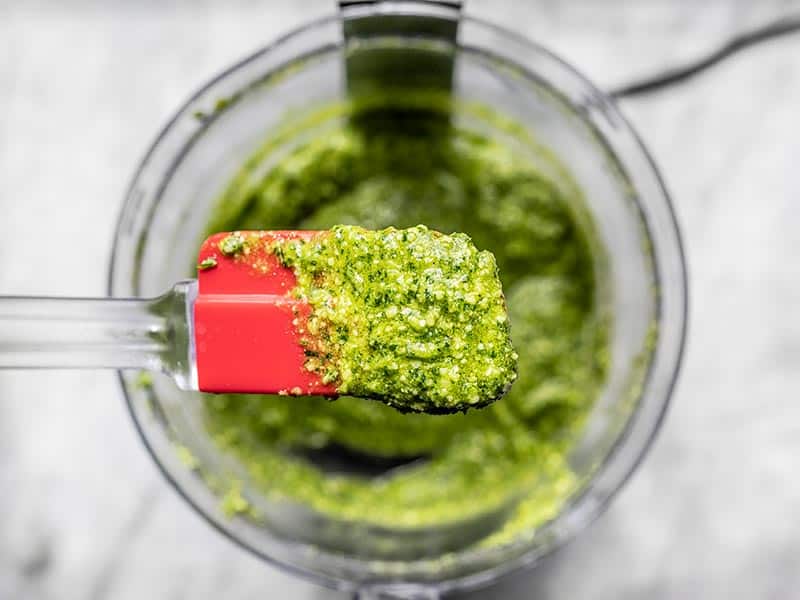
Check out that color!! This stuff is seriously amazing. Now it’s time to add the salt and really make the flavors pop. Add salt to taste. I added 1/4 tsp.
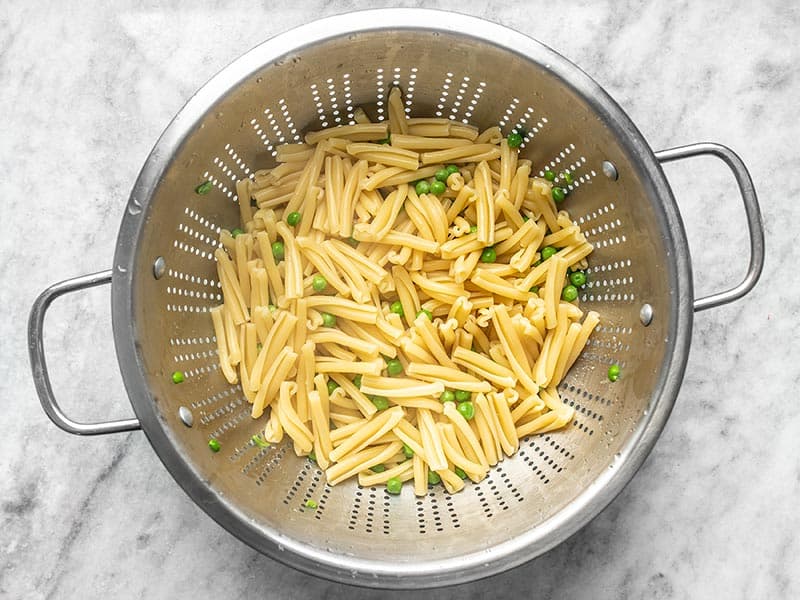
Bring a pot of water to a boil for the pasta. Once boiling, add 1 lb. pasta (I used casarecce, but any short textured pasta will do), and boil until the pasta is al dente. Once it’s tender, add 1 cup frozen peas and stir to combine. Let the peas sit in the hot water with the pasta for one minute, then drain in a colander. Let the pasta cool for a few minutes, or just until it’s no longer steaming heavily (you don’t want it to actually melt the Parmesan in the pesto).
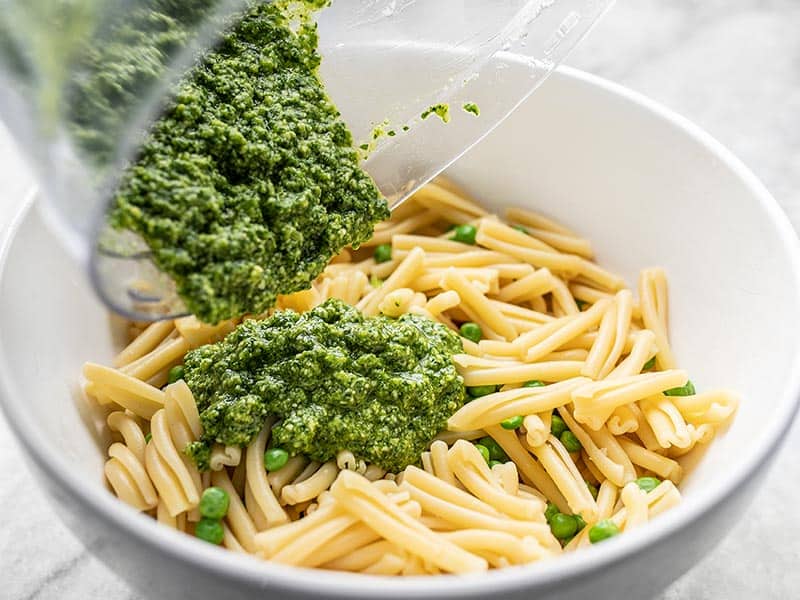
Once the pasta is slightly cool and well drained, transfer it to a large bow. Add the parsley pesto and stir to combine.
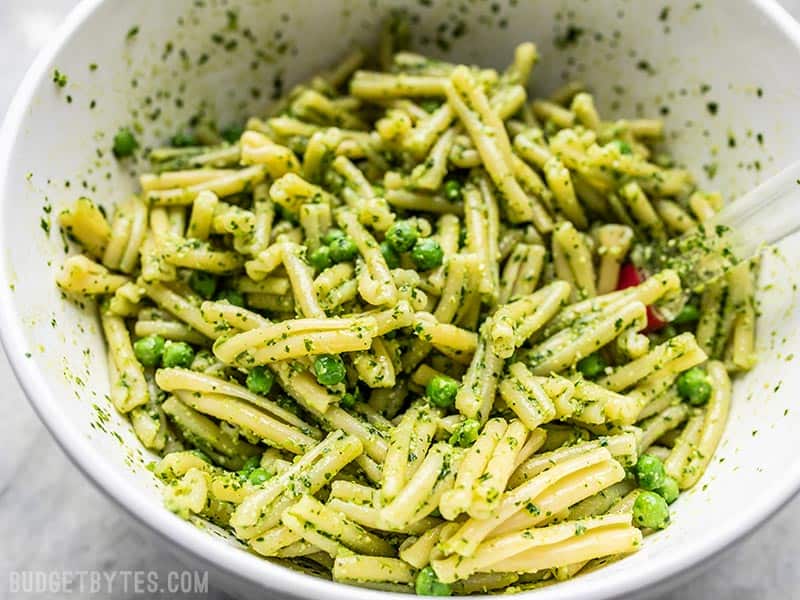
Yessss, look at all that freshness!
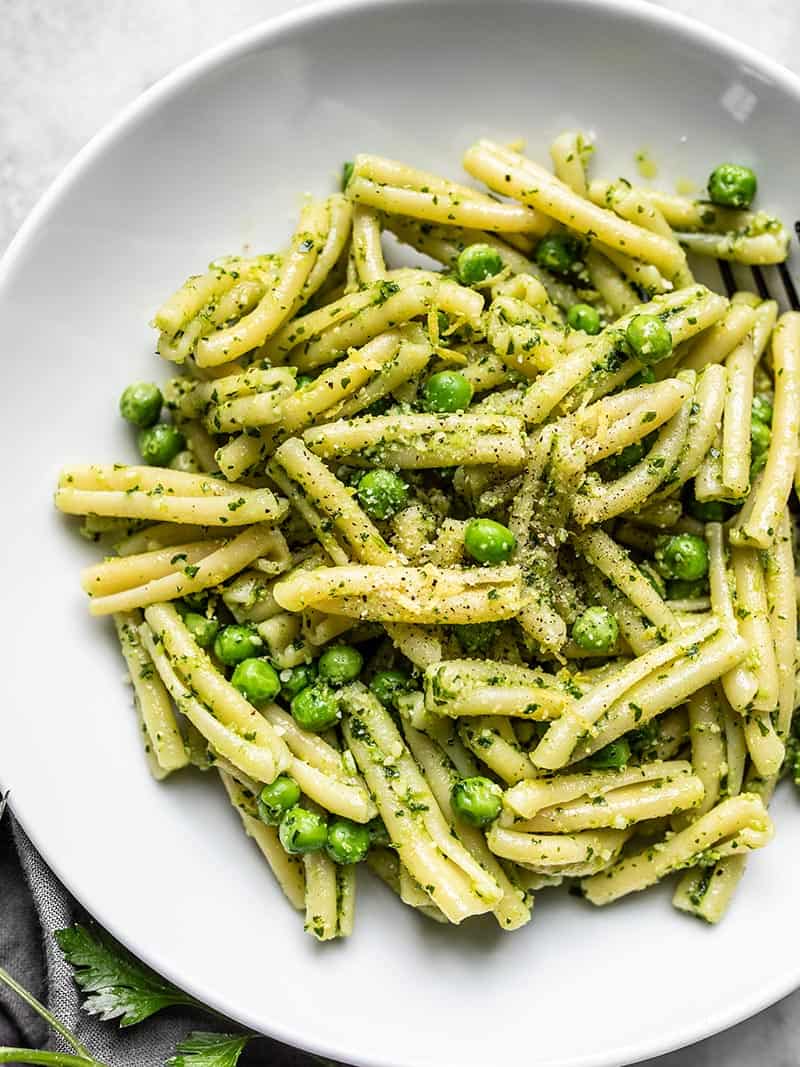
Add a pinch of the remaining zest to each bowl before serving (you can also add extra pepper or Parmesan, if desired). Dig in!
The post Parsley Pesto Pasta with Peas appeared first on Budget Bytes.

