
I talk a lot about how oven-roasting magically makes everything taste better, and garlic is no exception! Fresh garlic has a spicy flavor punch, but roasted garlic has a deep, mellow, and slightly sweet flavor. It tastes great on its own or you can add it to just about anything you cook to give it that extra special flavor. It’s a really easy and inexpensive way to take your food to the next level.
Why roast Garlic?
Not only is the flavor of roasted garlic phenomenal, but it also tends to be a bit easier on your stomach than fresh garlic.  The flavor of roasted garlic is much more mellow and deep than fresh garlic, and it has a beautiful sweetness from the natural sugars that caramelize during the roasting process. Plus, you can roast several cloves at once while you’ve already got the oven going for something else, then you can store that roasted garlic in the freezer for later use!
How to Use Roasted Garlic
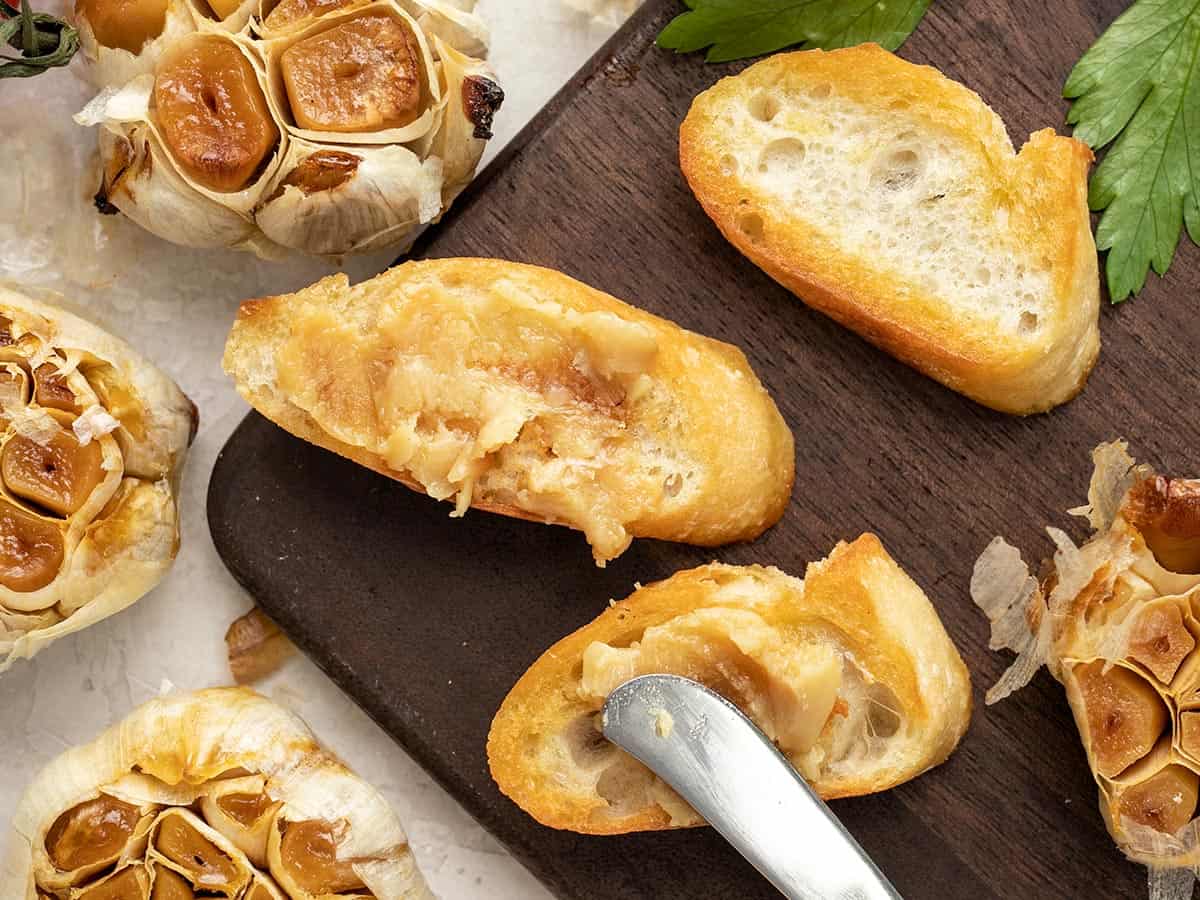
If you’re a garlic lover, like me, you’ll love just smearing this soft, spreadable roasted garlic on a piece of crusty bread. If you want to extend that garlic flavor a little more, you can whip it into some butter, cream cheese, or mayo for a delicious caramelized garlic butter spread. But really, it’s great in anything that would normally call for regular garlic. Try using roasted garlic in these recipes:
How to Store Roasted Garlic
The easiest and most cost-effective way to make roasted garlic is to make several heads of garlic at once and to do so while you’ve already got the oven going for something else. Just pop them in the oven as you cook your meat, vegetables, or whatever else you might be roasting. But then what do you do with six or seven bulbs of roasted garlic??
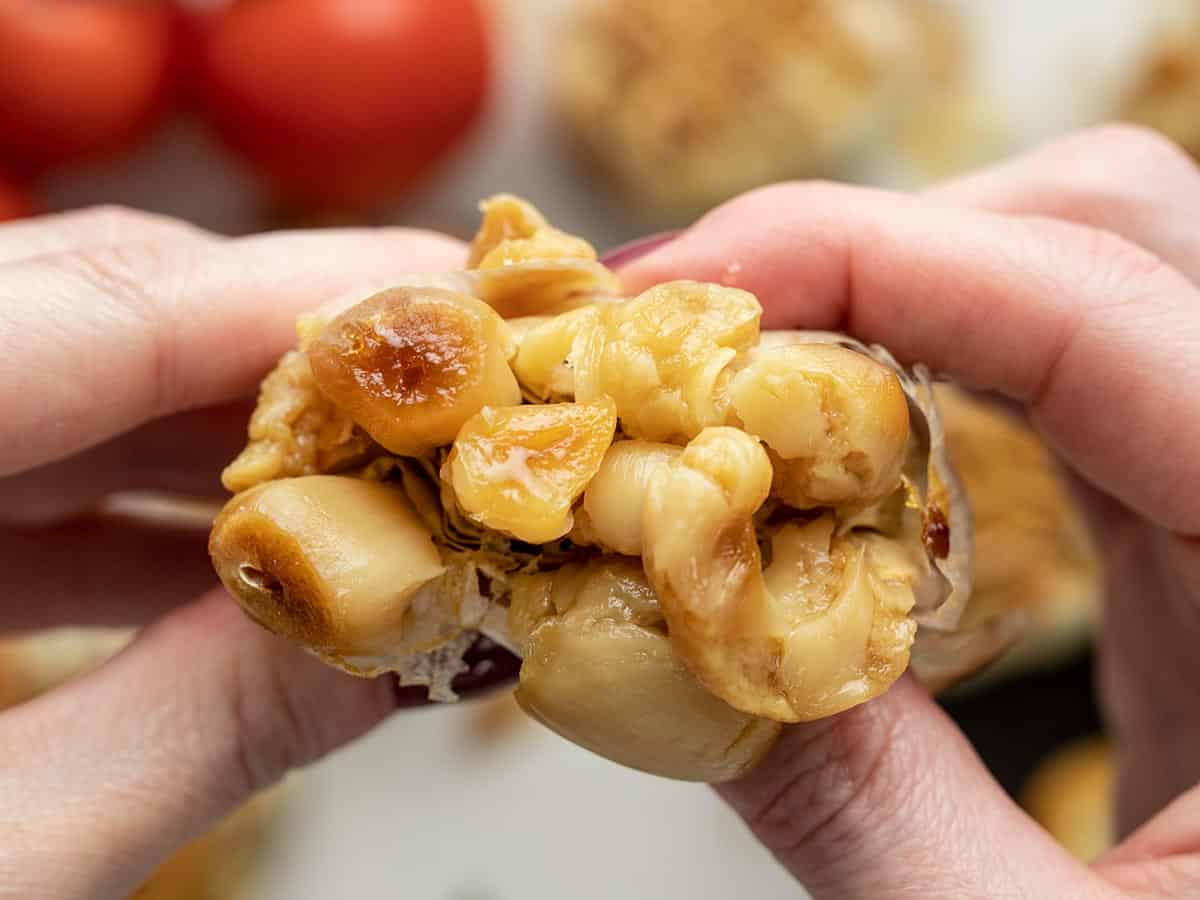
Simply squeeze the soft roasted garlic out of the papery skin (that part is kind of fun, if you ask me), then measure out the roasted garlic paste into one teaspoon or one tablespoon portions. Place the potions on a parchment or plastic lined plate or baking sheet, freeze until solid, then transfer to an air-tight freezer bag for longer storage.
Roasted garlic will last about 4-5 days in the fridge and 3 months or more in the freezer.

Roasted Garlic
Ingredients
- 6* heads garlic $3.84
- 2 Tbsp olive oil $0.32
Instructions
-
Preheat the oven to 400ºF.
-
Remove any loose outer pieces of papery skin from the heads of garlic. Slice off the top ⅓ of each head to expose the cloves inside (save the pieces of garlic cloves that have been cut off to use in other recipes).
-
Place the garlic in a baking dish. Drizzle olive oil over the cut surfaces of the garlic, making sure they're coated in oil.
-
Cover the baking dish tightly with a lid or foil and transfer to the oven. Roast for 30 minutes, then check the garlic. Add more time in the oven, 10-15 minutes at a time, until the garlic is deeply golden brown. Total roasting time will vary with the size and number of garlic heads you're roasting, as well as the type of dish you're roasting in.
-
Let the garlic cool. Once cool enough to handle, squeeze the soft roasted garlic out of the heads. Use immediately, store in the refrigerator, or freezer for later use.
See how we calculate recipe costs here.
Notes
Nutrition
How to Make Roasted Garlic – Step by Step Photos
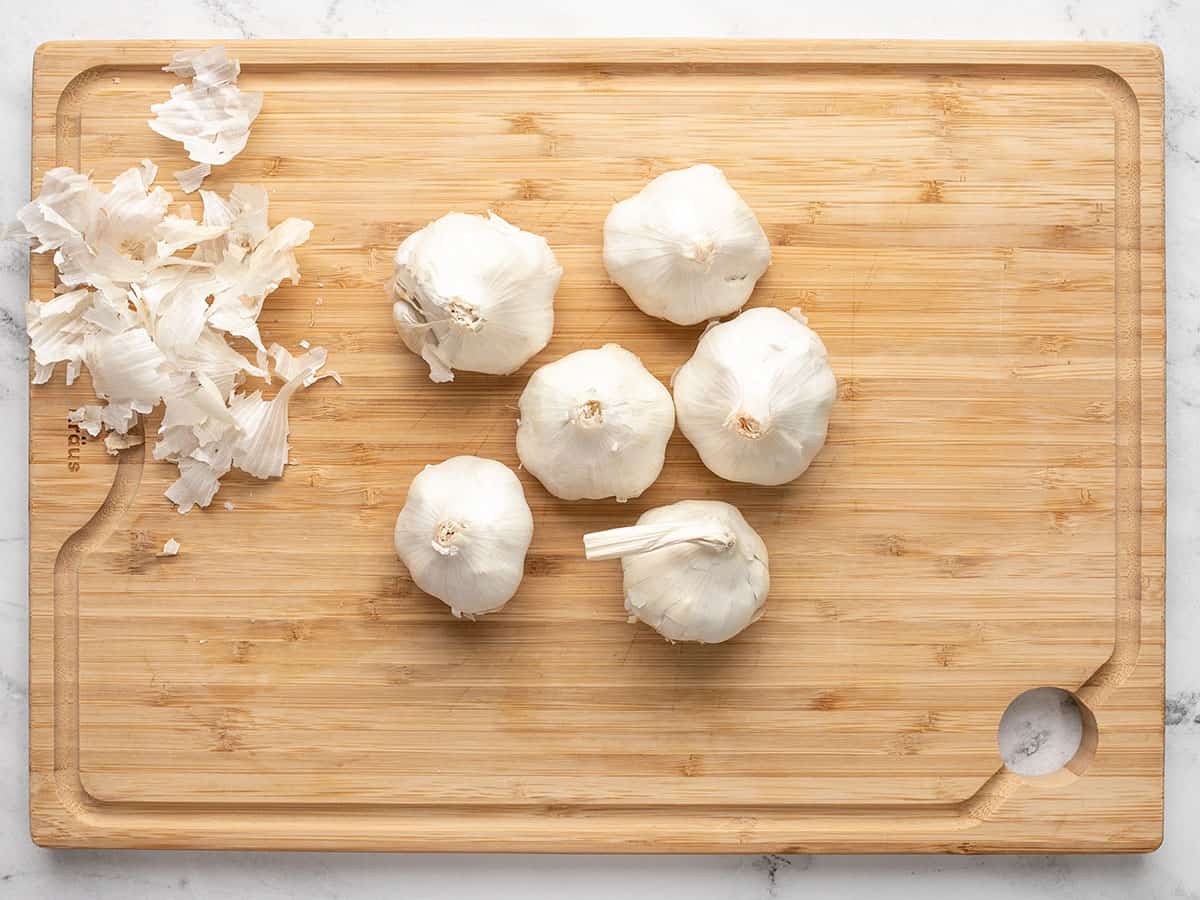
Preheat the oven to 400ºF. Remove any extra loose pieces of the papery skin from the heads of garlic before you begin. It will be much easier to remove the roasted garlic if the loose skins have been removed.
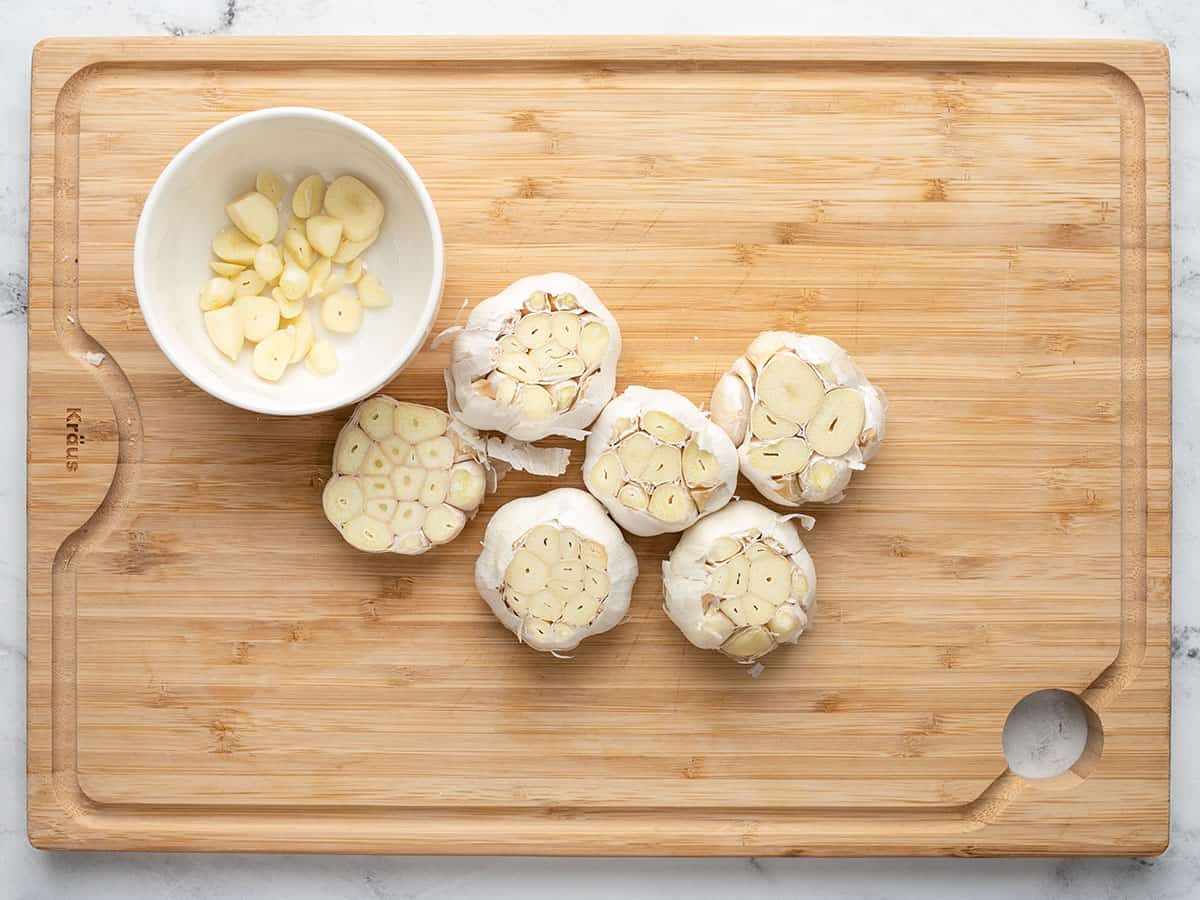
Slice off about ⅓ of the top of the garlic heads to expose all of the cloves. Make sure to save the garlic bits that are cut off and remove them from the skin. You can use the pieces that you cut off in other recipes later–it’s already partially chopped! :)

If you’re only doing one head of garlic at a time, you can wrap the garlic in foil to create an enclosed space. If you’re doing several heads at a time, place them in a baking dish that either has an oven-safe lid or that can be tightly covered with foil. Drizzle the tops of the garlic with oil to help prevent them from drying out as they roast.
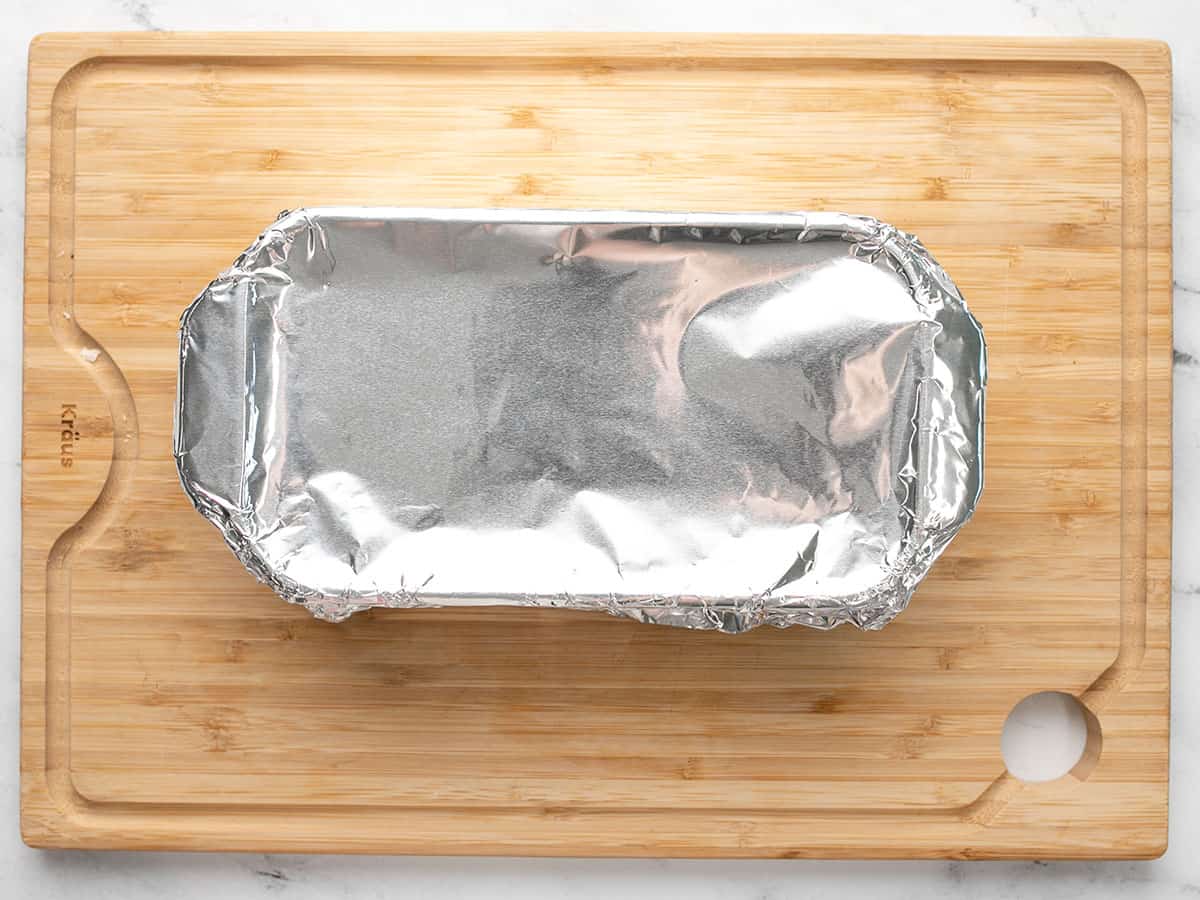
Cover the baking dish tightly (with a lid or foil), then transfer to the preheated 400ºF oven.
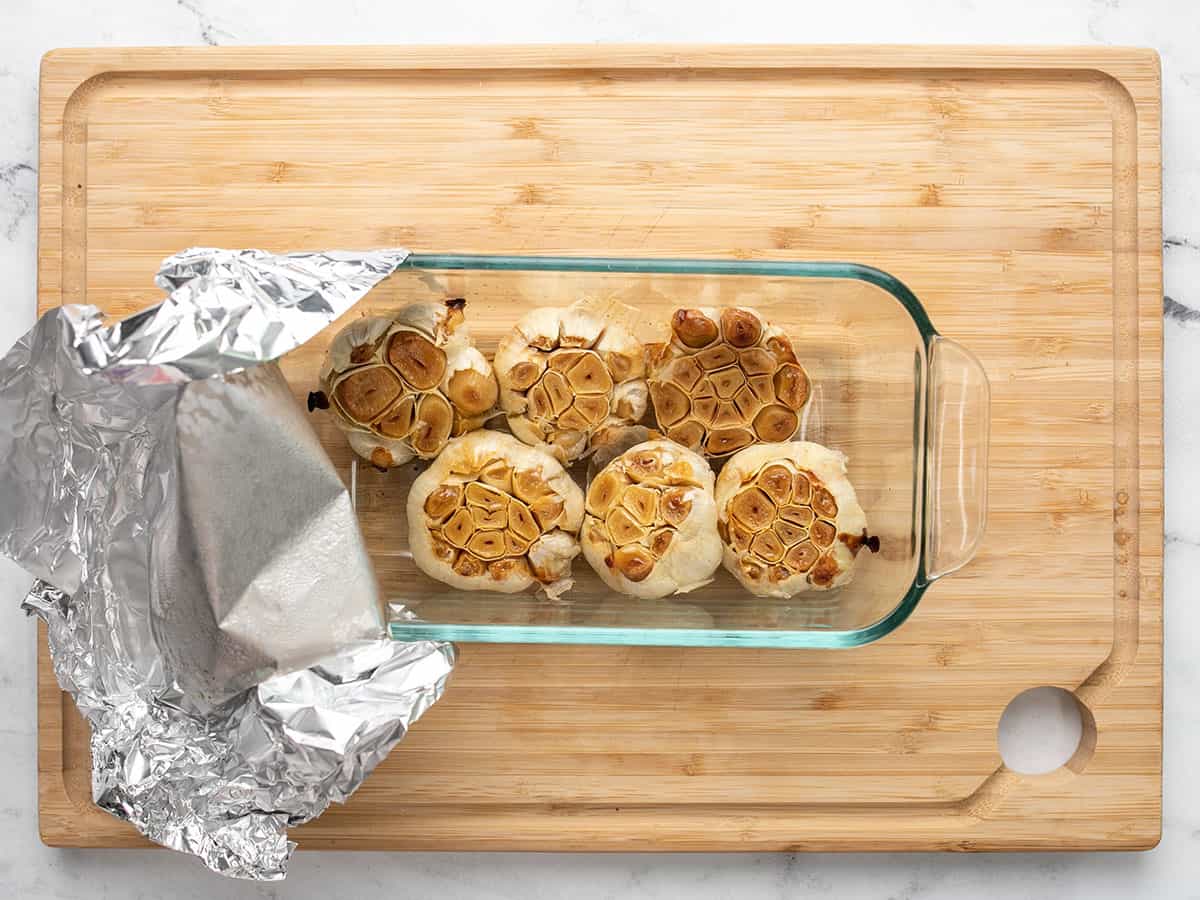
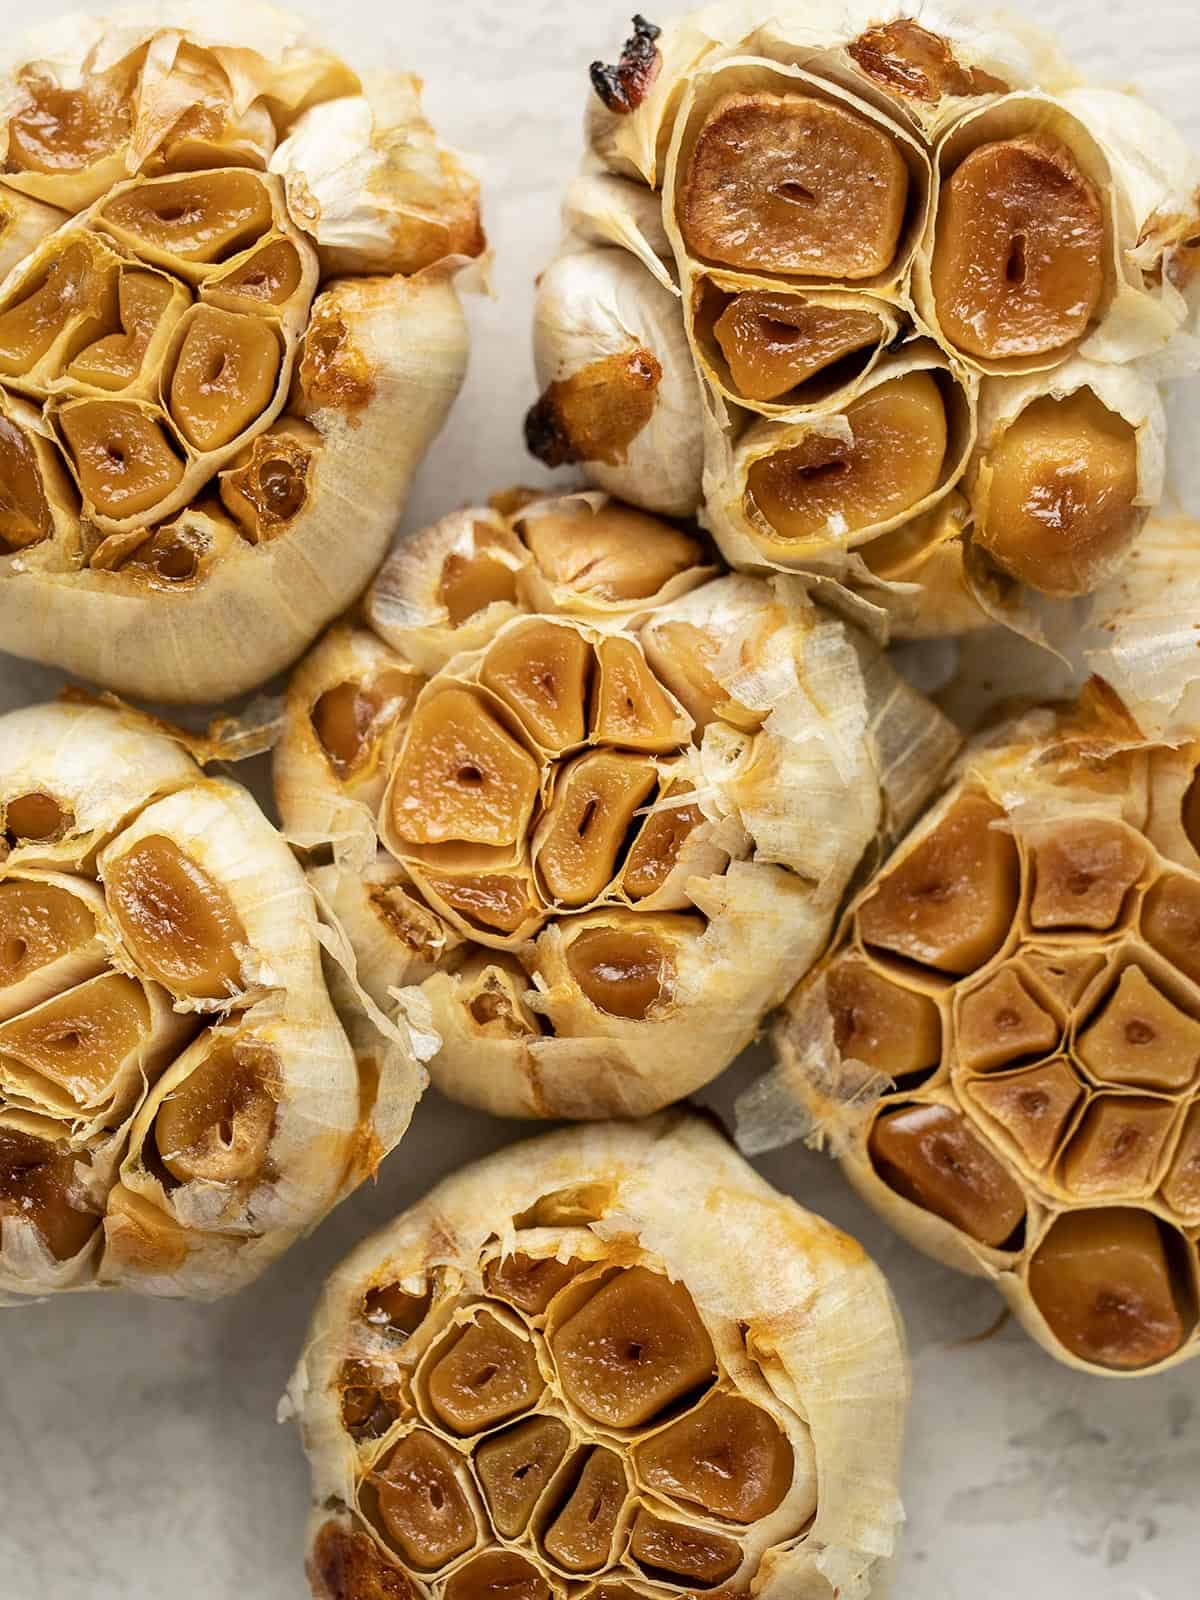
Roasting time can vary a lot depending on the size of your garlic heads, how many you’re roasting at once, or if you’re roasting in a glass or ceramic dish as opposed to just wrapping with foil. Check the garlic at 30 minutes, then add more time, 10-15 minutes at a time, until they reach this deep golden brown color.
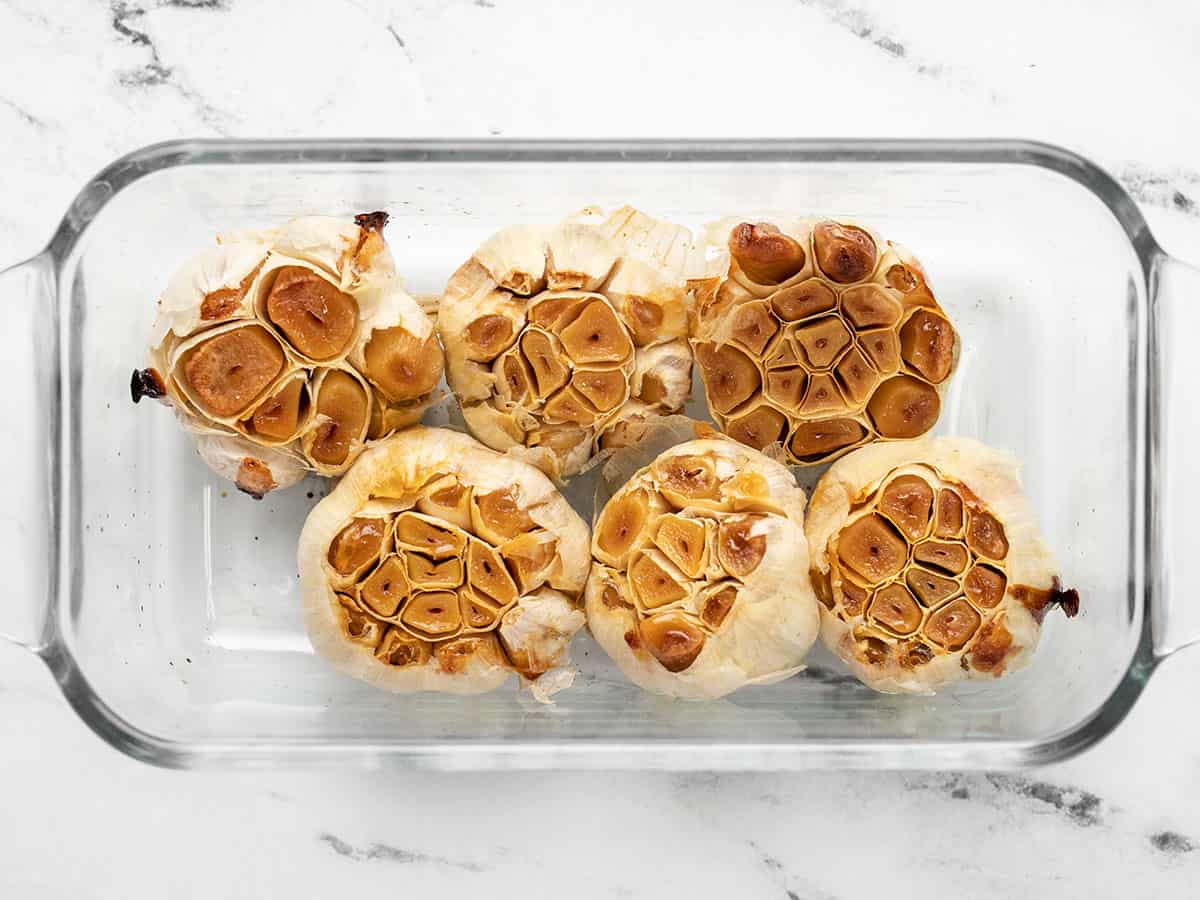
These beauties took just over 60 minutes to achieve that delicious golden color. Let the garlic cool until they can be easily handled, then squeeze the garlic out of the skins.

The post Roasted Garlic appeared first on Budget Bytes.
![Forest Essentials [CPV] WW](data:image/jpeg;base64,/9j/4AAQSkZJRgABAQAAAQABAAD/2wCEAAkGBwgHBgkIBwgKCgkLDRYPDQwMDRsUFRAWIB0iIiAdHx8kKDQsJCYxJx8fLT0tMTU3Ojo6Iys/RD84QzQ5OjcBCgoKDQwNGg8PGjclHyU3Nzc3Nzc3Nzc3Nzc3Nzc3Nzc3Nzc3Nzc3Nzc3Nzc3Nzc3Nzc3Nzc3Nzc3Nzc3Nzc3N//AABEIAHQAlwMBEQACEQEDEQH/xAAbAAACAwEBAQAAAAAAAAAAAAAABQEDBAIGB//EAD0QAAIBAwIDBgMGBAQHAQAAAAECAwAEEQUSEyExBhQiQVFxMmGBFUJScpGhIzNisSUmksEkNDVzotHxFv/EABkBAQADAQEAAAAAAAAAAAAAAAABAgMEBf/EADURAAICAQMBBgQFAwQDAAAAAAABAhEDEiExQQQTIjJRcWGBkaEjM0Kx0VLh8FNiwfEFFDT/2gAMAwEAAhEDEQA/APuNAFAFAFAFAFALNX13T9ICi7m/jSfy4IwXlk/Ko5ms55Iw5LRg5cC+K87Ral4rawh0yA9HvTvlPz2KcD6mstWaflVe5aoLl2dPG0EmzUe0bCXrsThxftzNYzVOp5a+iJT9IjBdPfblNRu/csD/ALVf/wBeVWsj+xGtf0mZhqq5awvrS7A+5MuP/JT/ALVWKzryTUvf+xL09VRXF2jS3mWDWrWXTpGOFkkO6F/aQch9cVpHtFOsi0/sQ8f9O49VgwBU5B6EV1cmZNAFAFAFAFAFAFAFAFAFAFAee1fWLqe+bR9ACvegA3Fw4zHaKfM+rei/rXPkySctGPn9i8YpLVLgzvYwdmrPvUCG81S6mSHvV0xLO7nAJP3VHoPSolFYlq5ZNuTNlpdalaarDY6pJbXC3MbNFLBGYyrLjKlSTy58jUxlOM1GfUrSatEX1teNqt21mEUS2y5Z48hiCwwD5HBrHNjyPJLR1ReMo6VYxTMOljhxSBkhwqNzYEDpWzuGDwrhFOZGDSIIOOv/AC7SRIMERFJB756+dc/ZIx24tfCmXyNk63qSQzCxbTmvRJA0siZX4BgHAPxHn0rozZEnocbKxj1uheIbns/Et5pAlutIYb5LJsl4VP3o888D8J+lZpPD4obx9P4LWp7S5PR2N5Bf2sd1ayrJDIu5GXzFdUJqauJm006ZoqxAUAUAUAUAUAUAUAUAl7S6nPaQxWWnBW1K9bh2wbmE/E5+Sjn+lY5cjjUVyy0Ve74FF08PZi3stNgnNstw7SXOpTDO4jm3PzkbHIHoPbFZOsSUV82X87bHjRQ67o+NQtZIYpxu4ch2unPKty+FuQPqK2pTh4im8WILCZ5r5zoAn1KVBwm1O/kzFEM81TA8R6Zx9TXPctX4e79XwXdV4thmLdt4XUdcmklyoMcGI1BbpyGTg48zUSh/qZH8thdcRLYY7JtwhvboMknD/msfFWSjhd6ZvZ1z1JbkuUS7anAgms5YtRhx/LfCOR8mHI/WtY99HeL1r7keB8qhbYwpq98stvfNGLa67xJazxHvEDnqobPJG9iPQ+iC7yVxfHR8ol+Fboda9qP2Vp7XK8NpAyhInbBlOfhX1YjOPnXRmyd3HUZxjqdCS3uYdJvIdRsWzoupSATJ07tOTjdjyyeTDyNYRmsclOPll9maNOSp8o9aOldpiTQBQBQBQBQBQBQEGgPOaCv2nreoa1J4o0Y2dp6BEPjYfmb+1c2LxzeT5I0nslEeX1nb39rJbXcSywyDDIw61vKKkqZRNrdHlpoZNWuv/wA7b3U7abYqBqFw75eXPNYd3t8R64x61zNan3aey5NF4VqfLOr69vHsYU7O2sHcwoktminVd6r8SmMgeHy5GoySmofhoRSvxGOxthdyNHpkiy2bLHO/EcjgjBIi3D8xPLpXD3feNrG7XPt8DXVp3Y/uLGTbbNbRWyyRorAK55kc8D1HzPrW2bs8vC8aSa/z5mcZpXbFSvNFJEbAmWXJluQJBHw0VjiPLdBk86wwuSru93y/gvT6mkkt9RovIJdRkFzacK11+1jEgWN9yujE7Uc4wVbB9q7pRc3qW016GSdbPg26KtlqzJrW1zckcMpK2e7MOTKo8jnqeprXFoyfidf2KzuPhN97p1td6fPZSRqIZ1YOFGOZ8/fPOtJ44yi4vhlVJp2Yuyl5Nc6WIbs5u7ORracnzZfP6jBqnZ5uUKlyti2RU9uo6rcoFAFAFAFAFAFAYdbuu46ReXY6wwO49wOVZ5ZaYNkxVsp7M2fcdA0+3+8sClz6sRlj+pNRhjpxpEzdyZo1a9XTtMurx/hgiaQj1wKtOWmLZCVujzFvEbDsva6fLbPdX2qI8lxHHOsUjs43OwJPlkCsEtONR6s0buV+gpuVutM0OwsdUshBcwuFs9QgYNwwTlt2Oe7bnIGQ1cuW4Y1GS36NGipybTN9hJbNb2qae8dvC1s0dwzneFUvgMcffPz6ZrHVGkoOlTv/AD1ZLvmQzVolSOSykmEph8Cztu3BuWB6Hl7VWTiqeNu669f7kK+JCzVJrBLi3JR5YtsYnhQ5M4xy3D1DY5E86pKWJSi1utr+Pv8AMvFSplub+01d9cvtMWKBYQiql0qiGMZyZM9Tg8sdOYrvWuOTvJRrb149zJ6XHSmM7TFh2tuIE5W+pQd5QDpxFwrfqNp+lbR8OZrpJWUe8L9D0RrqMzz9gO69sdRgHJLu2juQP6gSjfttrmh4c8l6qzR7wTPQV0mYUAUAUAUAUAUAj7bn/Kmpf9nH7iuftX5Mi+PzIcQ4EMYHTaP7VtHhFXyIu3x/ylqA8iEB9i6g/tWXaPy2Wx+ZCnt2ZO/aPFZ9476CXshEVKGRSvxqee3B+IHl0PWsu0J3HTz0L4+HfBgRVs0F1xzaXWm3fEl0uSVeGSR4miJ54ZWJAzjyrGT0rVdOL4LLfbo+oyh/xG2tpoFiW7u4Zn4kBAyAeUbAcvhIyfIisZrvYpxq2nx+xKel/BG+SSC4jgltVZEgtd0m04O3yT9jVMkoZFGWP9Md/wCAk42n1Zl1R0eUaSj21rFNw3MgKjhAcyDnqcgYq05LUsEaSdP2Cutb3EmsKeDc3Cd8n0wTgXV8GUzTOmdu3I2rGG5Zx55qcm6bVuPV9f8AomPNdT0l4WOtdmHPxsJg3i3cuFk8/PmBzrtk/wATG/8AODJeWR6bNdZkIJ+Xbmzx56fLn/Wtcz/+hezNF+W/cf10mYUAUAUAUAUAUAs7TWzXnZ/ULdBlnt3Cj545VlnjqxyRaDqSYsn1K5l0LRrmxuVgW7aFJJmjDlQ64GAeWd2B9az1yeOLT5otS1NMUmw1a90+4tr24vLhry0uIX4qgLHNG/gIAAADCs9M5Rabu0/qWtJo2XV9d3/ZfTdX069FnIqr3iRow+1cYkBXBJII6DHOrSlKWNTi6ISSk0xTp+nd97P6fqFpbJcahJcmSa+u2yCELc2LcwrYAwBgZrB49WNSSt3yy7lUmmbYwt/e3EujrBZyxRkOI35zcvFsAGMZGNw9Kwku8m5Ytmvv7FrpJS3NGnZujcLaPwFYs7s55BCOh/euTBeVyWN16+xefhpyOZ0S+tYoLSxt5OBKrTx7svMAw+HPUEc+fpiujGo5YKGOK2e/q/Ypbi7bMs0M9v2juNK0a7NlC/CLW20srBsl2TIIQ48uh510OLjmePG6W2xW04apbjPVDcXPaJ109Q0umafIU9OLJyUfov710Tbll8P6V9ykaUN+pXDearx7ErJcxRNJHBHb3EQ4k6gfxZHPVceXTp8xVVLLcXe3H8smo7m6D/iO29w45raWCRk+jO5b+yitV4u0P4IrxjPQV0mYUAUAUAUAUAUBBGRigPN9lQtsb7Q5wCbGcvEGHWFyWQj2OR9K5cG1430NJ71IjUtbu5ZrSHSODG8s88Ra5jLZeIE7AARjdg8/QdKvLI20ohQXUw6ZdfY92ovIXg0rWcTRiVSvdbhxlom9NxJI+eazg9L34f2Ja1LblGmfsvcGZY47lJdPhjPd7CUARI4+AEKOajmefU0l2dt87enQhZFXxGWh6XJpto8FxwZCju0UiJtOG5kY8uZPL0qcOF44NS35E5ansLuyKhzOrKCpjGQfc15f/iknOafob9oeyNN3oU13czyu0K8TJjZQQ8JAARlb6cxXa+ySlOUm1v8AVehksqSSK229nrI3uozte6k6iKPCjfKx58NcDmN2eZ6A1r+RHVN3IjzulsjnSpotCXbrJaO6vm4892y/weIeWzd5YGAM0xtYlU+X1Elr8vCG8GpwTTXgUYhtMB58+AnGSB7DGfet1li7fRGemqF/ZBHmtbjVZlIk1KczgHyjxtQf6QD9az7Om05vqXyc6fQ9BXSZhQBQBQBQBQBQBQHne0tvNZ3Nvr9lG0ktopS5iXrNATzx6leo+tc+ZOLWSPQ0g7Wlmi3stHmkTtBAodmQyrKjMVPhwWC9N23lnGfKrKMPzEVbl5RRe3N1q9/NaBLe606WKKSO1dMd5t35NIrkjDKT09vXNZyk5yaW6LKoqzRbnVdAkNqhbVrBACoDjvUC+WQcbx8+tLnidLdfdDwyV8M1z61BfWxisLyGCduRW6BjZfofOs8vaIzhphJJ/HYmMGn4kY9JtpdNl4pu7MKRhhxc5Fef2bFPs89WuNe5tkkpqqYyudaZgU0y2e7l/F8ES/MsfL2zXpPtWrbEr/YwWPrJ0LL2xvLG1n1y6mhutTiUFSyEw28eRu2KOfTz6nFVlCcIvLJ3L7IlSTelcGzTNZGpO9pdWLEFjGZol4tvIQOYDY/uMeWa1x5u82a/giUNO9mLUbe3uZY+zGkxLDbfzL4xchHGTnZ+Zj+2apNJvuYbLqSn+uR6qNFjRURQqqAAB5CutKkZHVSAoAoAoAoAoAoAoCCMjFAeVuLe57LXUt1YQvcaNMxe4tIxlrZj1eMea+q/UVzOLxPVHg0VTVPk36FY6L/1PR9rpKm1HSQsqKTkqgJwvPqBjpV8cYeaJEnLhiDSYTqmrzz3ghW7mlLNGXeC6tEXkoX8SkAEjkMk9a54x1zbfP3Rduoj+/uQmrRwTQxS2ixLxWdAxQsSFPty5+9Tlmo5FGSuNbkRXh2e5faW8c9pvggtoXLsAVhBGASKjHijOFxST9iJSadNnWnIbmyk71IZd5aN0IAUYJUgACr9mTlj8T+H/BE9nsVaLFMthPpt9GzLbsYFdxkSxY8Jz5+E4PzBq+FPS4S6bCT3tC5r5rSCHs/2fIur2GMRvOw8Fuv4nI5bvRfOs9eld1i3f7E6b8cuBzoulRaVamJGaWWRi80782lc9WP/AK8q3x41BfErKWpjCtSoUAUAUAUAUAUAUAUAUAUB5687NcO6e+0K6bTbxzmQIu6GY/1p0z8xg1g8NPVB0y6n0lucR6rqdnIPtvRWYoMC6sP4qY/L8S/vVXllDzx+hOlPhl8eq6JcTTSG5AeZBG6TBk5DPLBHzNZvN2dtuT59dhomuDVaXmm2lrHDFdxsiDAO/Jpjz9nxQUVLgOM5O2jO2q28IddPs7q6dmLbYoyASf6mwBUR7TjW2JN/Il43+ooey1vVztvrhdNtD1gtW3SuPQv0H0H1q+jNk870r0XP1FxjxuONO0+1022W2soUhiBztUdT6n1PzrohCMFpijNtvdkalLNb2plg4e4EAhwcYJx5e9JtpWgjBFq8jXq2jxR8TvBjYqfuAHxe+4YxWfevVponTtY5HStypNAFAFAFAFAFAFAFAFAFARigIeNH+NFb3GahxT5RNs5WGJfhiQeyiq93D0QtneB6VeiCcUAUBDKGGGAI9DQHPCjznYueucVFIHdSAoAoAoCDQFFpdxXYlMJJEUjRNkY8Q61WM1K6Jao0VYgioBNSCm6uFtreSd1dljXcRGhdj7AczVW6VhFqncAfWrAmgCgIzQFNrdxXSs0LbgrFTyxzrLHljkVxJcXHkurQgM1IJoCM0AZoCi0vIbsSmEk8KVonyMeJetVjJS4Jaoz6rqDWQjWOMO7565wACBnl16jlVMk9PAirLtOu++WwlKbGzgrnODVoS1Kw1RpNXIEGiX9pb/aEc91BG/fpTteQA9a5cM4q031ZeSewvvr9IdK1yN7rbMLxgimTxAHbjHnjrWUsiUZq97LKO6OdSm2668IuZxpTTR99ZX8Mcx+FA2chW8O4D5epqZN95V7bX7hLw/E4vtRWHR9aie72XI1BlReJ4wCy4AHXGP2qXOoSV72Et0V6jEGt+1V+09xx7Z3jgxO4WIGFCcKDjqalq9cvT+ESv0o6vGtpn1uXU76WC4tQO67bhkMScMFWVQcMS2fI5Ix8qNpuTb36EelGm11B4jqh1G44M7WEEmx224Yo2do/N6VPeVqt70g48E7i0UMrzLLssomMbTtE8fhzuXyYn5+lYT4Tu9l1r6epK5ofXk57gpiyJJwEjDdctW+bI+58PL4+ZSK8W4u4bw3otp0WG3vYeCpjlJ8ajkc4GDtz+lYwUoT0tUpKvmi20la5QplubzUNOvtzyCXTdOmhl2EjdcEEE8vQLkfnFNc5wf8AtX3J0pNfE1X+oRz3VstrdCT/AAu4duHJnyXBOPPrWksltJPowls79TiNU0bTdM1njTtHsU3rSTM+5XQeLBPLDBemOWahfhQjk+pHmbRmnS+4mmW96yEXUUtxIlxdPCplJB2blBPhU8l6cj6VWWu4qXW3yStO7R1aObj7OttRvA9g8lwFdJ32uykbEMhALYG/32+dIu9Km9t+odb0U28tv3RbWGSS4jn1Kfh7roxpIFGfHJzYj264qE46aXq+pLT6+g17LIl5bXkMzLIlveMIdk7Pw/CpwrnDYyT/APK27OtSafqUntTR6OCGO3iWKFAiKMACupRS4Mzs1IKGsrRmLNawFickmMZNZ93B8om2dPa27ycR4Imkxt3lATj0zU6Y3dC2SYISjIYkKPksu0Yb39anSvQizlrS2eXivbwtJjbvKAnHpmjiuaJtnZhiIcGJMSc3G0eL39aUiDiS1tpZEklt4nkj+BmQEr7Hyo0n0JtkyW0EkiySQxu6fCzICV9jRxT3aFsGt4H274Y22fDlAdvtUOEXyhbLCoJBIBI6cqtSIKr0AWzvgbkUspIzg461WfFkow9nogunLMzM8tyxmldsZZj7ewH0rPAvBfqWnybo7S2iBEVtCgOchYwM56/rWijFcIrbLGijMfDMamPGNpHLHtVmlVEHM0ENwhjnijlQnO11DD9DUOKfKJuiJLaCSHgyQRPF+BkBX9KaVVULZD2ltJGYpLeFoyclGQEZ9cVGmPFC2WRxRx54aKueu0YzyxVkkuCDupB//9k=)
0 comments