Extracted from Ottolenghi Test Kitchen: Shelf Love by Noor Murad and Yotam Ottolenghi (Ebury Press, £25)
1. Preheat the oven to 200°C/400°F fan. Poke the sweet potatoes all over with a fork (about 8–10 times) and place them on a medium, parchment-lined baking tray. Bake for 45–50 minutes, or until cooked through and softened. Set aside to cool and turn the oven temperature down to 180°C fan/375°F.
2. Meanwhile, in a small bowl mix together the onion, 1 tablespoon of lemon juice and a pinch of salt and set aside to pickle.
3. Remove the cooked potato skins and tear them into roughly 4 cm pieces. Transfer the potato flesh to a large bowl and set aside. Place the skins back on the baking tray and toss with 1 tablespoon of oil, 1⁄4 teaspoon of salt and a good grind of pepper. Bake for 8 minutes, or until nicely coloured and starting to crisp up. Set aside to cool and crisp up further.
4. Use a fork to mash the potato flesh until smooth, then add the cheddar, garlic, cumin, another tablespoon of oil, the remaining tablespoon of lemon juice, 1 teaspoon of salt and a generous grind of pepper, and mix to combine.
5. Put the remaining tablespoon of oil into a large frying pan, for which you have a lid, and swirl around to coat the bottom. Spoon the mashed potato mixture into the pan, using your spoon to distribute it evenly. Place on a medium-high heat and leave to cook for about 7 minutes, for the bottom to start to colour. Turn the heat down to medium and use a spoon to make eight wells in the potato mixture, breaking an egg into each. Sprinkle lightly with salt and pepper, cover with the lid and cook for 4–5 minutes, rotating the pan, or until the whites are set and the yolks are still runny.
6. While the eggs are cooking, put the butter and sriracha into a small saucepan on a medium heat and cook until the butter has melted, whisking constantly to emulsify. Remove the mixture from the heat before it starts to bubble – you don’t want it to split.
7. When ready, spoon the sriracha butter all over the eggs, then top with a good handful of the crispy potato skins, half the pickled onion and all the picked coriander leaves. Serve right away, with the rest of the potato skins and pickled onion to eat alongside..
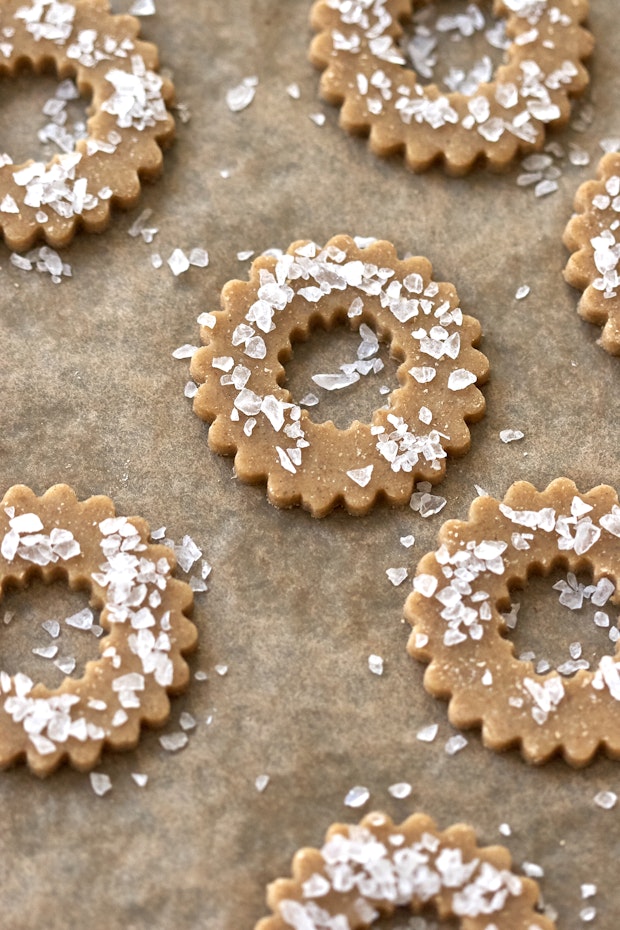
Powder-kissed and pretty, these Swedish Rye cookies are perfect for holiday cookie enthusiasts (or, anyone really!) after a not-too-sweet, shortbread-style butter cookie. I make them with a blend of rye and whole wheat pastry flours, and also break with tradition when it comes adding a secret ingredient. Because I love the taste of toasted rye bread slathered with cream cheese, I use a butter/cream cheese combination for the dough – instead of a butter-only dough.
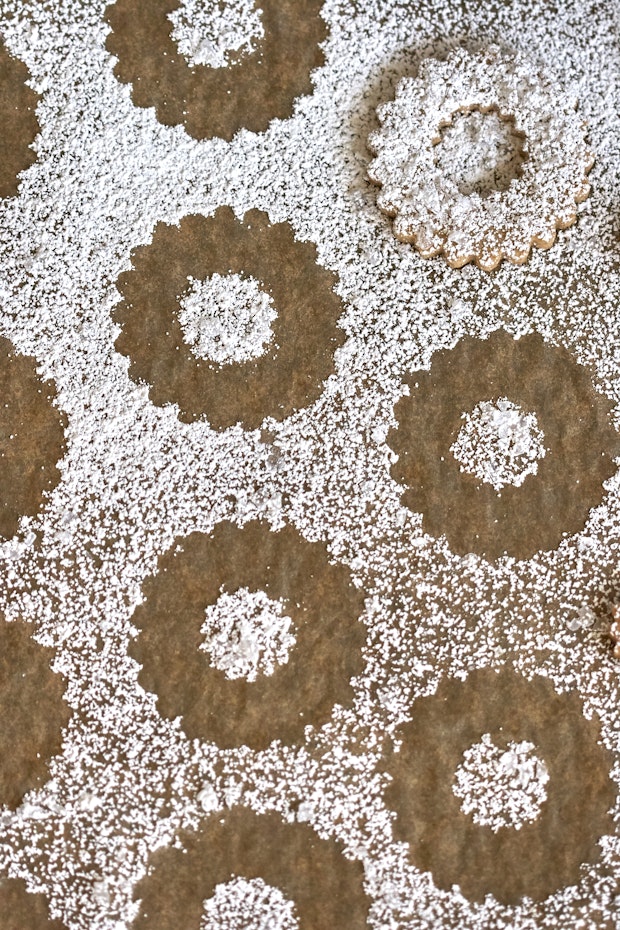
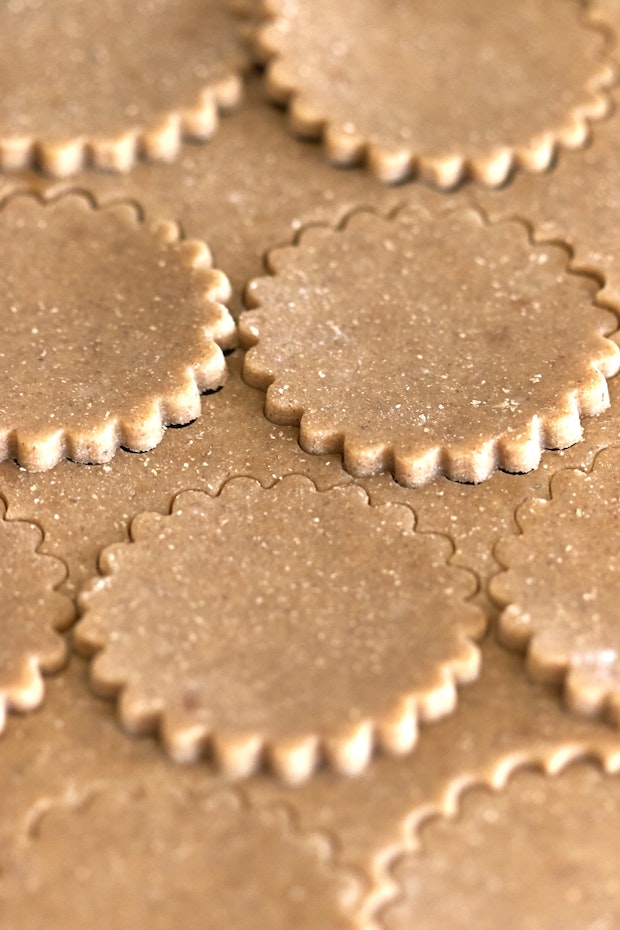
These cookies can be baked into all sorts of shapes although I do like to roll & stamp them. The dough is generally easy to work with and I’ve found that cutters from super small up to medium-large in size work really well.
Other Ideas
I suspect you could experiment with other flours in place of the rye and expect good results – barley or oat flours might work well. I was also thinking about doing a savory version of this cookie with herbs and grated cheese in place of most/all of the sugar – turning it into a buttery rye cream-cheese herb cracker…
Variations
A number of you have commented over the years with successful variations on this recipe. I wanted to highlight a couple here with the hope that it might be helpful!
- Can these be adapted to be vegan? Truman notes, “I replaced the butter and cream cheese with earth balance vegan buttery stick and tofutti better than cream cheese. This made it a bit more heart healthy, and vegan as well.” And along those lines, Keri adds, “I made the vegan version of these as well! They are delicious – I added some grated orange zest and ground anise seed, and they remind me of a less-crispy version of my grandma’s pepperkaker.”
- KanelBulle spiced things up, “I combined this with the gingerbread idea by adding spices – ginger, cloves, nutmeg and cinnamon – and using a dark sugar that is called “molasses sugar”. It came out brilliantly (even if I don’t have the cutters to make those rings).”
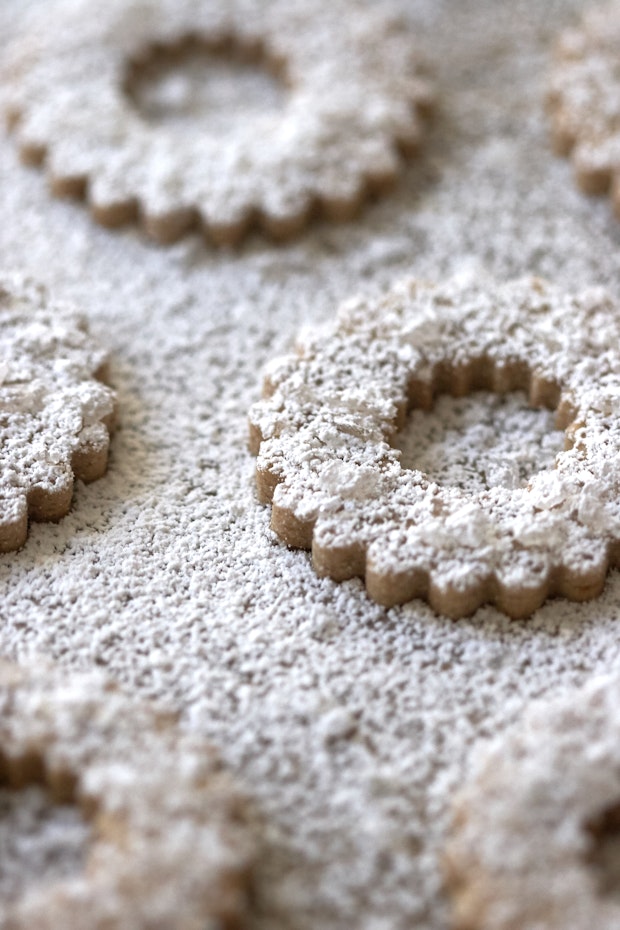
I like to make these cookies not just around the holidays, but throughout the rest of the year as well tbh. If you’re here and on the lookout for holiday/ Christmas cookie recipes, I’ve compiled a bunch of favorites from past holidays into one place. Or, here if you’re simply looking for more cookie recipe inspiration. I particularly love these chocolate puddle cookies, this shortbread, these special snickerdoodles, this millionaire’s shortbread, and these triple ginger cookies.
Continue reading Swedish Rye Cookies on 101 Cookbooks
This classic Salisbury Steak recipe is smothered in mushroom gravy and ready in under 30 minutes!

Salisbury Steak
Lean ground beef and turkey are combined to lighten up this classic, retro American dish. My family loves it over these Instant Pot mashed potatoes or serve it over mashed cauliflower. This makes enough for 2 nights for a family of four. Eat half and freeze the rest for another night. If you love this recipe, you might also enjoy these Salisbury Steak Meatballs!
It’s hard not to imagine TV dinners when you think of Salisbury Steak. It was originally a poor man’s beef dish back in the great depression when steak was a luxury. To stretch the dollar, they made these steaks with ground beef and fillers, shaped to resemble a real steak.
My family loves this dish, everyone from my picky teen, toddler and husband. I’m sure yours will too!! It’s total comfort food and so much better when it’s homemade.
More Comfort Food Recipes You Will Love:
Skinny Salisbury Steak with Mushroom Gravy
247 Cals 27 Protein 10.5 Carbs 11 Fats
Prep Time: 10 mins
45 mins
Total Time: 55 mins
This classic Salisbury Steak recipe is lightened up, smothered in mushroom gravy and ready in under 30 minutes!
- 1 1/2 tsp oil
- 3/4 cup onions, minced
- 1 lbs 93% lean ground beef
- 1 lb 93% lean ground turkey
- 1/2 cup unseasoned breadcrumbs, or gluten free crumbs
- 1 large egg
- 1 large egg white
- 2 cups beef broth
- 1/4 tsp salt
- 1/8 tsp ground black pepper, to taste
- 8 oz sliced mushrooms
- 2 tbsp all-purpose flour, or gluten-free flour blend
- 2 tbsp tomato paste
- 1 tsp red wine vinegar
- 2 tsp Worcestershire sauce, to taste
- 1/2 tsp mustard powder
- 1/4 cup water
- chopped parsley for garnish, optional
-
Sauté onions in oil over medium heat until golden brown, about 5 minutes.
-
In a large bowl, combine half of the sautéed onions, ground beef, ground turkey, bread crumbs, egg, egg white, 1/4 cup beef broth, salt and black pepper. Shape into 8 oval patties.
-
In a large deep skillet over medium-high heat, brown both sides of patties, about 4 to 5 min on each side, in batches as needed. Set aside on a dish.
-
Add mushrooms to the skillet, season with salt and pepper and sauté 2-3 minutes.
-
Return patties to the skillet with the mushrooms.
-
In a small bowl, blend flour and remaining broth until smooth. Mix in remaining onions, tomato paste, vinegar, water, worcestershire sauce and mustard powder. Pour over meat and mushrooms in skillet.
-
Cover and cook on low heat for 20 minutes, stirring occasionally.
Serving: 1patty w/ mushroom gravy, Calories: 247kcal, Carbohydrates: 10.5g, Protein: 27g, Fat: 11g, Sodium: 420mg, Fiber: 1g, Sugar: 2.5g
Blue Smart Points: 5
Green Smart Points: 5
Purple Smart Points: 5
Points +: 6
Keywords: one pot ground turkey recipes, Salisbury Steak, Skinny Salisbury Steak with Mushroom Gravy, TV Dinners
Want a pumpkin cocktail? Try the Pumpkin Old Fashioned! It’s a cozy slow sipper with bourbon and hints of vanilla and spice.

Looking for a pumpkin cocktail that’s sippable and not too sweet? Try our new favorite fall drink: the Pumpkin Old Fashioned! This one is for bourbon-lovers: it’s a nuanced slow sipper with notes of vanilla, maple and spice. It’s barely sweet and bourbon-forward, ideal for sipping by the fireside or any fall occasion. While it’s bright orange, it tastes just like the Classic Old Fashioned you love…only cozier.
What’s in a Pumpkin Old Fashioned cocktail?
This Pumpkin Old Fashioned cocktail is 100% Old Fashioned, with a hint of pumpkin spices. It’s a great contrast to most pumpkin cocktails, which tend to be on the sweet and creamy side (like this Pumpkin Martini). This one has just the right finish from the pumpkin spices, but it’s still very bourbon forward. Here’s what you’ll need:
- Bourbon
- Pumpkin puree (not pumpkin pie filling)
- Pure maple syrup
- Pumpkin pie spice
- Vanilla
The ingredients might make it seem like a sweet drink, this Pumpkin Old Fashioned is anything but! Take a sip and it tastes like bourbon on the front end, but the finish has a distinct nuance of spice.

Use pure maple syrup or simple syrup
Don’t have pure maple syrup? This pumpkin cocktail uses pure maple syrup, not the synthetic kind! You can substitute honey or simple syrup if you don’t have it on hand. Even better, make a batch of Brown Sugar Syrup! It takes just 5 minutes and all you need is brown sugar. The flavor is even deeper and more caramel than maple syrup.
How to make a Pumpkin Old Fashioned
The method for making a Pumpkin Old Fashioned cocktail is different from the typical Old Fashioned. For the classic, you muddle a sugar cube with bitters, then add the bourbon right in the glass. For the pumpkin version, you’ll have to shake it! Here’s why:
- Shake the ingredients in a cocktail shaker. This is unconventional for an Old Fashioned. But it’s necessary to integrate the pumpkin puree into the drink. It makes a beautiful orange color!
- Strain into an ice-filled glass. When you’re making an Old Fashioned, a big ice cube is key. Make a batch of Clear Ice for the best results.
- Garnish! This pumpkin cocktail looks great with a rosemary branch and orange peel, evoking the colors of…you guessed it, a pumpkin.

More pumpkin drinks
There are so many tasty ways to add pumpkin to your drinks! From smoothies to cocktails, we’ve got you covered. Try these delicious pumpkin drinks:
- Try a tasty Pumpkin Martini
- Opt for a healthy Pumpkin Smoothie
- Grab Pumpkin Spice Iced Coffee

Pumpkin Old Fashioned Cocktail
- Author: Sonja Overhiser
 Prep Time: 5 minutes
 Cook Time: 0 minutes
 Total Time: 5 minutes
 Yield: 1 drink
- Diet: Vegan
Description
Want a pumpkin cocktail? Try the Pumpkin Old Fashioned! It’s a cozy slow sipper with bourbon and hints of vanilla and spice.
Ingredients
Instructions
- Place all ingredients in a cocktail shaker. Add 1 handful ice and shake until cold.
- Strain the drink into an ice-filled lowball glass. Garnish with rosemary and an orange peel, if desired.
 Category: Drink
 Method: Shaken
 Cuisine: Cocktails
Keywords: Old Fashioned Pumpkin, Pumpkin Old Fashioned, Pumpkin cocktail
A Couple Cooks - Recipes worth repeating.

Mummy cookie bites are a ghoulish and festive treat for the Halloween season! Amazingly delicious, the white chocolate mixed with the oreo truffle is the perfect combination!
These mummy cookie bites are such a fun treat to make! They are yummy and your kids will go crazy over them! If you want to try out a few more festive holiday treats, try this Halloween Charcuterie Board, these Mummy Hot Dogs, or these Mummy Mini Pizzas. They are all fun and delicious!

Mummy Cookie Balls
These mummy cookie bites are amazing! Crushed up Oreos, mixed with cream cheese creating a soft, truffle-like inside. Then, you coat that with melted white chocolate and chill them in the fridge. They are so easy and absolutely delicious! My kids love that they can be decorated and changed depending on the holiday. Because of that, we have these ALL the time!
These are such a fun treat to make with your kiddos! They are simple and easy and the kids love rolling them up into balls and decorating them. I love that they are small, individual serving sizes so you can enjoy them as much or as little as you want! This makes them perfect for a dessert at a party. In fact, make some Pumpkin Cream Cheese Truffles and Thin Mint Truffles to go with them! They can feed a lot of people and the rich, Oreo taste is just too irresistible for anyone to stop after just one. Go ahead and give them a try because I know that you are going to LOVE them!
What Ingredients Do I Need?
This is the amazing part… you only need 3 ingredients to make these mummy cookie bites! It doesn’t get much simpler than that. See the recipe card below for a list of exact measurements.
- Cream cheese: I made sure that this was softened at room temperature before I mixed it. This helps make it smooth with no clumps!
- Golden oreo cookies: I love the vanilla flavor of these! You can also try using chocolate oreos for a different taste!
- Bakers white chocolate: This white chocolate gives this recipe the perfect outside coating!
- Decorations (optional): I used candy eyes to make them mummy-like for the Halloween season! But depending on when you make these, you could switch all of that up!
How to Make Mummy Cookie Bites
These mummy cookie bites are so quick and easy to make! They take about 15 minutes to make. In fact, the hardest part is waiting for them to chill for a few hours in your fridge! But that is what makes these a great “make-ahead” dessert!
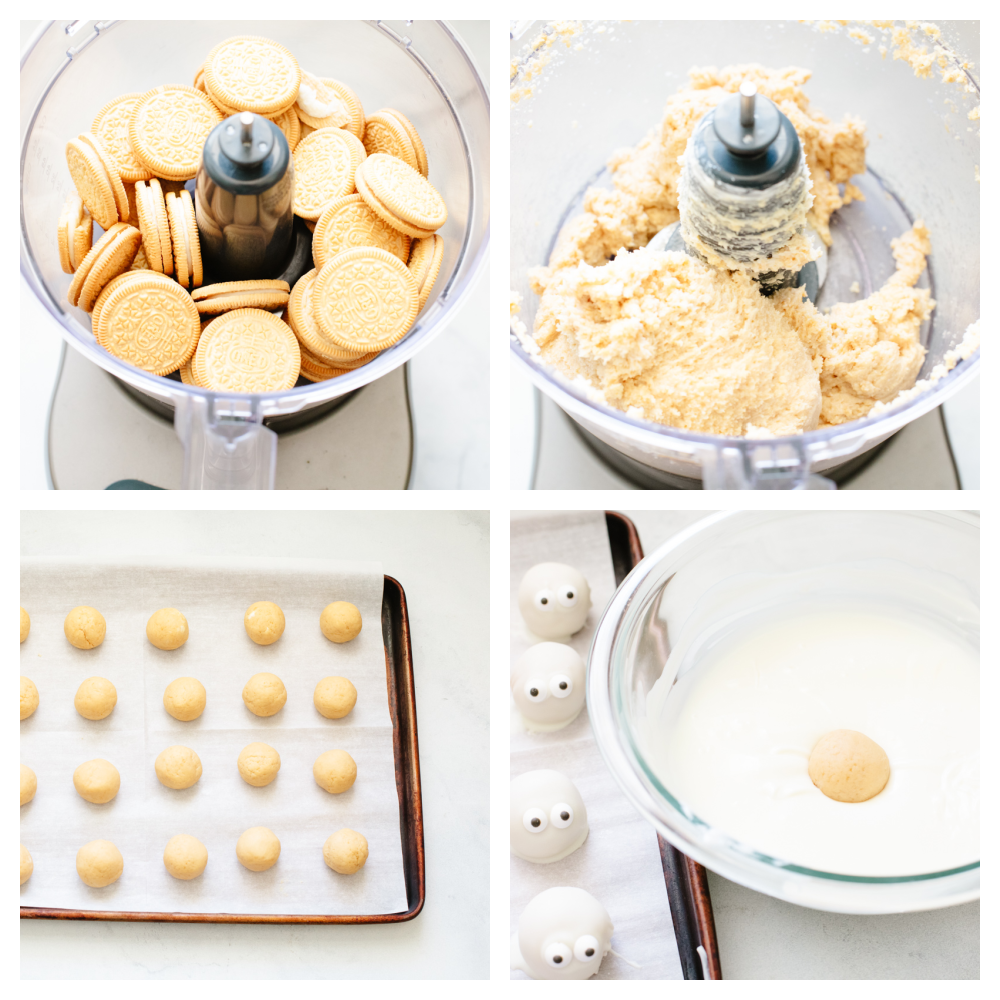
- Mix and make into balls: Mix cream cheese and cookie crumbs until blended then shape into 1 inch balls.
- Freeze balls, melt chocolate and dip: Freeze for 10 minutes. Meanwhile, melt the Baker’s chocolate as directed. DIP balls in melted chocolate and place in single layer on waxed paper-covered rimmed baking sheet. (Re-freeze balls if they become too soft to dip.)
- Chill: Refrigerate 1 hour or until firm.
- Melt chocolate for topping: MELT remaining chocolate as directed on package; spoon into small resealable plastic bag. Then, press out excess air from bag and seal the bag. Cut 1/8-inch piece from one bottom corner of bag.
- Drizzle and decorate: Squeeze bag to pipe chocolate onto each ball for the mummy’s eyes. Immediately add desired decorations for the eyeballs. Then, pipe the remaining chocolate onto balls to resemble gauze strips.
- Chill (again): Refrigerate until firm.
Varitations to Try
These mummy cookie bites that are made like this are the perfect Halloween treat! But, if you change up only a couple of things then you can make them for ANY occasion or holiday! Here are a few ideas to try!
- Oreos: If you want, you can make these with regular, chocolate oreos instead! This changes up the taste completely and makes them rich and delicious in a whole new way!
- Change the colors: You can use candy melts in different colors! Try using red or green for a Christmas party. Or, red, white, and blue for the 4th of July! If you want to use food coloring then you can but make sure that it is OIL based and not water based. Water based food coloring will make your chocolate seize!
- Chocolate: Instead of using white chocolate for the outside shell, go ahead and use regular chocolate! Change up the taste a little!
- Toppings and decorations: You can top these with just about anything! My favorite is to use different color sprinkles. On top of the white chocolate, it looks so cute! You can also top them with cinnamon sugar ot shredded coconut. Just make sure that you pu all toppings on just after dipping them. Then, they will stick and stay!
How to Store Leftovers
If you have leftovers of these amazing mummy cookie bites then just be sure to store them correctly so that they save well for later! Store them in an airtight container and put them in your refrigerator. These can last 3-4 days in your fridge!

More Halloween Recipes to Try
I love Halloween! Not just because of the trick or treating, pumpkin carving or fun decorations… But mostly because of the FOOD! Here are a few more fun recipes that I’ve made to celebrate your halloween season! They are delicious and impressive. Your guests will want to make sure that they are invited to all of your future parties because they won’t be able to get enough of this delicious food!
Appetizers
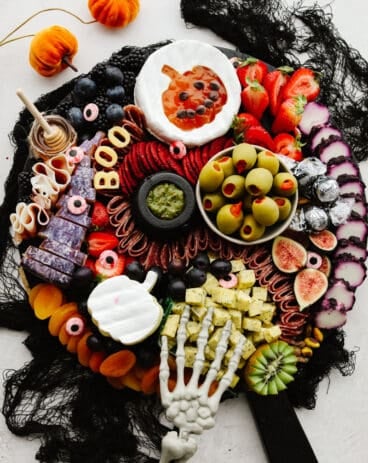
Halloween Charcuterie Board
Desserts
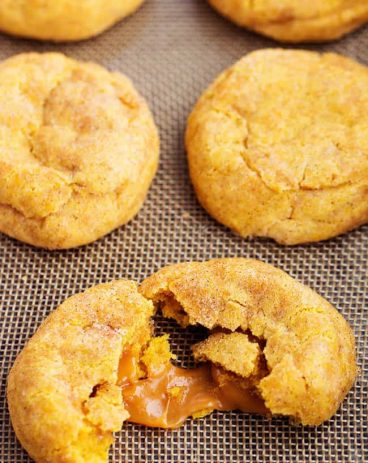
Caramel Pumpkin Snickerdoodles
Desserts
Pumpkin Spice Sheet Cake
Dinner
Mummy Hot Dogs

Mummy Cookie Bites
Ingredients
- 1 package (8 ounces) Cream Cheese (softened)
- 36 finely crushed golden oreo cookies
- 14 ounces Bakers white chocolate
- Decorations: candy eyes
Instructions
-
Mix cream cheese and cookie crumbs until blended. Shape into 1 inch balls.
-
Freeze for 10 minutes. Meanwhile, melt the Baker's chocolate as directed. DIP balls in melted chocolate; place in a single layer on waxed paper-covered rimmed baking sheet. (Re-freeze balls if they become too soft to dip.)
-
Refrigerate 1 hour or until firm.
-
MELT remaining chocolate as directed on package; spoon into small resealable plastic bag. Press out excess air from bag; seal bag. Cut 1/8-inch piece from one bottom corner of bag.
-
Squeeze bag to pipe chocolate onto each ball for the mummy's eyes; immediately add desired decorations for the eyeballs. Pipe remaining chocolate onto balls to resemble gauze strips.
-
Refrigerate until firm.
Notes
Nutrition
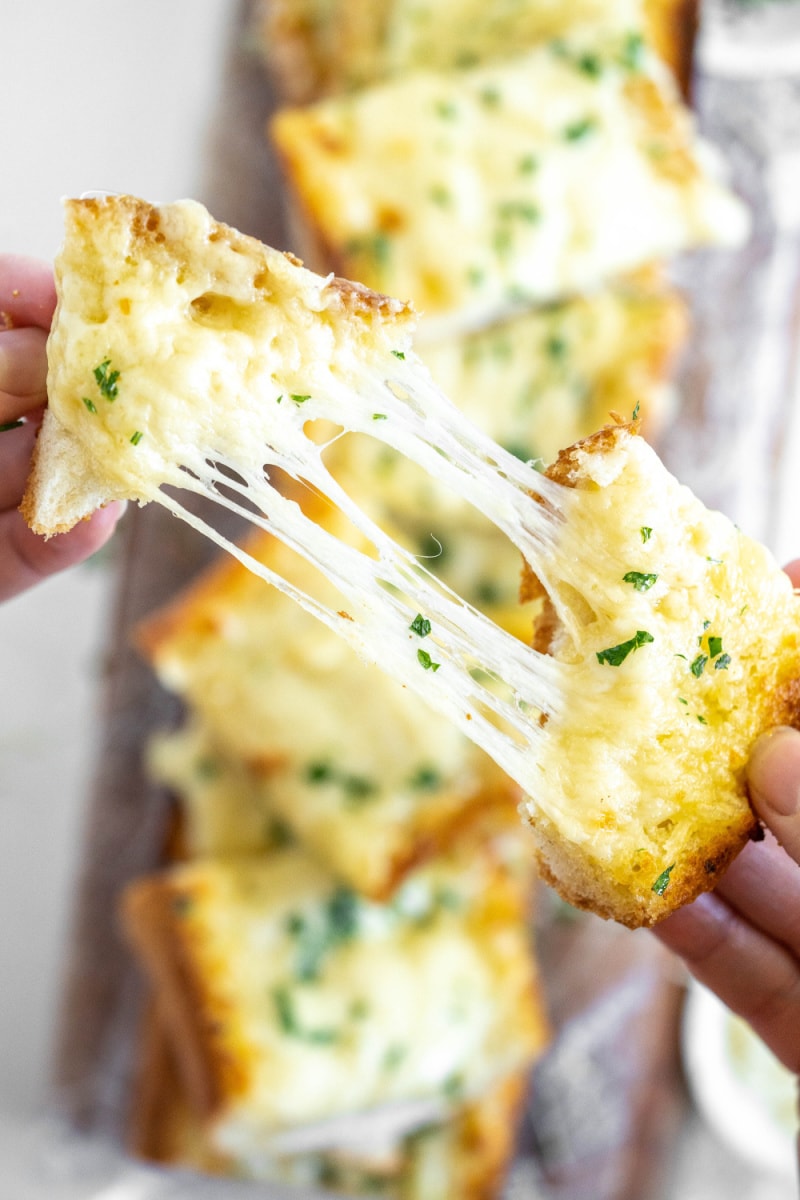
Cheesy Garlic Bread is the best buttery French bread recipe toasted with garlic, mozzarella and Parmesan cheeses.
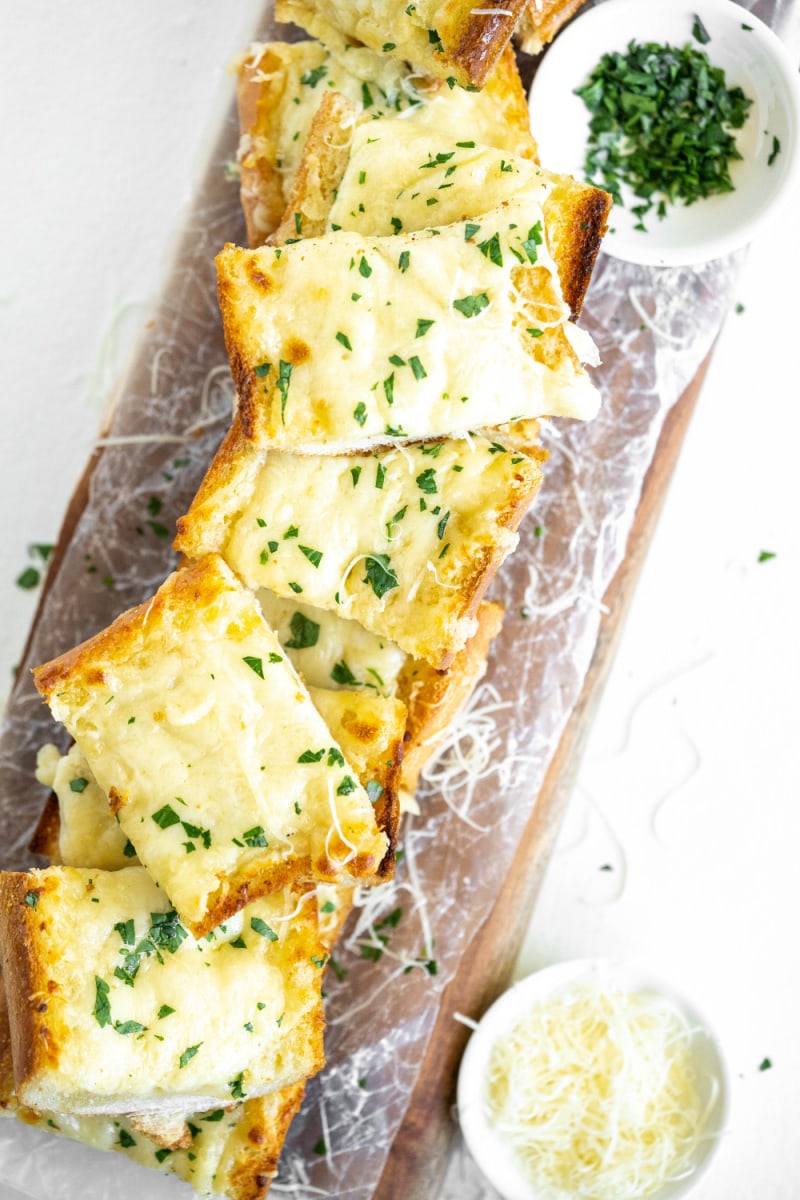
There’s nothing better than having a few good hunks of garlic bread with your dinner- especially if you’re using it to soak up a bunch of marinara sauce in your favorite pasta recipe. But there’s a way to make garlic bread even better. Turn it into cheesy garlic bread. It’s pretty much out-of-this-world delicious, and you must try it!
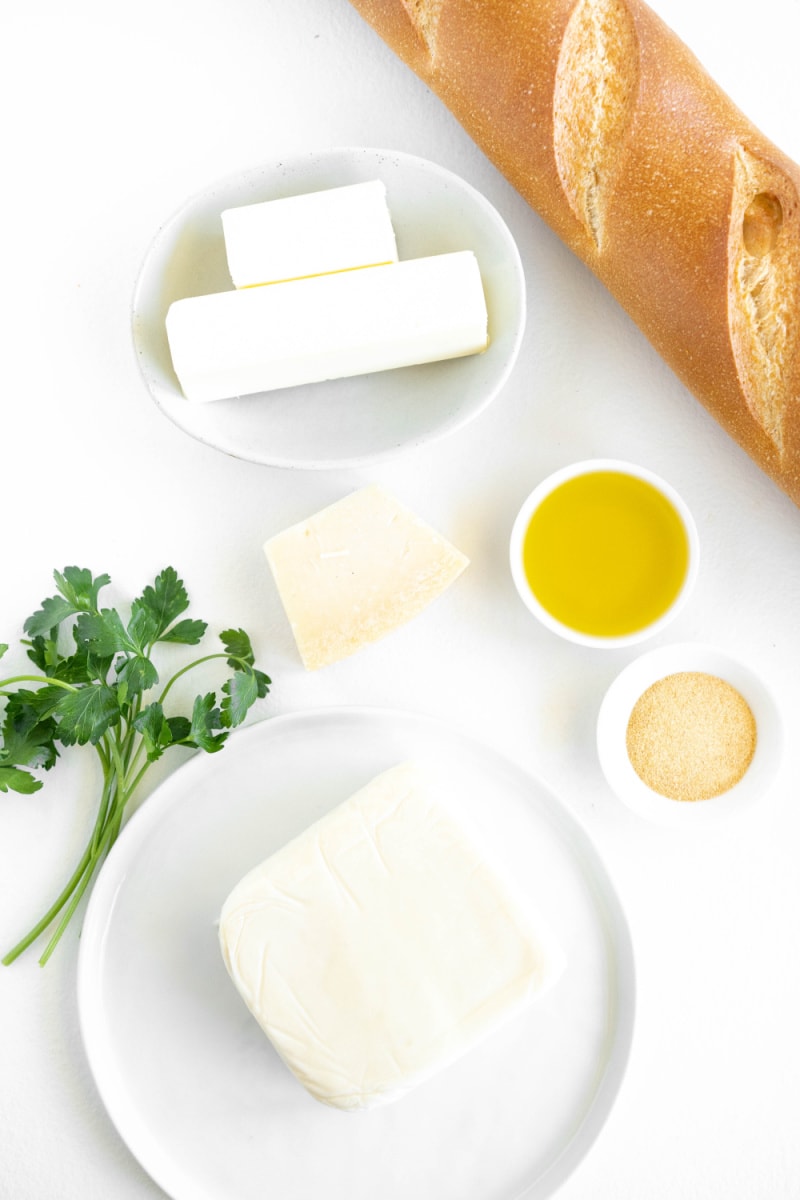
Ingredients needed:
- French bread or baguette
- olive oil
- butter
- garlic powder
- mozzarella cheese
- Parmesan cheese
- fresh parsley
Ingredient notes:
If desired, you can use 4 cloves of crushed fresh garlic instead of garlic powder. Dried parsley may be used in place of fresh parsley. Or you can leave out the parsley all together. If you’re feeling really crazy (or depending on what you’re serving it with), you can change up the cheeses and use Fontina, Gouda, Swiss, Havarti or whatever you want!
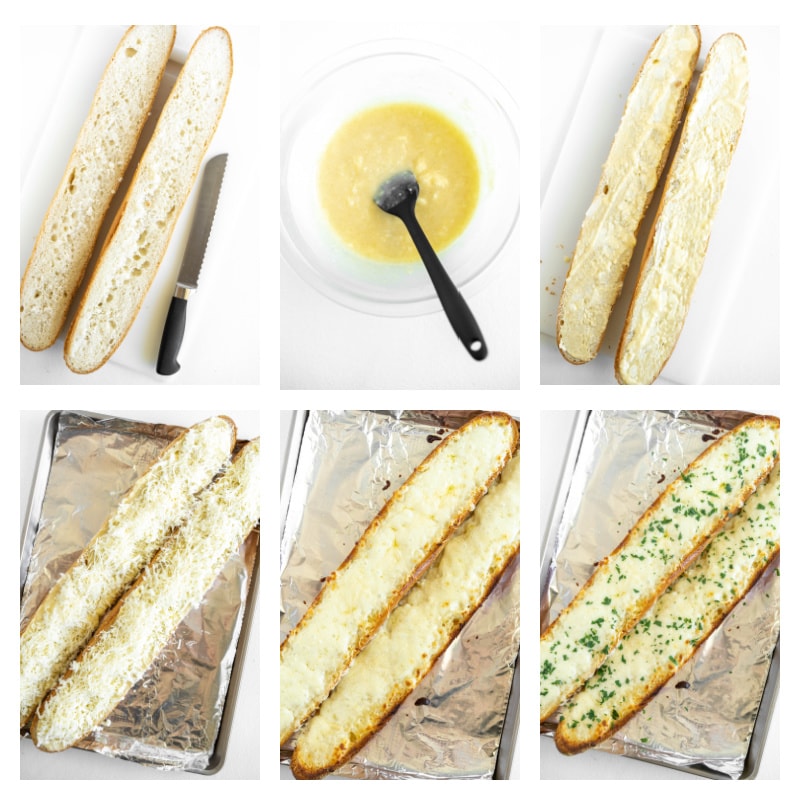
How to make Cheesy Garlic Bread:
Cut your French bread loaf in half lengthwise. Combine butter, oil and garlic powder in a bowl. Spread the buttery mixture onto both halves of the French bread. Sprinkle mozzarella and Parmesan cheeses on top. Bake until the cheese is all melted and the bread has browned around the edges. Sprinkle parsley on top.
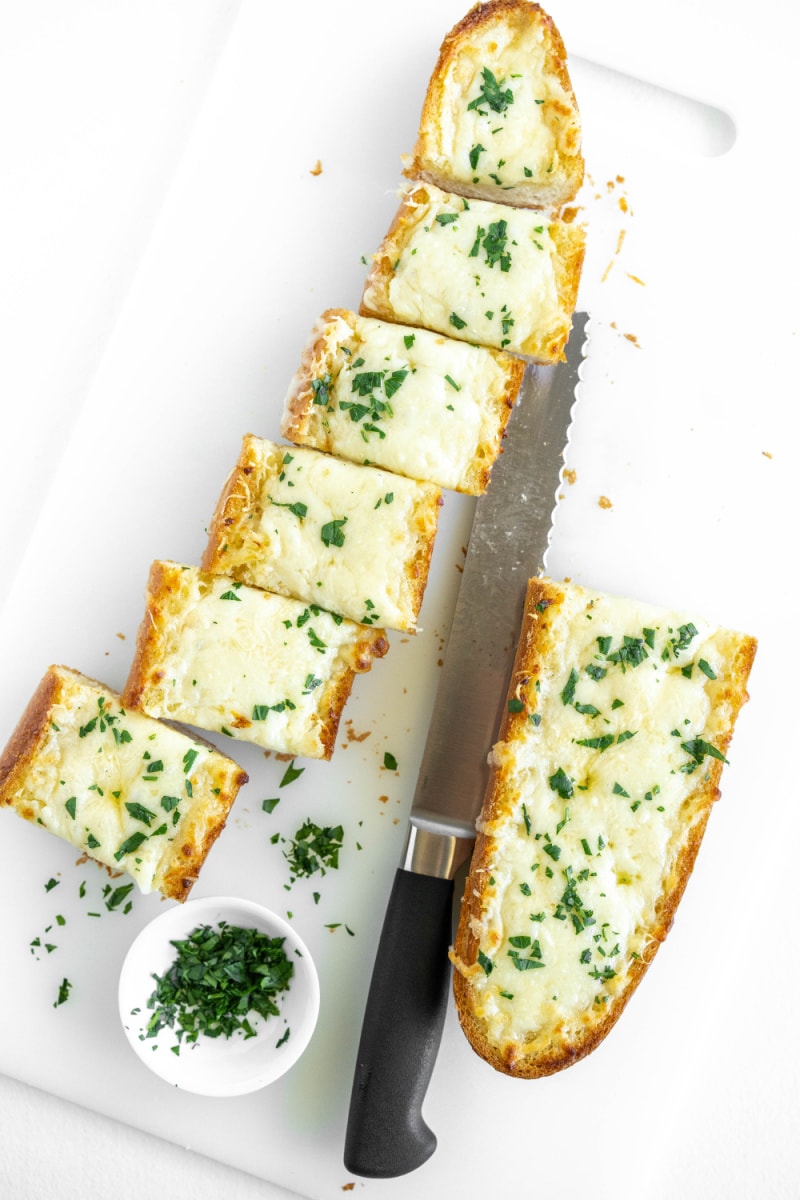
Be sure to let the cheesy garlic bread sit for a few minutes after coming out of the oven. Then it will be easier to slice and the cheese won’t go melting off the sides of the bread.
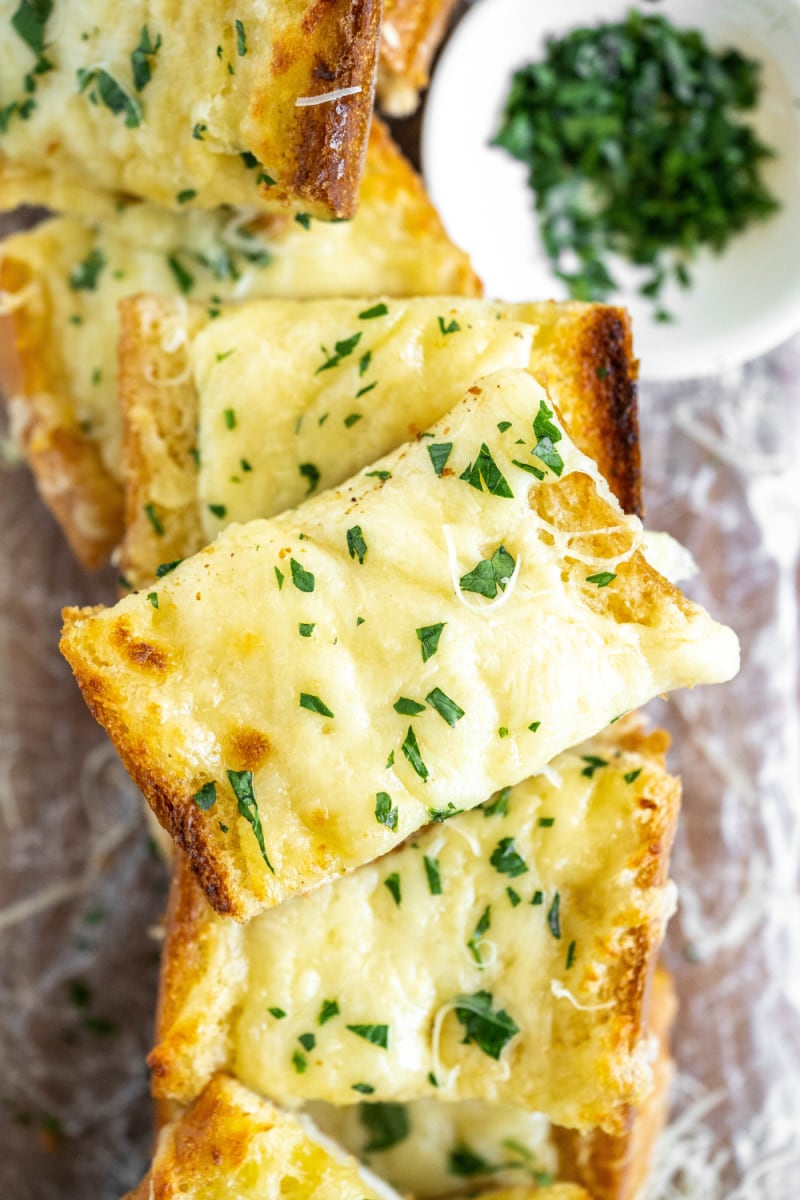
Wrap your bread in foil or tuck it into a bread basket to keep it warm. It will be best eaten warm because of all that cheesy deliciousness. It’s the perfect bread to serve with a great pasta dinner like spaghetti and meatballs or baked penne. But it’s also an excellent pairing with grilled meats. My favorite meal to prepare in the summer months is grilled flank steak, caesar salad and a splurge of cheesy garlic bread.

I wanted to give you an idea of the cheese factor in this bread. It’s pull-apart yummy. You think you really love garlic bread until you’ve had cheesy garlic bread. Then you’ll have a new favorite. Enjoy!

Cheesy Garlic Bread
Ingredients
- One 16-ounce loaf French bread, cut in half lengthwise
- 12 tablespoons (1½ sticks) salted butter, softened
- 2 tablespoons extra virgin olive oil
- ½ tablespoon garlic powder
- 2½ cups shredded mozzarella cheese
- ½ cup freshly grated Parmesan cheese
- 1 tablespoon minced fresh Parsley
Instructions
-
Preheat the oven to 400 degrees F. Line a large baking sheet with foil.
-
Place the bread halves (sliced side up) onto the lined baking sheet.
-
In a bowl, stir together the butter, oil, and garlic powder. Spread onto the bread. Sprinkle on the mozzarella and parmesan cheeses.
-
Bake until the cheese is melted and the bread is starting to brown along the outside, about 12 to 15 minutes. If desired, broil briefly to brown the cheese in spots.
-
Sprinkle the parsley on top. Let the bread cool for a couple minutes, and then slice and serve.
Notes
- If desired, you can use 4 cloves of minced fresh garlic instead of garlic powder.
Nutrition
The post Cheesy Garlic Bread appeared first on Recipe Girl®.


