I guess you could call this my Unpopular Opinions week. It’s okay, though, I still love the Aperol spritz.
I’m not afraid of controversy, but I’ll avoid confrontation at all costs. I like to think of myself as a peacemaker, but also a rebellious troublemaker deep inside. It’s within this bundle of contradictions that I was both thrilled and appalled by the announcement of a fully vegan burger going on the permanent menu for McDonald’s Germany. Yes, the very same golden arches that can’t seem to make room for animal-free french fries back home in the US. The Big Vegan TS is another daring response to super meaty patties popularized by Beyond and Impossible, made with soy and wheat, swaddled by a sesame seed bun, lettuce, tomato, pickles and red onion. Not just meatless, not just vegan with modifications, this assembly automatically omits any and all cheese, mayo, or animal-derived additives. It’s even prepared in a dedicated deep-fryer, rather than the standard griddle smeared with beef fat. No matter how you feel about the clown at large, this is big news.
Even crazier than its mere existence was the coincidence that I would be abroad just about one week after the initial launch. I had to get one. I couldn’t possible get one. It went against every shred of nutritional common sense instilled in me, every consideration for supporting small businesses and shunning a conglomerate otherwise responsible for some of the most egregious animal abuse in the world.
Curiously, inevitably, will be my downfall one day. Believe it or not, however, this was not that day.
Arriving at the table at speeds that only a well-oiled fast food operation could hope to achieve, it looked and smelled every bit as meaty as anything as anything else on the menu. Crisp on the outside, charred and smoky on the nose, while the interior remained juicy, hauntingly pink as promised. Sinking my teeth in to the soft, squishy white bread, lightly stained with grease, it struck me that I had never actually eaten a burger at McDonald’s before in my entire life.
I hated it. I loved it. It was everything I wanted it to be and better, but still worse. It would have been easier just to hate it on principle, but no one can deny that carefully engineered combination of fat, sugar, and salt designed to hit all the pleasure centers of the brain. As my omnivorous dining companion pointed out, the original tastes so minimally like a beef in the first place, you could likely swap the two without noticing any difference.
That’s the ultimate point here. The Big Vegan TS is not an entree made with me or the vegan population at large in mind. Forever pandering to millennials and younger generations more concerned about healthy eating, it’s a smarter alternative to red meat for someone who might otherwise indulge without a second thought. Providing a lower cost, mainstream meatless meal in places where accessibility might otherwise be a barrier, it’s a huge step in making real change across an entirely different demographic. Though hardcore vegans may still raise hell about the purveyor, it’s a move that should be celebrated for the overall impact on animal lives.
Hopefully the success of this bold new innovation will encourage McDonald’s worldwide to follow suit in short order. While such decadence would be an admittedly rare indulgence for me, I can’t lie; I’d travel anywhere for those crispy, iconic fries.
The post Here’s the Beef appeared first on BitterSweet.
Hold the phone, it’s banana pudding. Caramelized banana pudding, to be precise. The recipe is as delicious and comforting as it sounds, and it’s being served up with a few Friday favorites to put your mind on weekend mode. If you need some mindless reading and a seriously killer Southern dessert recipe, you’re in the right spot!
Okay, you know I’m all for Southern food, even the classic cult favorites that feel a little odd or out of place in my kitchen. But a peanut butter & mayonnaise sandwich? We may have taken it too far. I love the polarizing food debates (Coke or Pepsi? Dressing or Stuffing? Is Spam really a food?) , but IMO this one just needs no debate. Decide for yourself with a look at this article from Food52.
I traveled to Orlando last weekend for my sister’s high school graduation. In a comical turn of events, we discovered that my Mimi was wearing shoes to the grad party almost identical to my sister’s. Could it be that there is a sandal that knows no generational borders? In case you’re interested, I found some similar cute ones here and a loftier, more-refined option here. Oh, and by the way, it turns out my Pops has the same New Balance sneakers as my husband… this was less funny and altogether terrifying to me.
I’ve been seeing various forms of kolaches (the classic Czech pastry) popping up all over the internet. Turns out I’m not the only one. The humans at Bon Appetit spent a couple of days driving nearly 300 miles to try 20 varieties of this European treat, and I’m more than thrilled to pick up a few recipe ideas here. Anyone want to see some kolaches on this site?
I’m in no rush to get this baby out, but I am more than eager to get my hands on some non-maternity wear. At some point in time during this pregnancy, my favorite stores started selling clothes that might as well have been made for my body type. Like all of the wide-leg, loose-fitting pants we’re seeing everywhere? I’m here for it. Check out my favorites from Madewell here… I especially have my eye on that little tie-waist striped number.
Food & Wine broke down the ins and outs of the store-bought summertime favorite popsicles. Their recipe uses whole fruit and can be adapted to include different herbs and unique produce. This recipe may be the one dessert that Moms and kids will rally behind this summer.
A few months ago, I told you about my slow tiptoe into better-for-you skincare products. In an effort to nail down something that was accessible and reasonably priced, I decided to try out a few new products from Supergoop! A few of my girlfriends have been ranting about them for months, so I figured they couldn’t be terrible. Most intriguing? A dry shampoo with SPF that you can sprinkle in your hairline before a day in the sun, a mineral face powder with SPF that bronzes as it protects, and vitamin-containing serum chock-full of sun guard. Give a peek and let me know if you’ve had luck with any of their other products!
My friends at Kitchn asked me to work on the ultimate Southern banana pudding recipe for their site. As a fairly new transplant to the South, I hardly felt qualified to be the judge of this kind of thing, but I was happy to take a stab at it anyways. Along the way, I learned more about banana pudding than I thought I needed to know and was excited to make an attempt at a recipe I’ve wanted to formulate for some time: caramelized banana pudding.
There’s an excellent BBQ restaurant close to our home that serves caramelized banana pudding. Unlike my husband, I’m not really a pudding kind of gal, but THIS banana pudding is really worth every calorie. After trying their rendition of caramelized banana pudding, I decided to attempt a homemade version, and the outcome of that attempt is what I’m so excited to share with you today.
The pudding itself is pretty classic in nature. This is an egg and flour thickened pudding that is cooked over the stove until thick and creamy. Layered in between are vanilla wafer cookie crumbs and bananas that have been cooked barely in butter, brown sugar, and cinnamon. There’s literally no wrong way to make this caramelized banana pudding. With ingredients so decadent, it’s bound to be a homerun.
I like to serve this dessert in individual mason or weck jars, but you can also layer it in a 2-quart baking dish. Either way, the recipe will yield about 8 servings. You can expect a cool and creamy treat with bits of crunch throughout and loads of warm flavors that you normally don’t get in a classic banana pudding. This is definitely the highbrow treat your summer Southern dinners have been looking for, and I hope you enjoy it as much as I have. Happy Friday to you all and happy baking!
This post was made in partnership with Barilla, but all opinions are my own, per usual!
Growing up in a Greek household, Mediterranean flavors were a staple at every meal. From rosemary to lemon to thyme to tomatoes, every bit of produce paired perfectly with pasta, which made it a family staple. Pasta is a deeply important part of the Mediterranean Diet. The Mediterranean Diet isn’t about severely limiting the food you eat or fasting or anything extreme like that. Instead, it’s a healthy way of eating, inspired by the traditional lifestyle + dietary patterns of the Mediterranean region, and can help reduce the risk of chronic diseases. It incorporates a variety of quality food groups that should be eaten often in reasonable quantities, including pasta. My go-to pasta, Barilla®, is made with few, wholesome ingredients to provide a simple and natural way to enjoy eating. It’s the perfect canvas for those delicious Mediterranean flavors like chicken orecchiette!
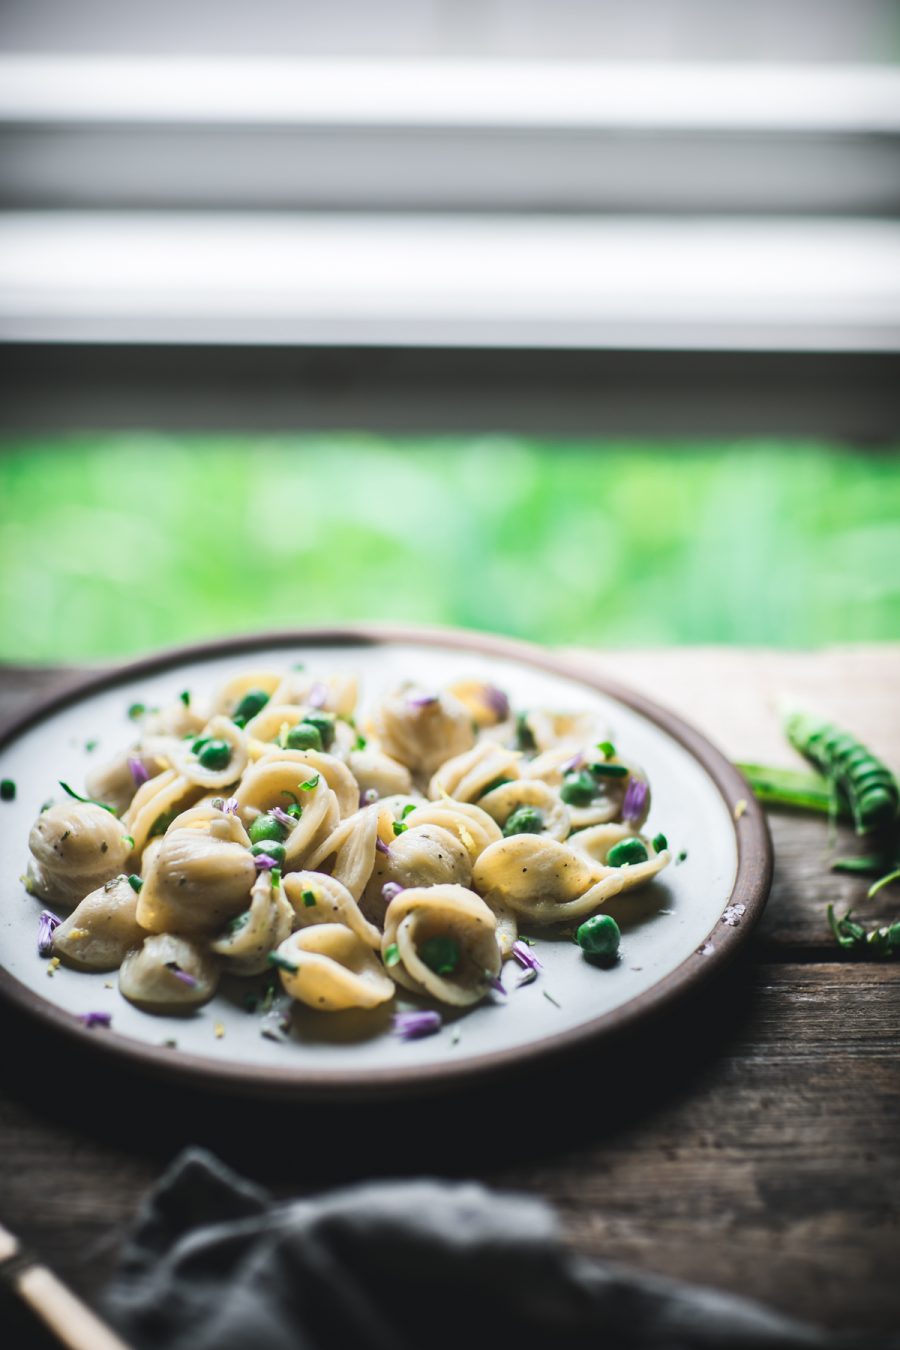
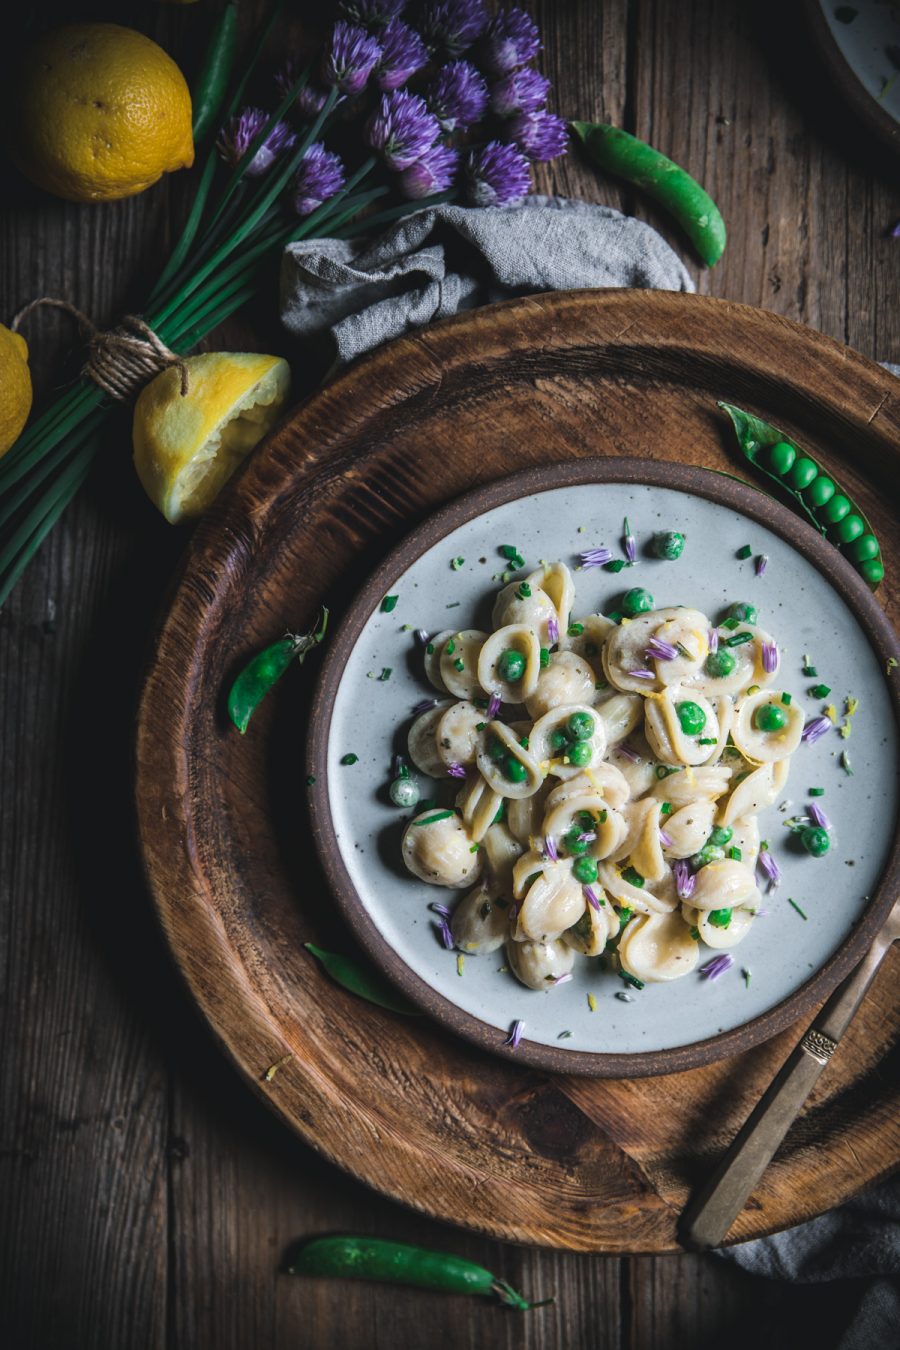
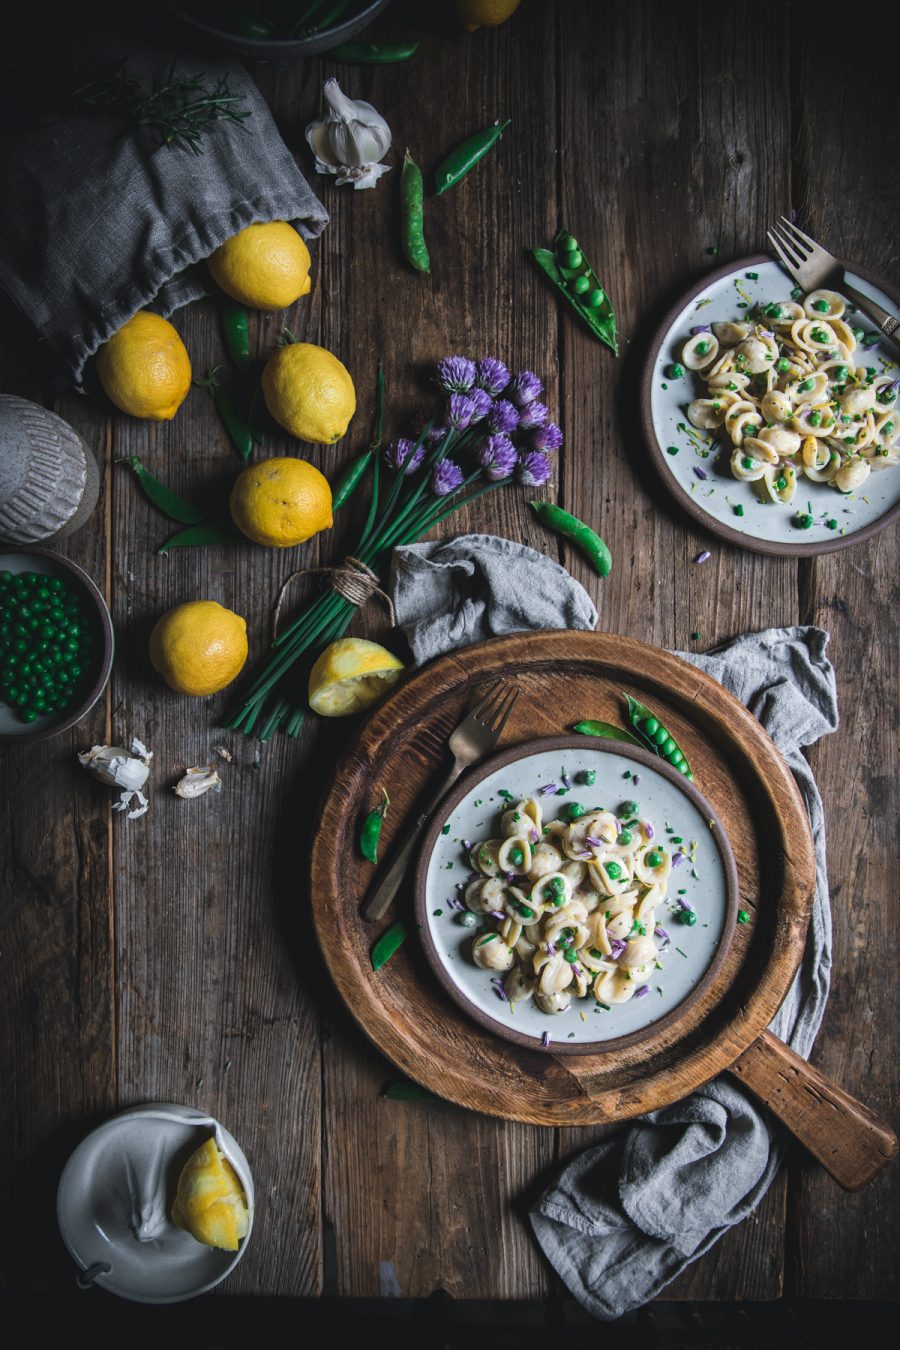
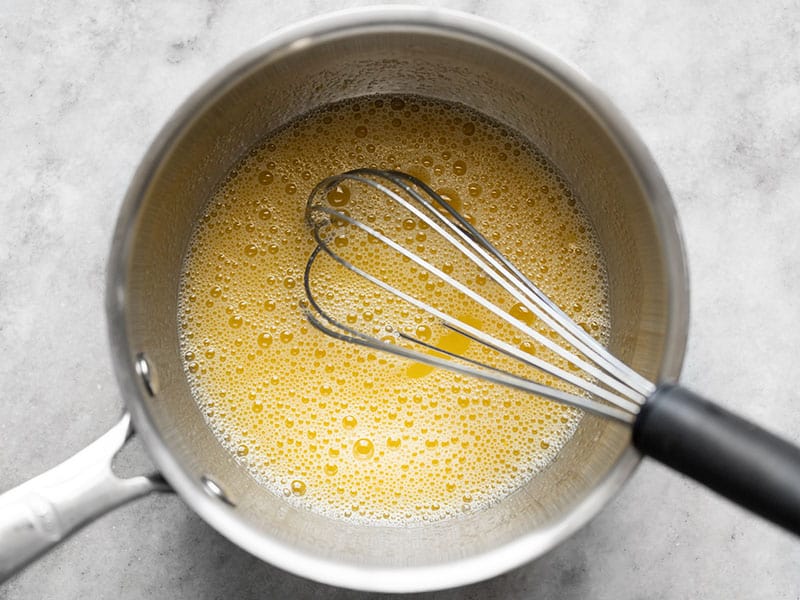
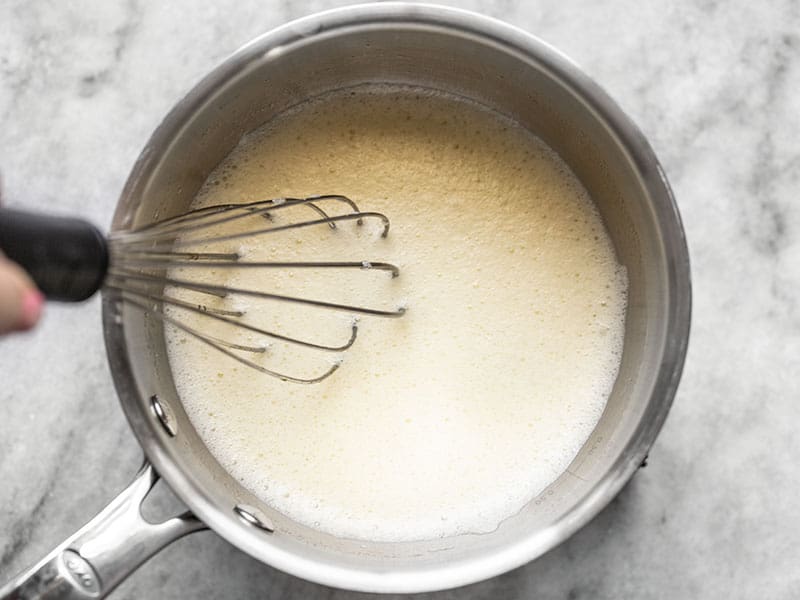
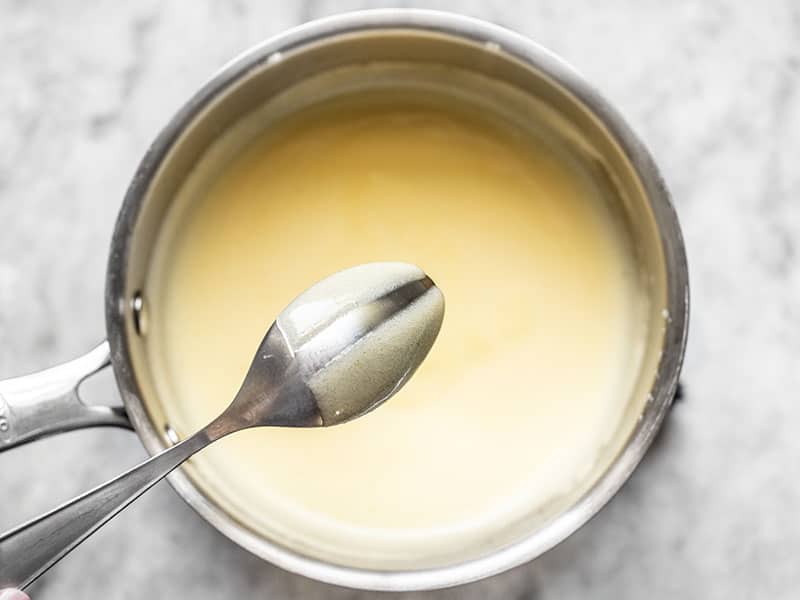
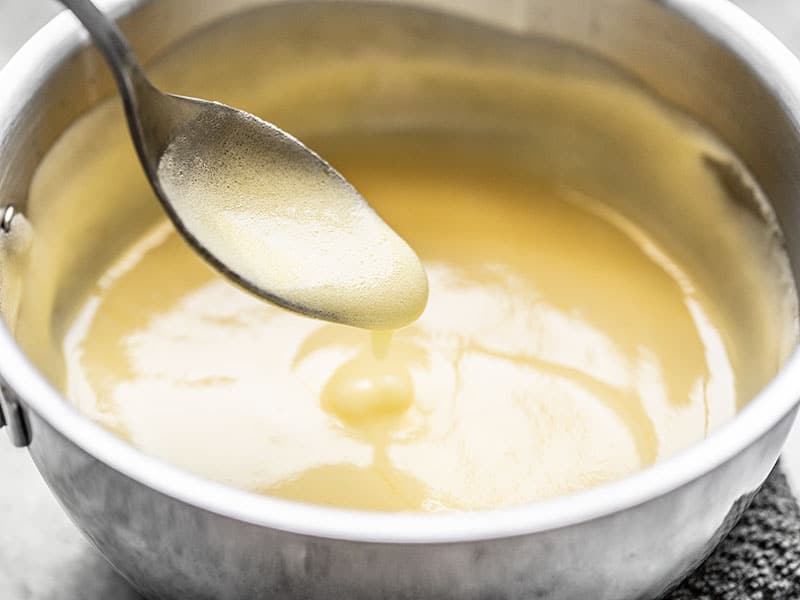
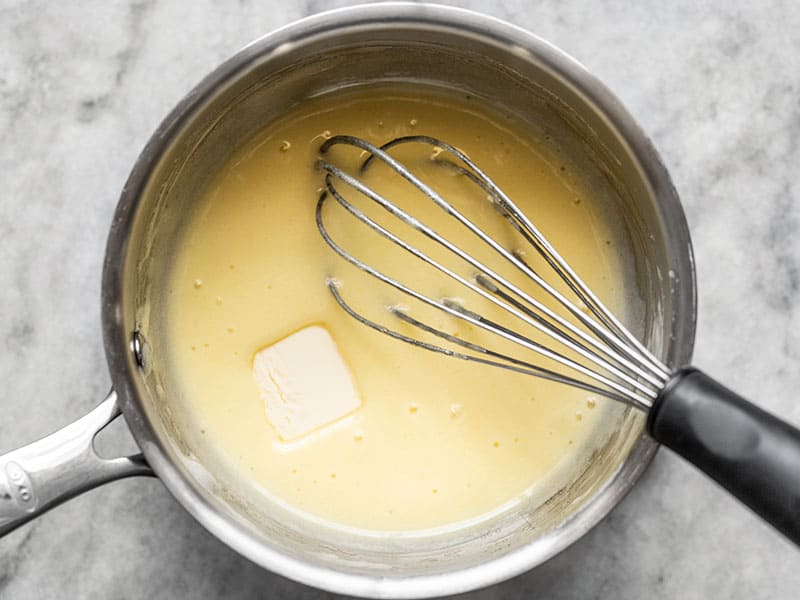
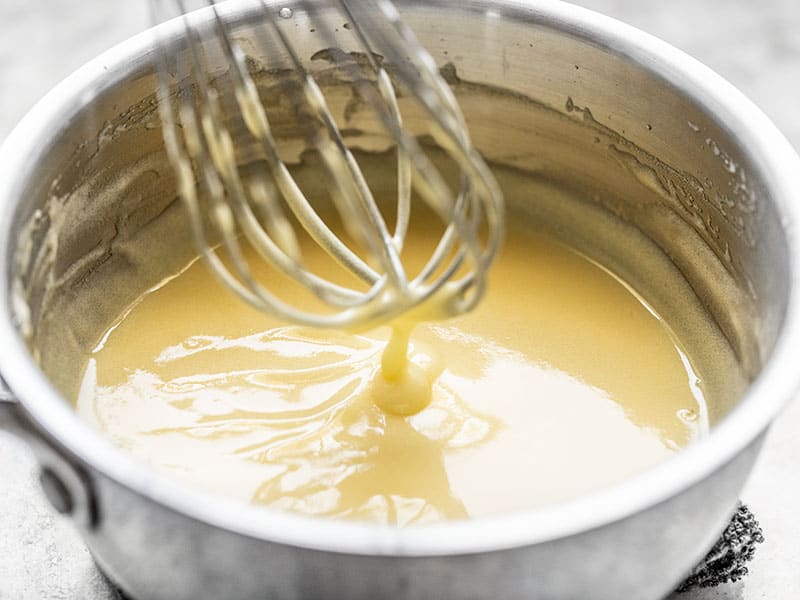
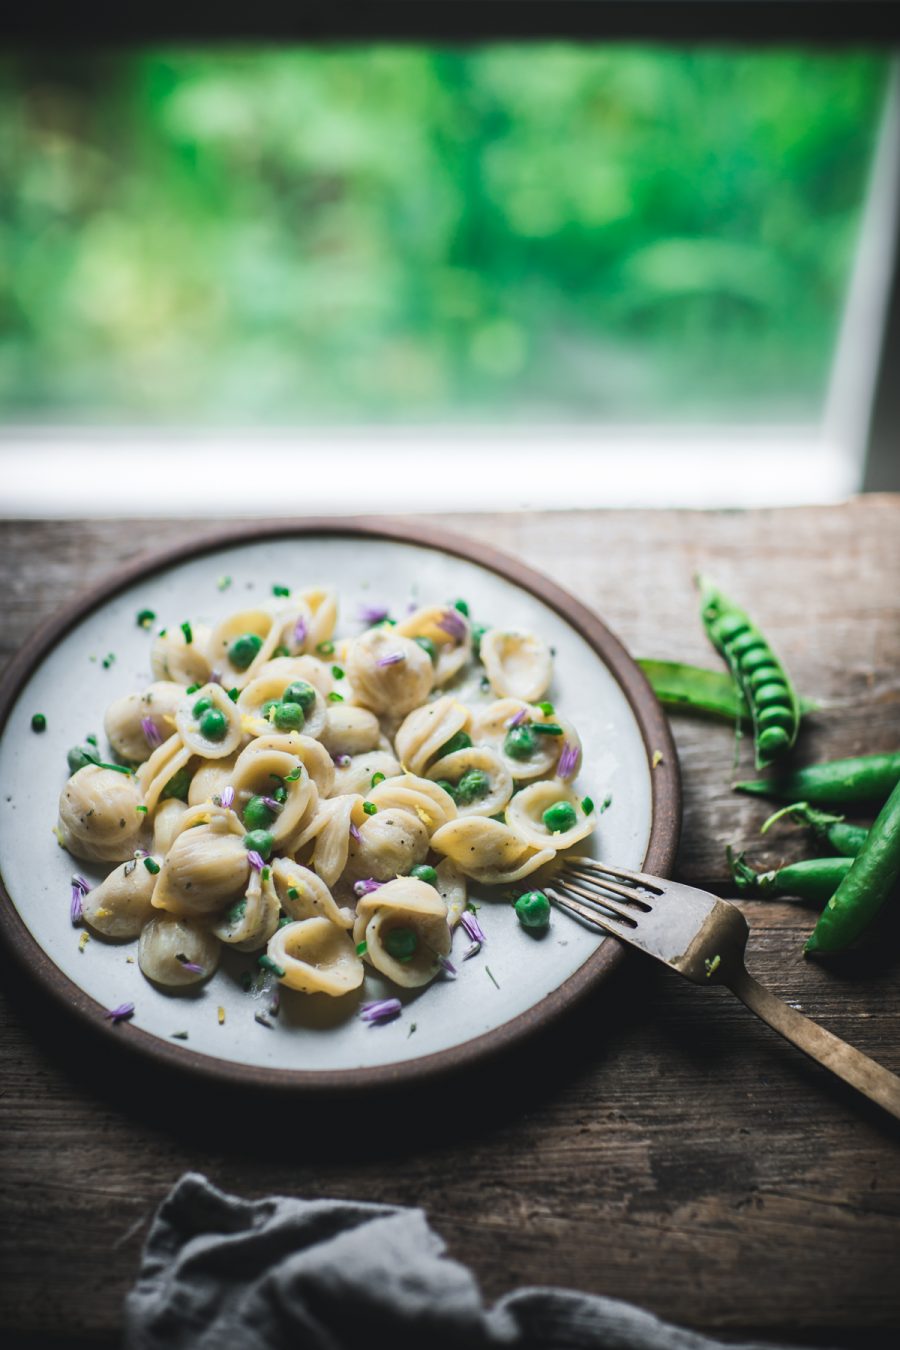
This dish combines several of my favorite spring ingredients from the region, and that’s lemon, rosemary, chicken, peas, and chives. I like using chicken thighs because they’re much more flavorful than the breast, but if you’re a white meat fan, you can feel free to substitute in a chicken breast instead, and just follow the cooking directions in the recipe as such. There’s something extremely comforting about the combination of chicken, lemon, and rosemary, and that makes up the basis of the light and creamy sauce the Barilla Collezione orecchiette is coated in.
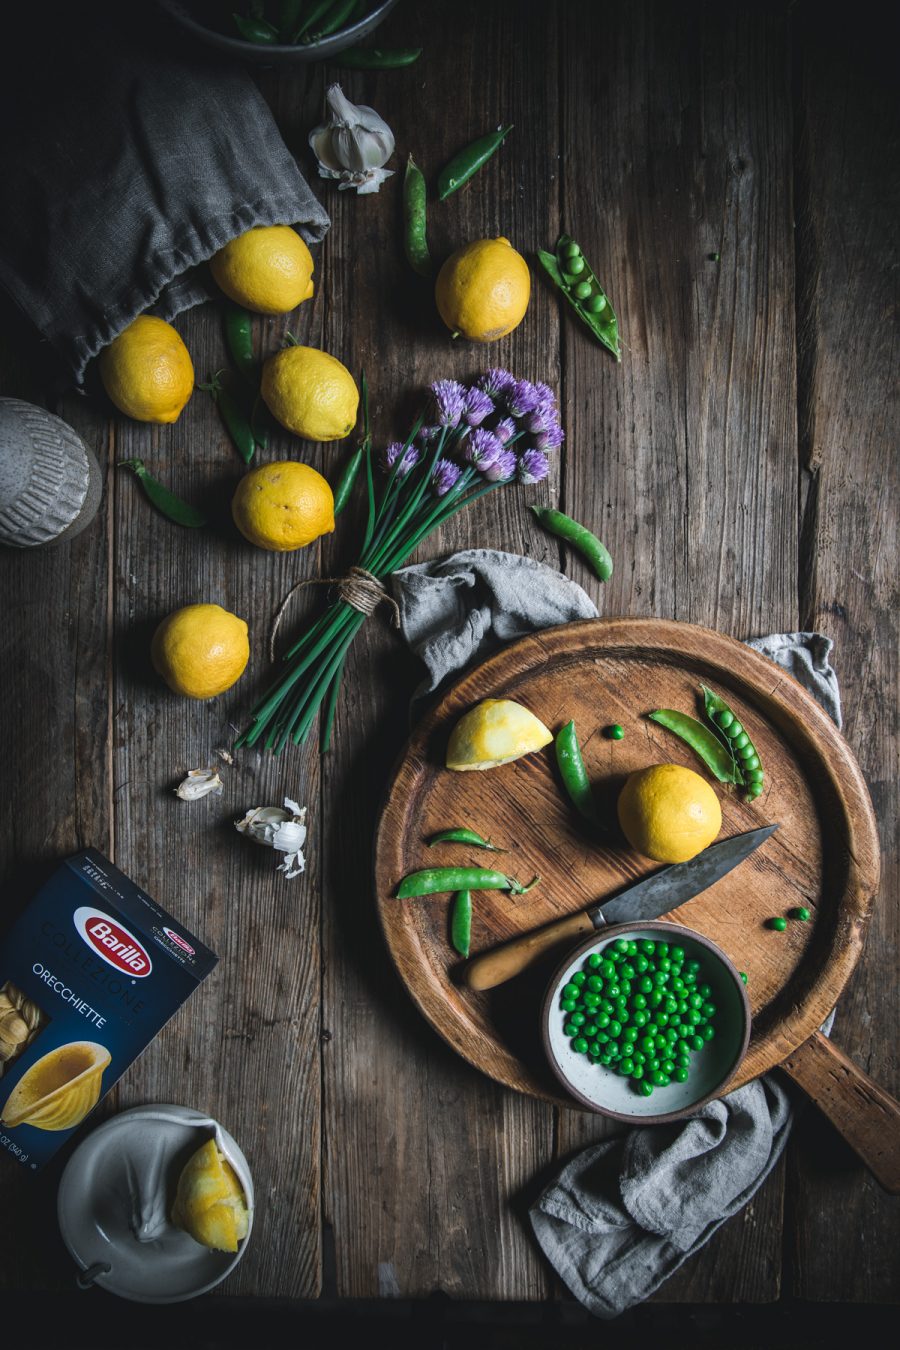
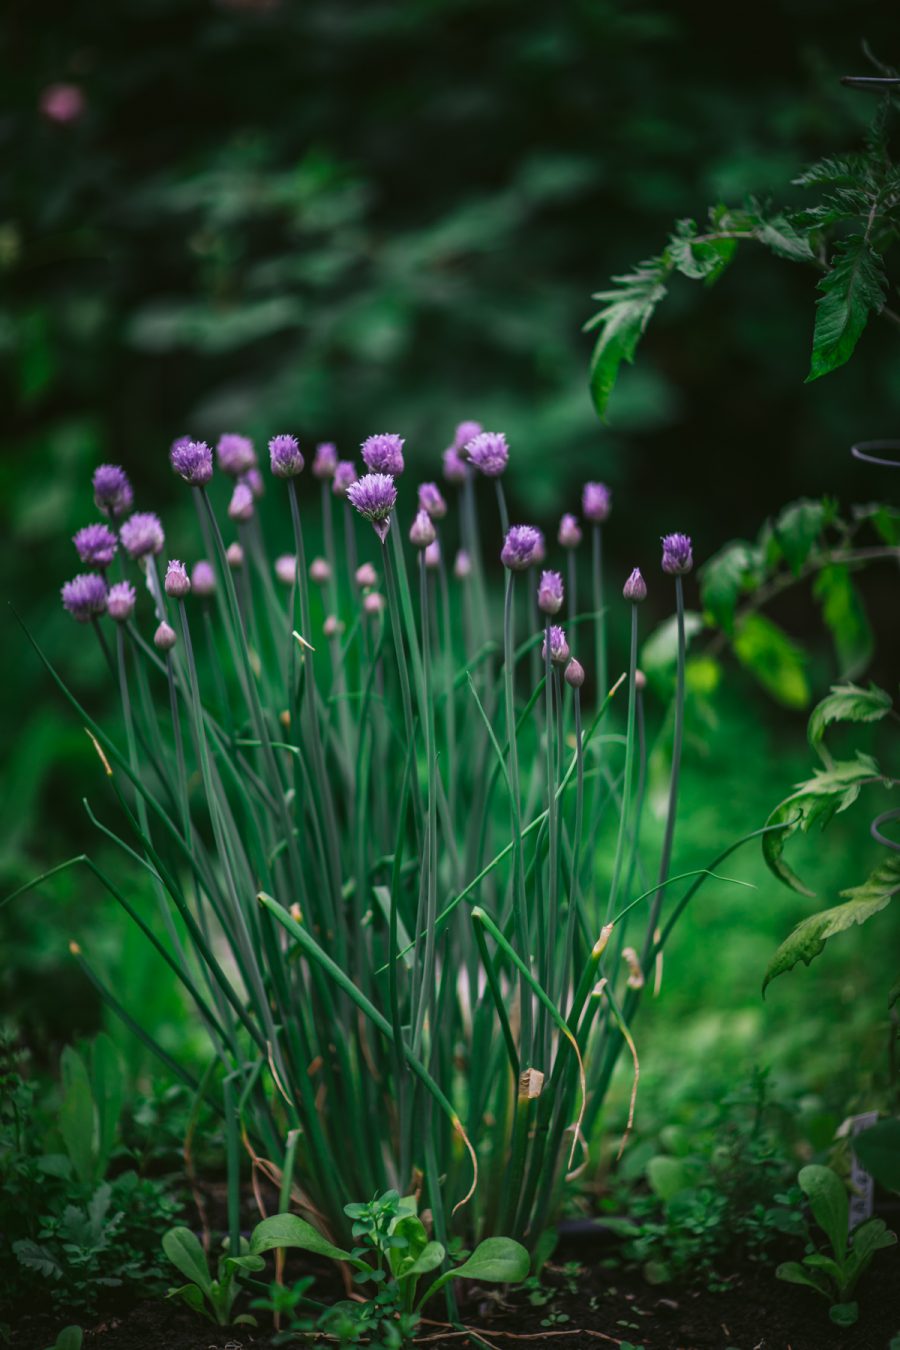
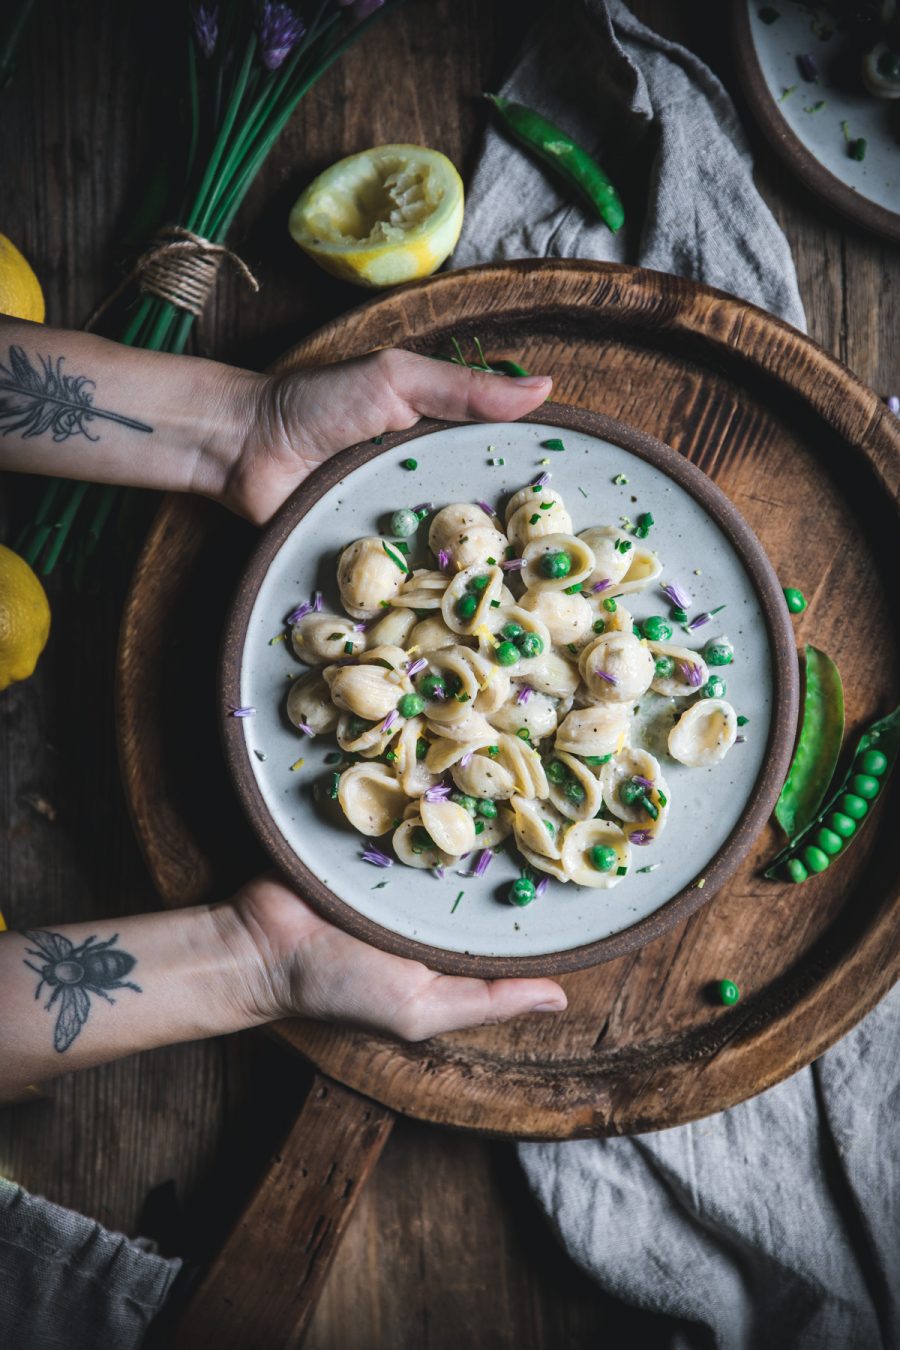
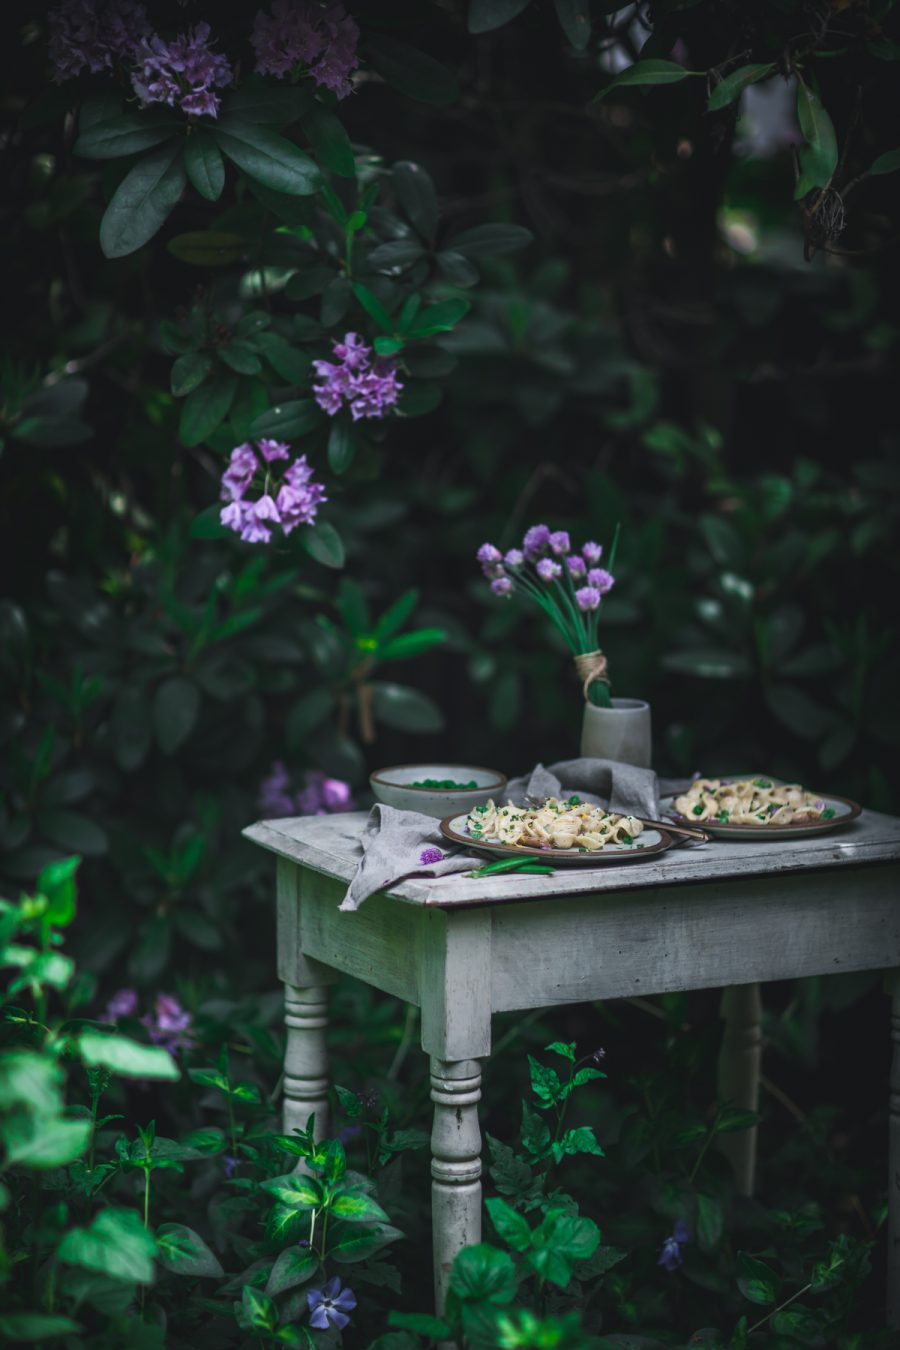
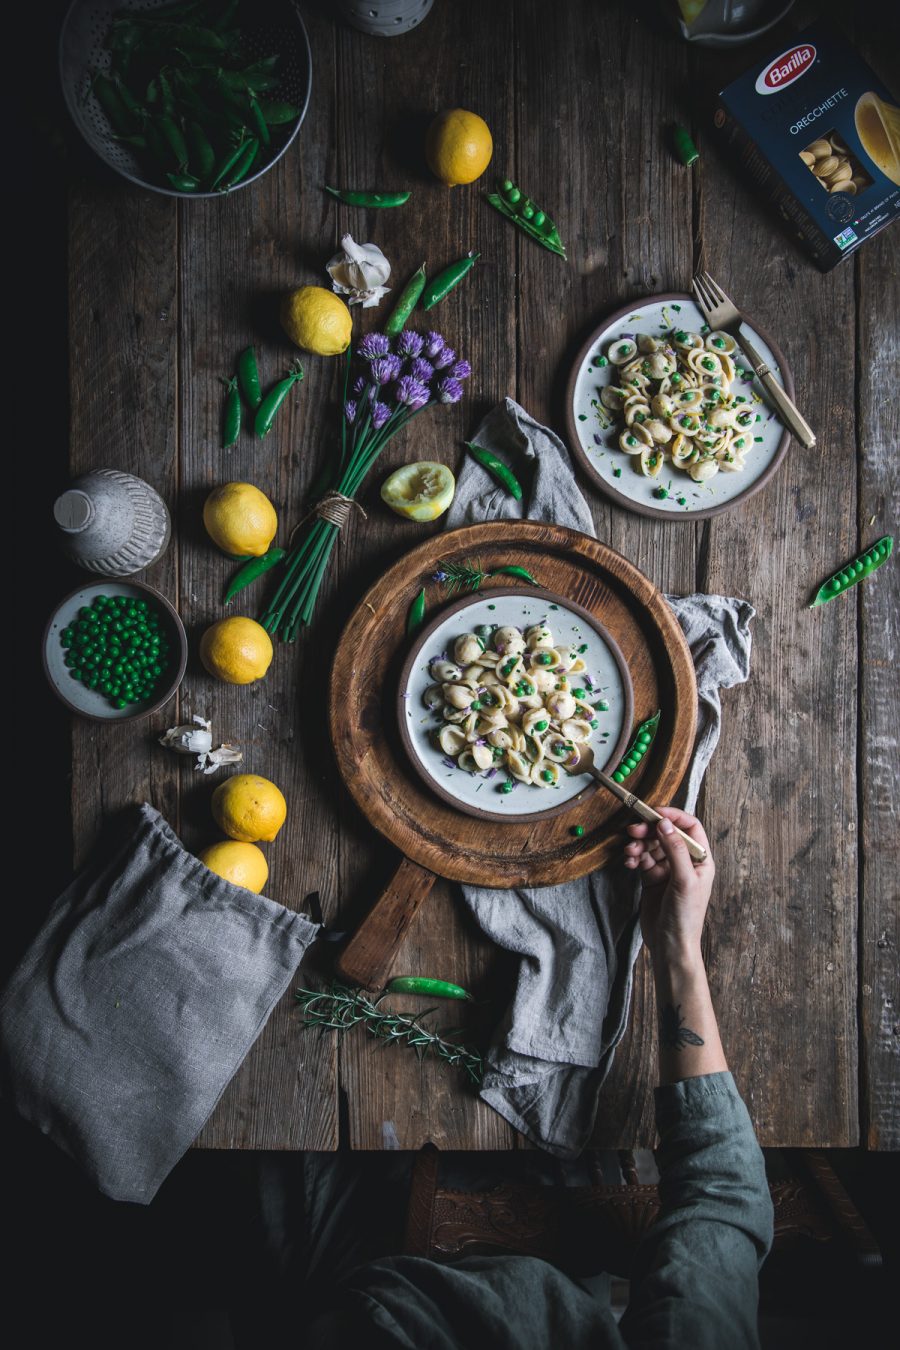
If you’re unfamiliar with orecchiette, it’s a traditional type of pasta that’s shaped like a little bowl, and it perfect for scooping up and holding sauce. And in the case of this recipe, it also make an ideal vessel for little peas to rest in, almost like a pearl tucked into a shell. I also included some fresh chives from the garden, because they add the most wonderful savory herbal flavor to the dish. The little purple flowers you see are chive blossoms, but you can just use chopped fresh chives as directed in the recipe, since they have the same flavor and are much easier to find year-round.
It’s so much fun to experiment with the different seasonal flavors of the Mediterranean region—I highly recommend checking out
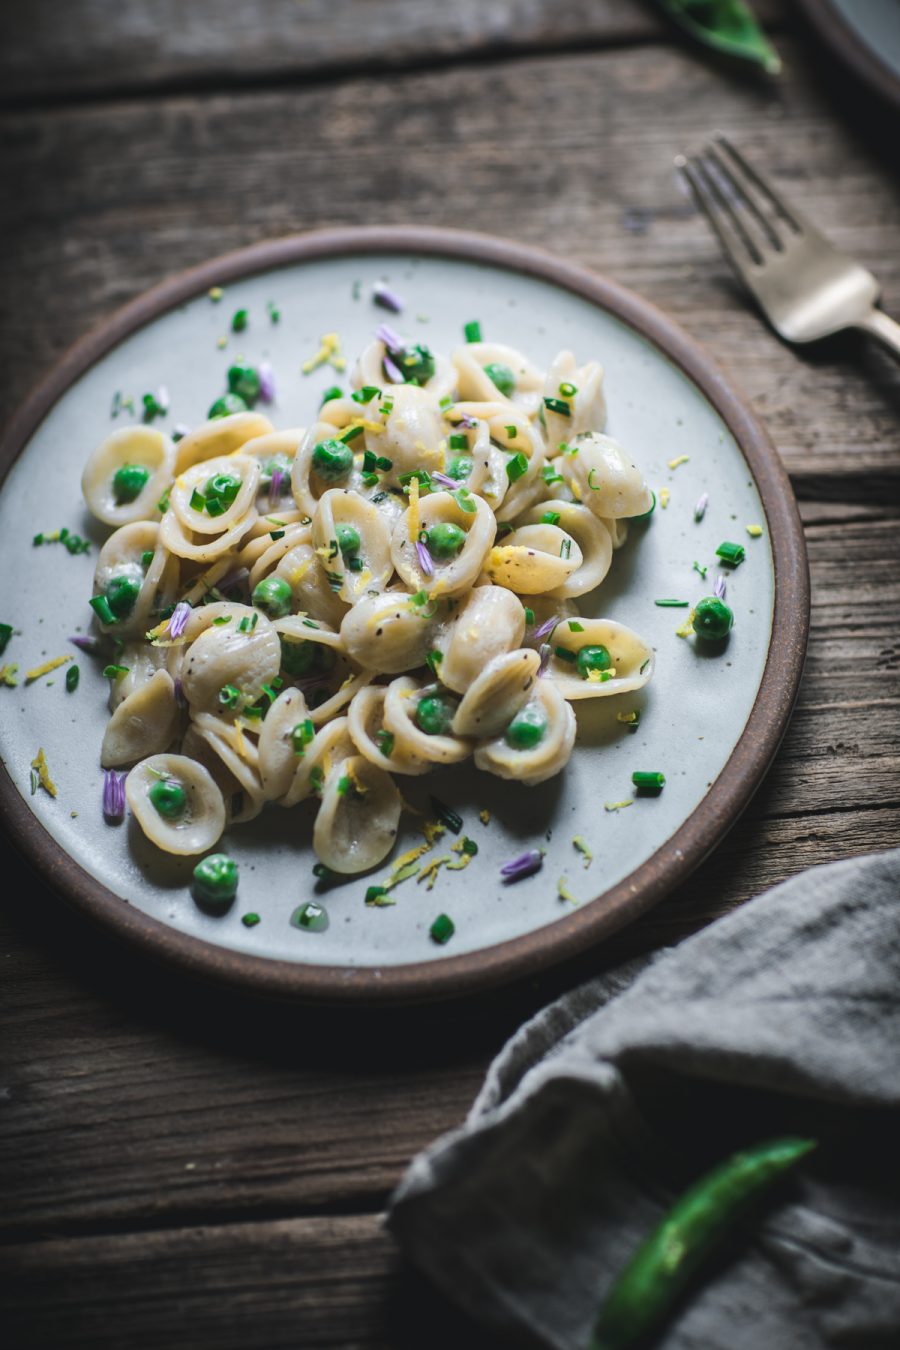
 Barilla’s Italian Recipe Builder to help you craft your own. It helps you create a Mediterranean-style recipe for 500 calories or less per serving and gives you hundreds of combinations of flavor and variety. As for size, each recipe makes about 6 to 8 servings, depending on the box size. It’s an awesome tool to help you experiment more with all the bright and delicious produce that’s out there. I can’t wait to see what you create!
This delicious orecchiette combines the bright flavors of spring with the nourishing taste of the Mediterranean. The sauce is made from a chevre, rosemary, and lemon base, and the orecchiette pasta is tossed in it along with peas, chives, and delicious roast chicken.
Your new favorite bread: Oat & Flax Skillet Bread, made with only 3 ingredients (excluding water and optional salt). It is vegan, oil-free, easy-to-make and so delicious, plus only 91 calories per big wedge.
Aperol is a bitter Italian aperitif that is meant to stimulate the appetite. It is primarily used to make a variety of light and refreshing cocktails, since it actually has a very mellow sweetness to it, along with its signature bitter orange flavor. I enjoy making Aperol spritzes – mixing the aperitif (2 parts) with prosecco (3 parts) and a splash of soda water (1 part) over ice – at home during the hot summer months, but it is one of the most popular drinks going in Italy.
This Aperol and Olive Oil Pound Cake is a very Italy-inspired dessert. The dense, tender pound cake is made with aromatic olive oil instead of butter and is flavored with Aperol, giving it a sweet start and a very complex finish as the flavors of the aperitif and the olive oil blend together. The cake is easy to make and the batter will come together in just a few minutes. Unlike a traditional pound cake, you don’t even need to wait for the butter to soften, since there is no butter in this recipe!
The cake has a delicate, dense crumb that almost melts in your mouth when you take a bite. It has a really nice sweetness on the first bite, but that sweetness mellows into a bright citrus acidity from the olive oil and finishes with a hint of bitter orange similar to what you mine find in marmalade, thanks to the Aperol. I added some fresh orange zest to amp up the orange flavor a bit, too. The cake tastes like Italy and, surprisingly, that slightly bitter flavor of the Aperol keeps you coming back for bite after bite. It’s unexpected and very delicious.
This cake keeps extremely well, as the olive oil helps the loaf to remain nice and moist even a few days after baking. The flavors of the cake will actually deepen as it rests, so I tend to think that this is best the day after baking, even though you can eat it as soon as it has cooled!
Pound cakes aren’t typically topped with frosting and this one is no exception. I pair it with lightly sweetened whipped cream and fresh fruit. The whipped cream is a nice contrast to the bitter orange notes in the cake, as is just about any kind of berry.
Aperol and Olive Oil Pound Cake
2 cups all purpose flour
1 1/2 tsp baking powder
1/4 tsp salt
1 1/4 cups sugar
3 large eggs
1 tbsp orange zest
3/4 cup olive oil
1/3 cup Aperol
Preheat oven to 350F. Lightly grease a 9×5-inch baking pan and line the base with parchment paper.
In a medium bowl, whisk together flour, baking powder and salt.
In a large bowl, whisk together sugar, eggs and orange zest, then whisk in olive oil and Aperol until smooth. Whisk in the flour mixture until batter is smooth and no streaks of dry ingredients remain. Pour into prepared pan.
Bake for 50-55 minutes, or until a toothpick inserted into the center comes out clean and the top springs back when lightly pressed.
Allow cake to cool in the pan for 20-30 minutes before turning it out onto a wire rack to cool completely.
Makes 1 cake; serves 10-12.
The post Aperol and Olive Oil Pound Cake appeared first on Baking Bites.
This Funfetti Bundt Cake is covered in white chocolate glaze and plenty of rainbow sprinkles.
Funfetti Bundt Cake is a fun cake to make for celebrations. All of those pretty sprinkles on top make it a nice cake to serve for a birthday party, and it’s also a good cake to bring to a potluck. Little kids seem to really love their sprinkles, and this cake has plenty of those!
This cake has a great vanilla flavor. And there are a lot of rainbow sprinkles mixed into the actual cake batter too. That means the slices of cake are super pretty with splashes of rainbow everywhere!
As pictured, the cake here was made in a traditional bundt cake pan. My favorite bundt pan of all time is the super swirly Nordic Ware Platinum Collection Heritage Bundt Pan. I just love the way that one comes out of the pan with such clean lines and a nice shape.
The glaze in this recipe is delicious. It’s made with white chocolate melted with cream and powdered sugar. It has great flavor, and it adds just the right amount of sweetness to the exterior of this cake.
See how nice it looks? Don’t worry about the glaze being gooey. Given time to set, the glaze will set just fine and harden up a little bit.
Funfetti is another name for rainbow sprinkles. In some parts of the country, they’re also known as “Jimmies.” They can be found in your market’s baking aisle. The fun thing about rainbow sprinkles is that you can find them in different colors too. Red, white and blue sprinkles can be used for a patriotic holiday cake. Pastel sprinkles can be used for a baby shower!
Slice and serve!
I’ll add that I enjoy a scoop of vanilla ice cream served with my Funfetti Bundt Cake. Enjoy!
Such a fun birthday cake!
Preheat the oven to 350 degrees F., Spray a 10 to 12 cup bundt pan with nonstick spray.
In a medium bowl, whisk together flour, baking powder, baking soda and salt.
In a large bowl, use an electric mixer to combine the sugar, butter and oil at medium speed for 4 minutes or until light and fluffy. Beat in whole eggs, one at a time. Beat in the vanilla.
At low speed, beat in the flour mixture and buttermilk, making three additions of flour and two of buttermilk, and beating until incorporated.
In another medium glass or stainless steel bowl, using the handheld mixer and clean beaters, beat the egg whites on medium-low speed until foamy. Gradually increase to high speed and beat until firm peaks form.
Using a spatula, carefully fold whites into batter in two additions. Fold in the sprinkles (see Recipe Notes below). Transfer the batter to the prepared pan and smooth the top.
Bake in a preheated oven for 45 to 55 minutes or until a tester inserted in the center comes out clean. Let cool in pan for 10 minutes, then carefully invert the cake onto a wire rack to cool completely.
In a small saucepan, stir together the white chocolate, cream and salt over medium-low heat until melted and smooth. Whisk in 1 cup of the sugar. Whisk in more sugar, if necessary, 2 tablespoons at a time, until the glaze is thick but pourable.
Pour the glaze over the cooled cake, letting it drip down the sides. Decorate with plenty more sprinkles. Let the glaze set for at least 20 minutes before serving.
The post Funfetti Bundt Cake appeared first on Recipe Girl®.
Luscious might be an understatement. It’s kind of mind blowing how four of the most basic ingredients in your kitchen can make something so beyond delicious as this homemade lemon curd, but somehow they do. With just a small sauce pot, a whisk, and four simple ingredients you can make a little jar of velvety sunshine to spread or dollop on top of all your food. And now that I know how fast and easy it is, and that you can freeze it, I will never pay $4 for a jar of it at the store ever again.
Curd is one of those unfortunate words, like “moist,” that never really sounds appetizing. BUT I promise you, this stuff is heaven. Lemon curd is dessert spread, kind of like a lemon custard, or like a sweet version of hollandaise sauce (I hope I didn’t lose you there). It tastes a LOT like the filling for lemon squares (did I get you back on board?). It’s super rich and smooth, but still light and bursting with fresh lemon flavor.
EVERYTHING. Well, almost. You can use lemon curd anywhere you use jam or preserves, so on toast, biscuits, scones, etc. It’s also a great topper for yogurt, oats, parfaits, cakes, pies, cookies, donuts, pancakes, waffles, crepes, need I go on? Anywhere you want lemon flavor, grab a spoonful of your homemade lemon curd.
I made approximately 578 batches (exaggeration) of lemon curd this week, testing all sorts of methods from the microwave to the stove top, adding ingredients in all sorts of different orders, but I found that the method below created the silkiest, lightest, and smoothest homemade lemon curd without an excessive amount of work (only about 10 minutes compared to 2 minutes for the microwave version).
So be aware that there are a million ways to make homemade lemon curd, but the method below is my favorite. It’s actually quite similar to the way I make hollandaise sauce (see Almost Eggs Benedict).
Fresh squeezed lemon juices is and always will be better than bottled, but during my one million test runs of this recipe I found that bottled lemon juice did not make my lemon curd any less delicious. I don’t know if it’s all the sugar and butter, but I didn’t notice a massive difference between fresh and bottled in this recipe. So unless you have some lemons in your freezer that you’re trying to use up, save yourself some trouble and pour your lemon juice instead of squeezing it.
That being said, if you are using fresh lemons, go ahead and zest your lemon before juicing it. Adding lemon zest to the lemon curd will make a marked difference in the flavor. 👍
This homemade lemon curd will last in your fridge for 1-2 weeks, but you can also freeze it! You guys know how I love freezing everything. In the freezer the lemon curd will last at least a few months and the beautiful part is that it only hardens about as much as ice cream, so you can scoop it out as needed.
And that’s where I’m really in danger. When I scooped a spoonful of frozen lemon curd today to test its freezer durability, it tasted a LOT like a really rich lemon sorbet. So I’m going to have to stop myself from eating this as a frozen dessert. 🙊
This luscious homemade lemon curd only takes four simple ingredients, about 10 minutes, and tastes like velvet sunshine in a jar.
Add the sugar, egg, and lemon juice to a small sauce pot. Before placing the pot over the heat, whisk the ingredients together until smooth.
Place the pot over medium heat and cook while whisking continuously. The mixture will become very frothy as you whisk. When the liquid becomes hot enough to cook the egg, the mixture will begin to thicken and no more liquid will separate from the foam. It will take about 5 minutes of whisking over medium heat for the mixture to thicken, but will vary depending on your cookware. The mixture should be thick enough to coat a spoon (see photos below).
Remove the pot from the heat. Add one tablespoon of butter at a time, whisking until it has fully melted into the sauce before adding the next. As the butter is melted into the sauce, it will become less frothy and more silky in texture, and look more glossy rather than foamy.
Once all of the butter has been whisked in, transfer the lemon curd to an air-tight container and refrigerate until completely cooled. The curd will thicken further upon cooling.
Do not use aluminum cookware, as this can be reactive with the lemon juice.
I love spreading my homemade lemon curd on English muffins. Since it already has tons of butter in it, it’s almost like butter and jam rolled into one!
I’m adding a few more step by step photos than usual, since I really want you to see the texture changes that occur during this process. Lemon curd is easy to make, but you have to use your eyes to know when it’s time to move on to the next step.
It can be helpful, but is not critical, to take your butter out of the refrigerator and slice into 1 tablespoon pieces before you begin. Letting it warm up slightly can make it easier to melt into the sauce later.
Add 1/4 cup sugar, one large egg, and 1/3 cup lemon juice to a small sauce pot.
Before placing the pot over heat, whisk the sugar, egg, and lemon juice together until smooth.
Place the pot over medium heat and begin to whisk continuously. You’ll be whisking for about five minutes until the mixture thickens. It will get very frothy as you cook and whisk and will seem like nothing is happening, but once it reaches the magic temperature it will almost suddenly thicken. The photo above is when the mixture was at the half-way point. Very frothy on top, but there was still a layer of liquid under the froth.
When the mixture gets hot enough, the egg will begin to thicken the sauce and the entire mixture will become thick and frothy, with no layer of liquid on the bottom. It should be thick enough to coat the back of a spoon. When you drag your finger through the mixture on the spoon, the sauce should stay put and not run back to fill in the line.
Here is another view of what it looks like once thickened. It’s still very frothy in texture. There is no liquid on the bottom of the pot. It’s all thick froth. When it reaches this point, remove the pot from the heat.
Whisk one tablespoon of butter into the sauce, making sure it is fully melted (from the residual heat of the sauce) before adding the next tablespoon. As you whisk in the butter the sauce will become less frothy and more silky. It will also look a little more glossy and translucent, and less white/opaque.
Here is what it looks like once all of the butter has melted in. More glossy and translucent, less frothy. While the lemon curd is fairly thick at this point, it thickens further once refrigerated.
The flavor also mellows a bit as it refrigerates. It’s quite sour at this point but it gets creamier as it refrigerates.
You can refrigerate the lemon curd for 1-2 weeks, OR freeze it for a few months.
You can scoop frozen lemon curd out as needed, and it will thaw quickly at room temperature.
I’ve died and gone to lemon heaven. ☀️🥰🍋
The post Luscious Homemade Lemon Curd appeared first on Budget Bytes.