English cucumber "cups" are filled with a fresh, easy, flavor-packed Asian filling, perfect for show-off appetizers or healthy snacks.
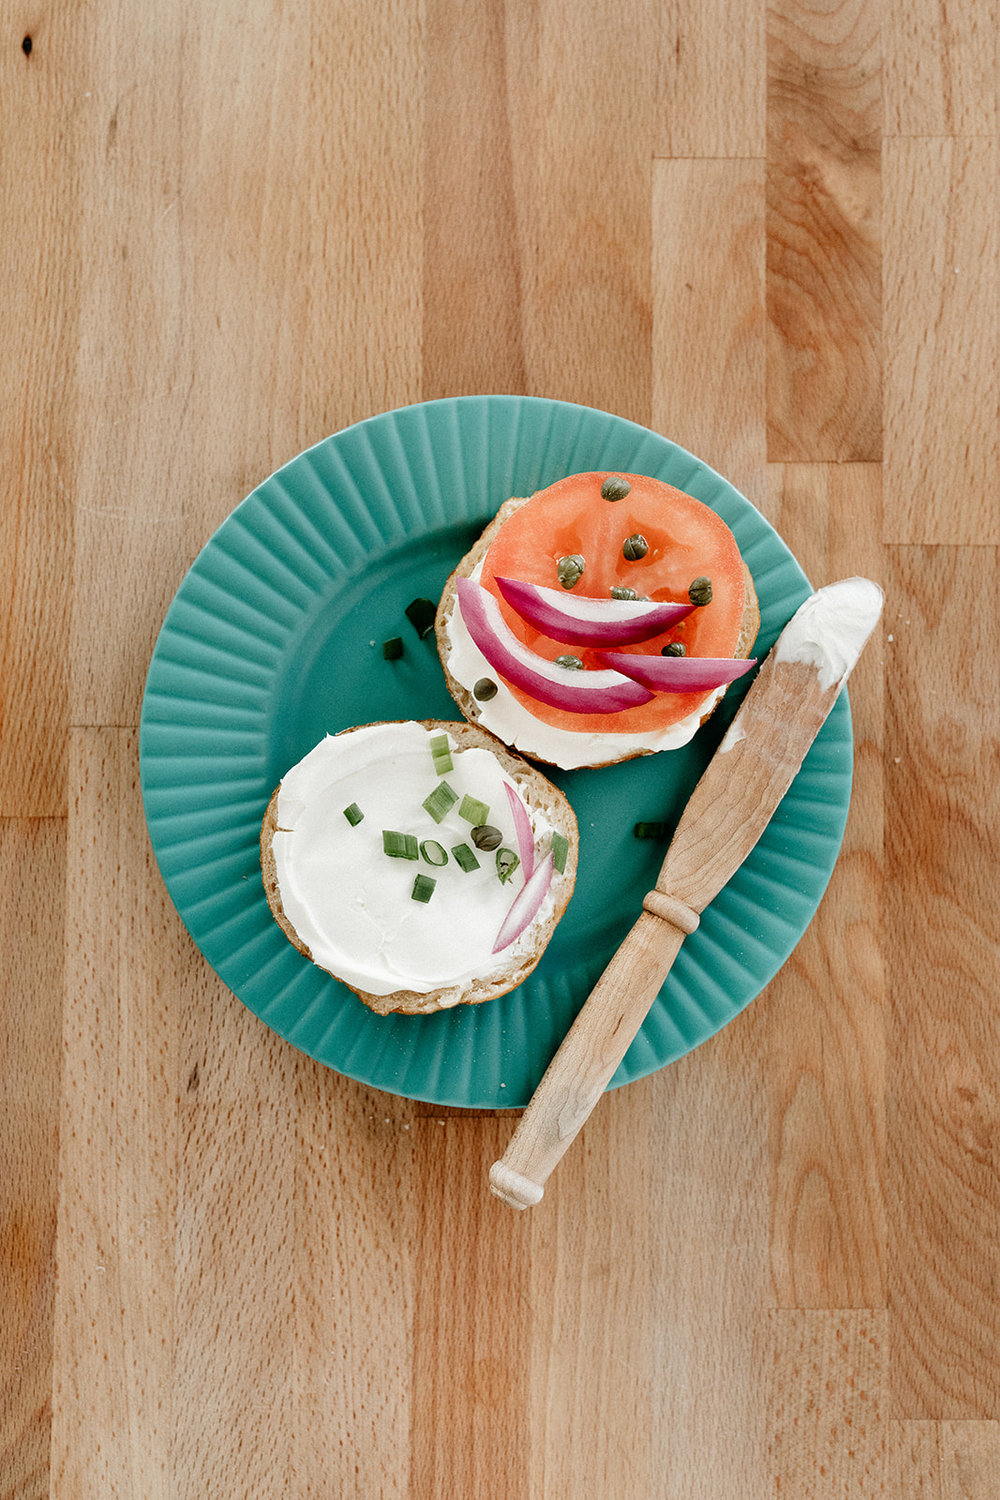
Potato bagels were my first love, years before the everything bagel became my go-to. I would get them at the Einstein Bros. in my suburb back in the early 90s when it first opened and had this cool industrial vibe and really tasty cakey black and white cookies. I loved the potato bagels because they were all around softer than the others, and there weren’t any scary toppings like poppy seeds and dried garlic looking to ruin my day. They fit comfortably into my very picky childhood and I’d usually have them with fluffy whipped butter, or plain cream cheese if I was feeling wild. I pretty much forgot about potato bagels though until my severe first trimester bagel craving brought me back to an Einstein for the first time in forever. It was actually right around Yom Kippur I think. I’d been planning for weeks to make bagels for Yom Kippur break fast, even though I didn’t fast this year after reading mixed things on the internet about fasting while pregnant. I made my dough on a Monday, and you know the dough needs to rest overnight before you complete the process, but my craving by Monday night was soooo insane that I had no choice but to put the bagel dough to sleep and then immediately drive out to the other end of town to the Einstein to buy a bagel so that I could eat one ASAP. And I got a potato bagel because when I spotted it in the basket it made me all nostalgic and brought back my earliest bagel memories. I also chose it because as intense as my craving was, I was still in need of very bland food as to not get nauseous. This potato bagel was not as I remembered it though, it seemed skinnier and much less doughy. Or maybe it was exactly the same, and I was the one who had changed. Living in New York must have just spoiled me bagel-wise because these days when I eat a bagel I’m looking for tons of height, doughiness, and a moderate jaw workout. So although I didn’t break out in a jaw sweat in the parking lot scarfing down my bagel (ew, jaw sweat? Sorry, that just came out.), it was still good enough to hold me over until the next day when my homemade bagels came out of the oven.
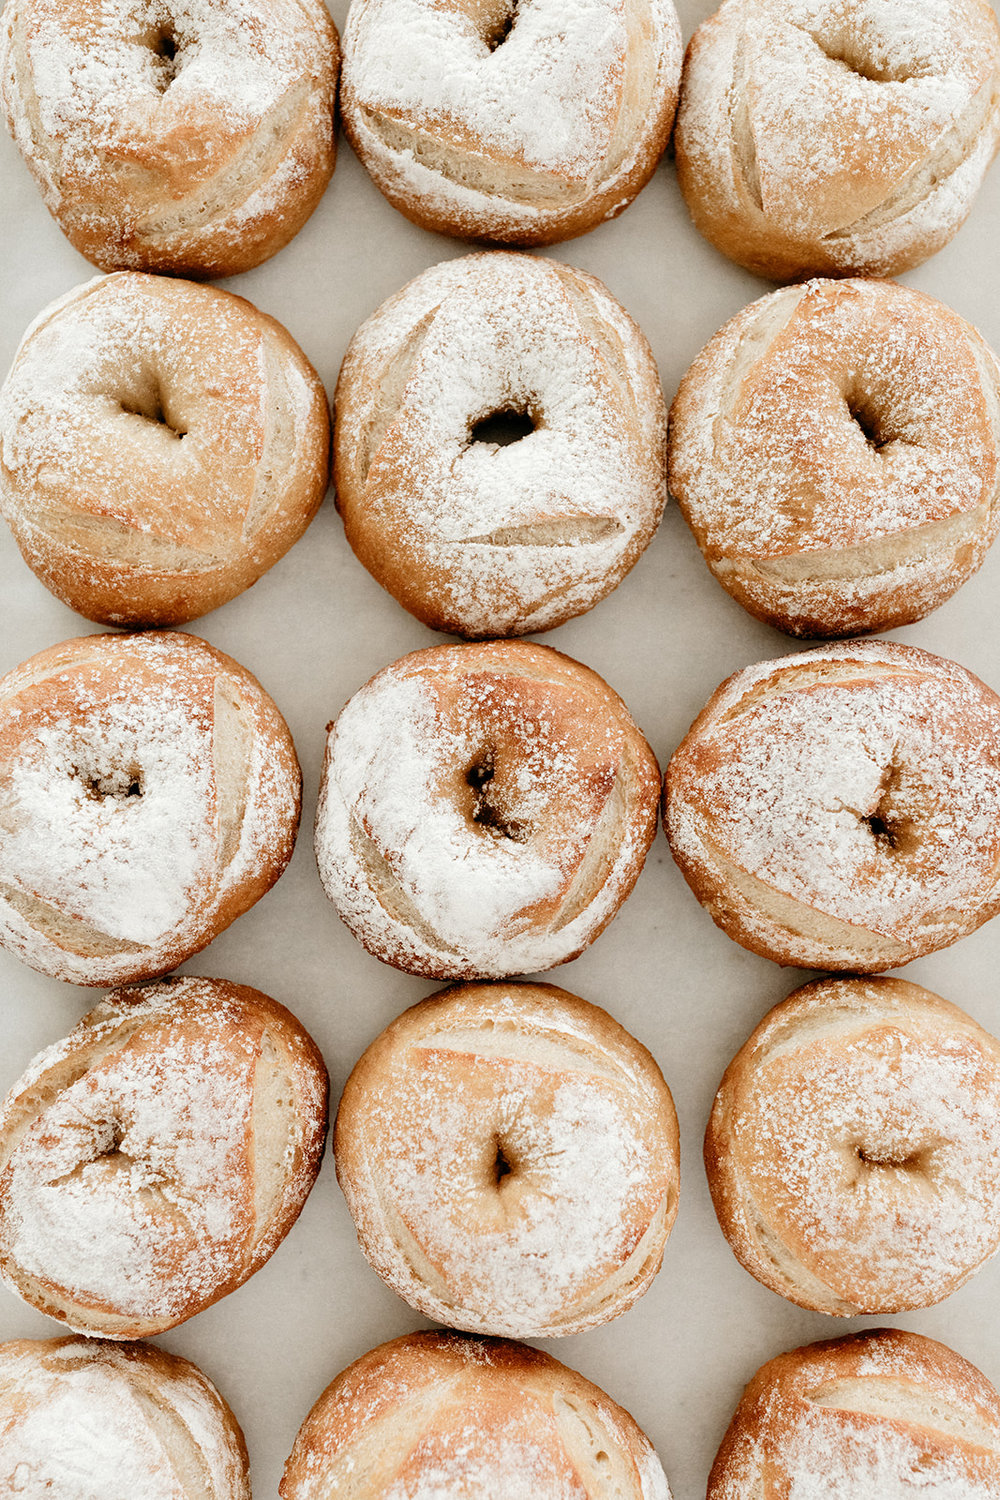
I couldn’t shake my desire for a hot mind-blowing potato bagel though! So I made these. I added riced potato to my go-to bagel recipe and learned that the defining look of the Einstein potato bagels is easy to achieve. The outcome is a deliciously chewy bagel that has a perfect amount of tenderness and the faint flavor of potato. My freezer is packed with them now, so I no longer run the risk of emergency cross-town bagel runs. Which is good because my pants don’t fit anymore, I really don’t wanna put on pants and drive across town.
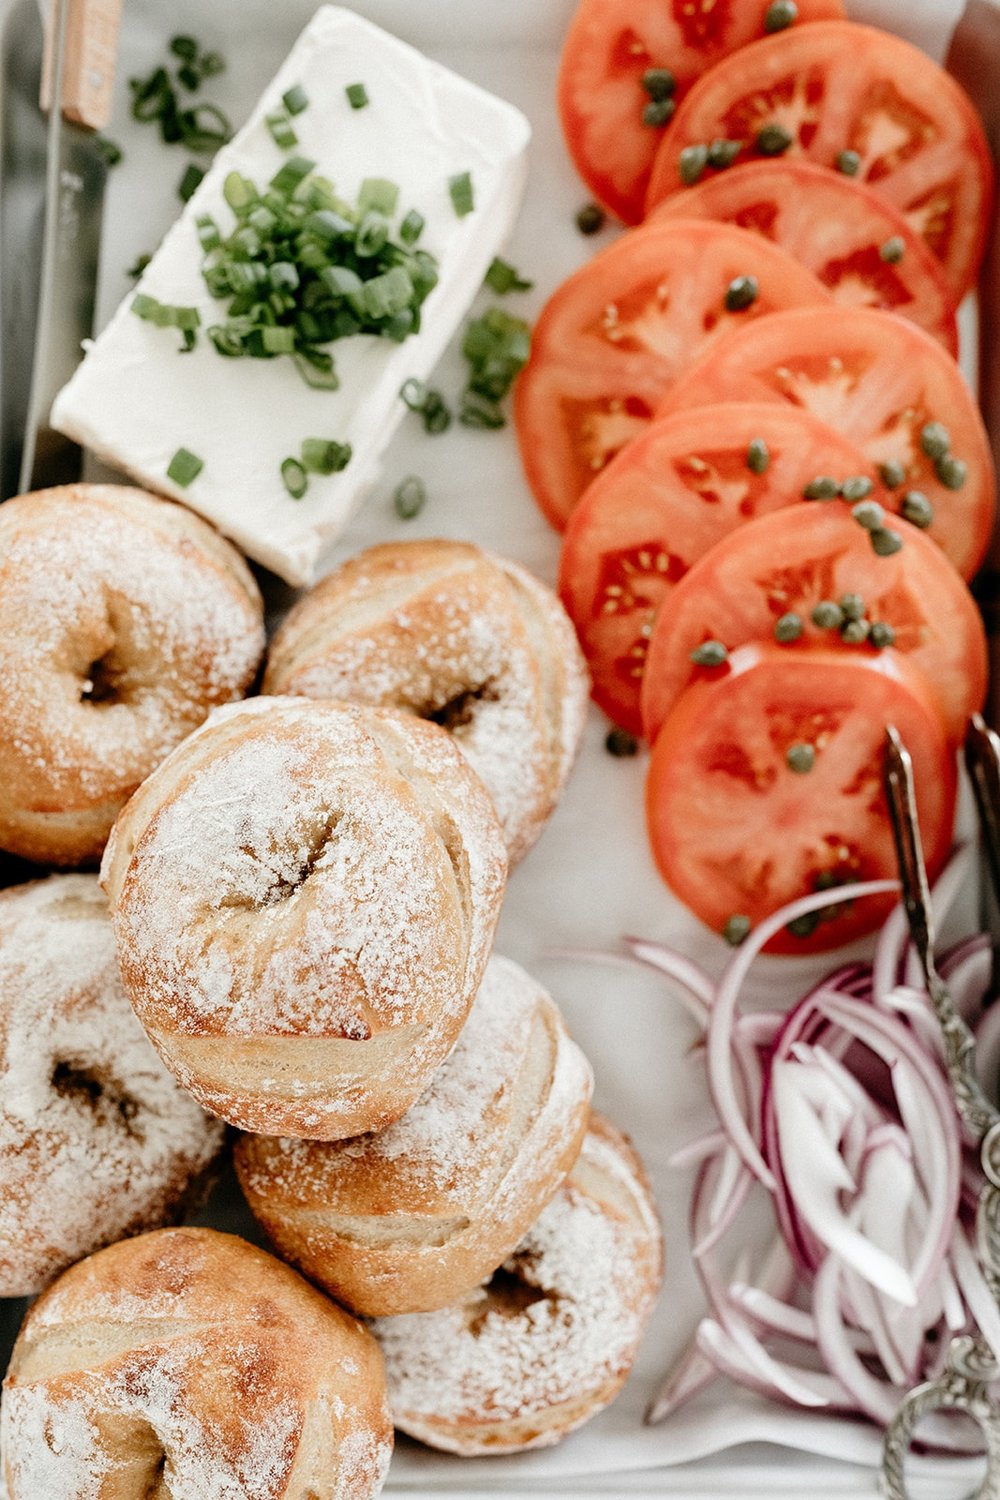
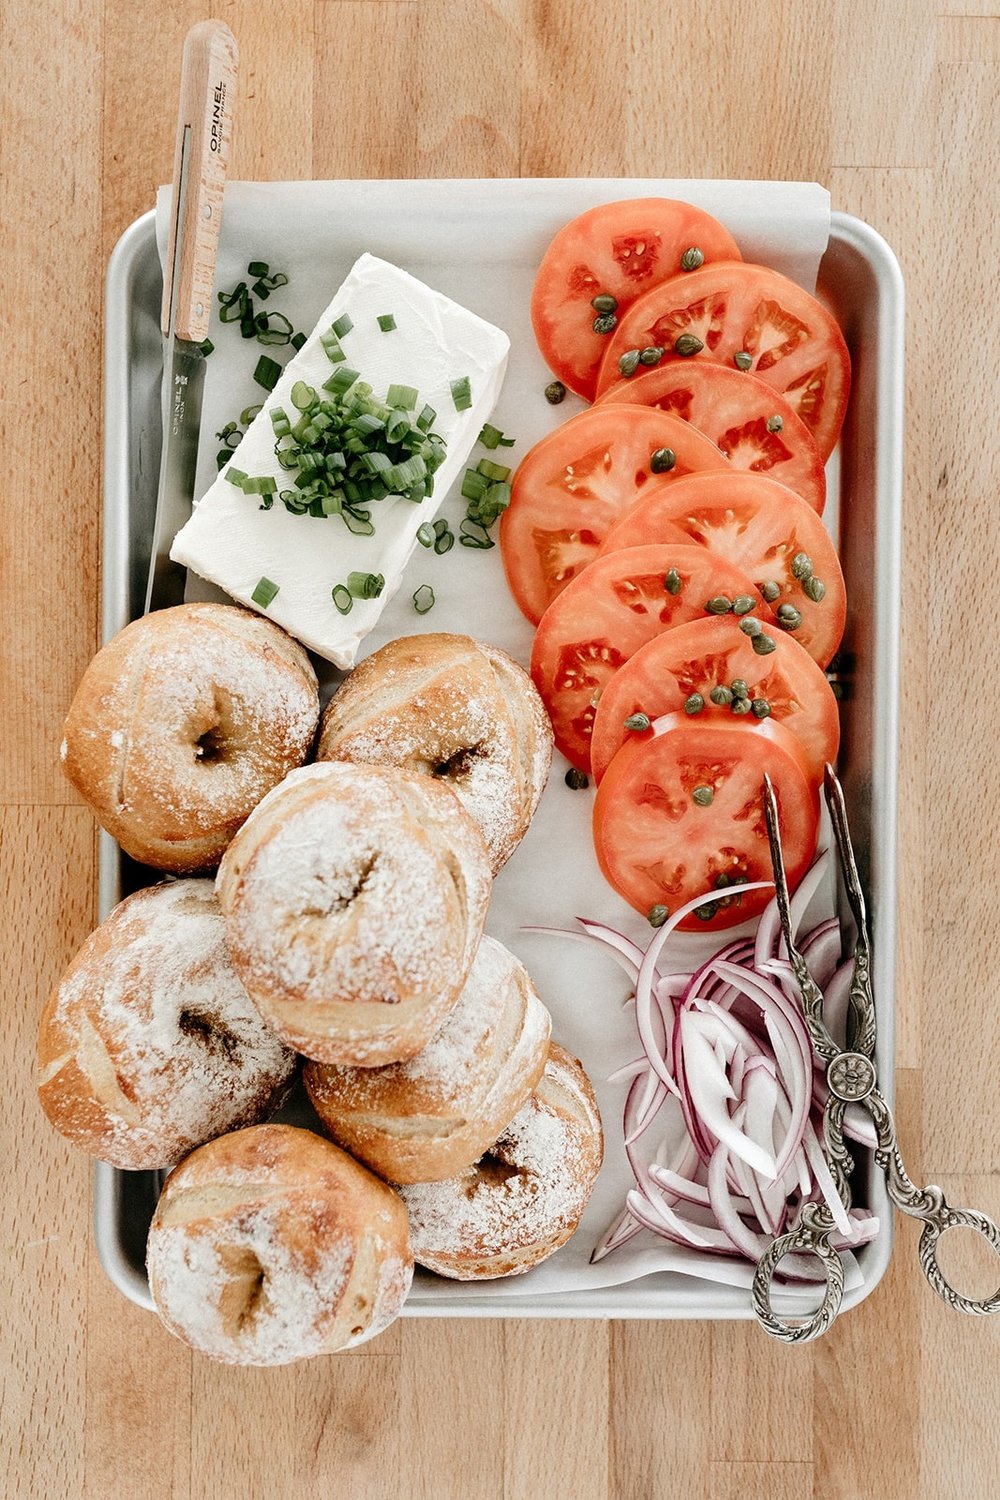
A note on bagel size: I’ve been making smaller bagels (batches of 16) because I just find that they’re less committal that way and yield a good size for breakfast with a side of green smoothie or lunch with a side salad. Or first dinner that leaves you room for second dinner. That’s what’s pictured. If you’re looking for larger bagels, go ahead and make 12.
For more bagel talk and a tutorial video, check out my everything bagel post.
Potato Bagels
makes 16 small-ish bagels or 12 large-ish bagels
Ingredients
12 oz peeled russet potatoes, cut into 1” cubes
1/2 c (118ml) cool water
2 1/4 tsp active dry yeast
1 tsp + 2 tb (25g) brown sugar, divided
6 c (780g) high gluten flour, plus more for dusting
1 tb kosher salt
2 1/2 tb (54g) barley malt, divided
1 tb baking soda
Clues
Place the chopped potato in a large pot and cover it with water. Bring to a simmer and cook until a fork pokes easily into the potato, begin checking for doneness at about 10 minutes. Drain the potato, reserving 1 cup of the cooking water in a medium bowl. Rice the potato and set it aside. Add the 1/2 cup cool water to the bowl with the hot cooking water, the two temperatures of these waters should even out to warm (about 105º-110ºf), if it’s too cold, microwave it a little, or if it’s too hot, let it sit for a few minutes to cool. Add the yeast and the 1 teaspoon of brown sugar, give it a little swirl and let it sit for about 5 minutes, until foamy on top.
In a large bowl or bowl of stand mixer fitted with a dough hook, combine the flour, salt, and remaining 2 tablespoons of brown sugar. Add the mashed potato, yeast mixture, and 1 1/2 tablespoons of barley malt and mix to form a stiff dough. Knead in the stand mixer or turn onto a floured surface and knead by hand for 7-10 minutes, until smooth and slightly sticky, adding additional flour if the dough is sticking to the bowl or too sticky to handle. Transfer to a large oiled bowl, cover with plastic wrap, and refrigerate overnight.
When ready to shape, let the dough sit at room temperature for an hour and then turn it out onto a clean work surface. Divide it into 12 or 16 equal parts (see notes about sizing) and stretch them into smooth balls, making sure to seal any dough seams well. Shape the bagels by sticking your thumb through the center of each ball and using your fingers to gently stretch a 2” hole. Cover the bagels with a towel and let rise for 15 minutes.
Meanwhile, preheat the oven to 450ºf and line 2 baking sheets with parchment paper and grease them well. Bring a large pot of water to a boil and add the baking soda and remaining tablespoon of barley malt. Working with 3 or 4 bagels at a time as to not crowd the pot, boil them for 1 minute on each side (use a timer for this). With a slotted spoon or spatula, lift them out of the water, allowing excess water to drip off, and then transfer them to the baking sheets, spacing them about 2 inches apart. (If making 16 bagels, you will likely need to bake a third pan of bagels, which you can do after the first 2 pans come out of the oven.)
With a serrated knife, make 3 cuts in a triangle shape on top of the bagels and then dust them lightly with flour. Bake the bagels for 10 minutes, switch racks and rotate the pans 180º, and bake for 5-8 more minutes, or until golden brown. Let cool slightly and enjoy!
Leftovers should be cooled fully, stored in the freezer in plastic bags, and reheated in the toaster. Slice them before freezing if you’d like so you can put them directly from the freezer into the toaster.
Enjoy!

-yeh!
photos by chantell and brett!
It’s increasingly difficult to get consensus on what makes the most healthful diet, but I think we can all agree that eating more nutrient-dense plants after an overly-indulgent holiday season is a positive thing. Putting a handful of new, veg-centric recipes into rotation this time of year can help move the needle in the right direction. Hopefully this will provide a bit of inspiration! Many of the recipes are easily adaptable, and weeknight friendly. Enjoy!
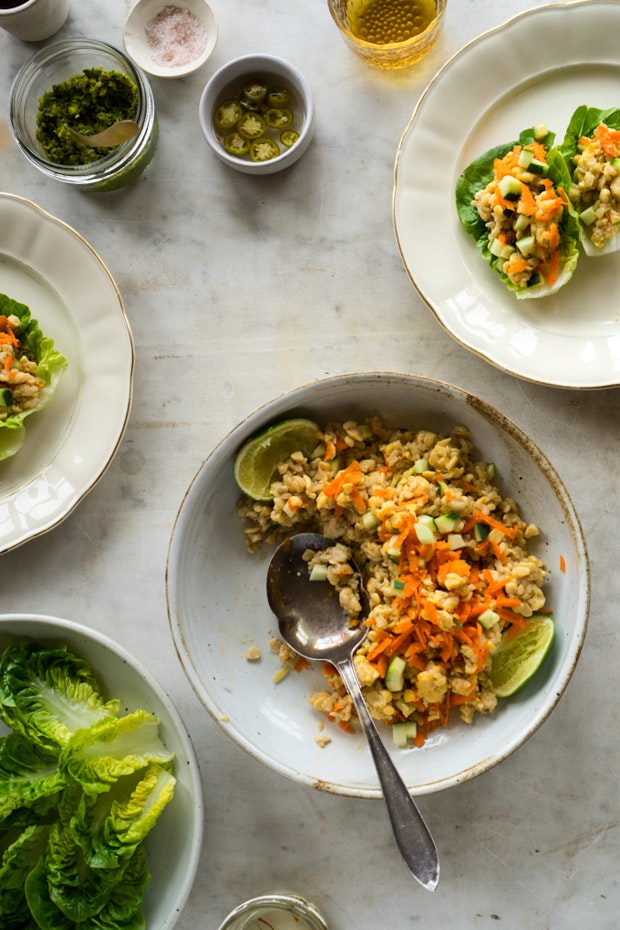
1. Garlic Lime Lettuce Wraps – I love these! Ginger and garlic tempeh rice, folded into lime-spiked lettuce wraps with lots of herbs, cucumber, and carrots. A one-pan meal that comes together in no time! Get the recipe here.
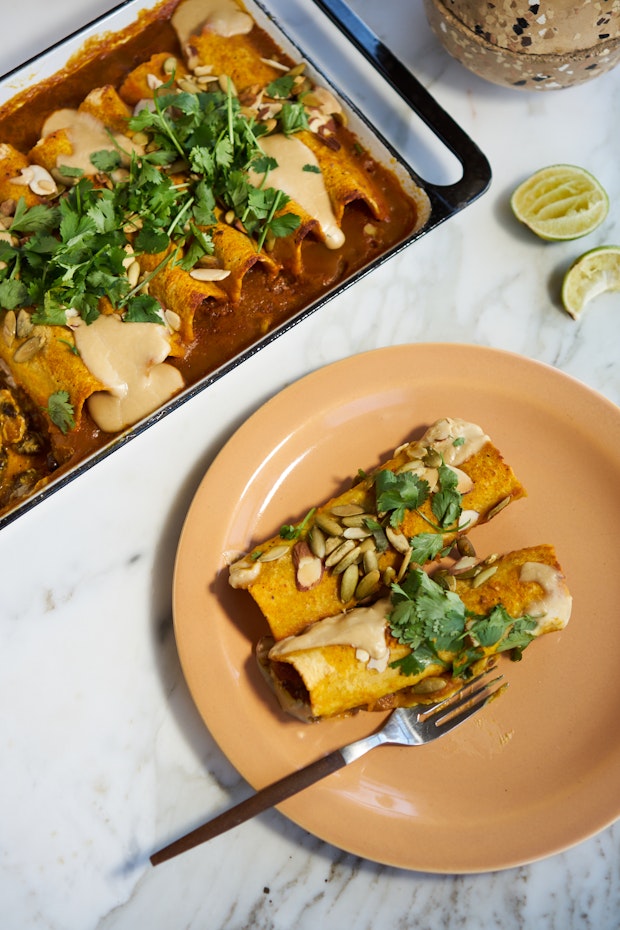
2. Quick Vegan Enchiladas with Sweet Potato Sauce – These are knock-out delicious, in the oven in less that ten minutes, and a healthful alternative to all the heavy cheese versions out there. With black beans, sweet potatoes, and a stealthy turmeric boost.Get the recipe here.
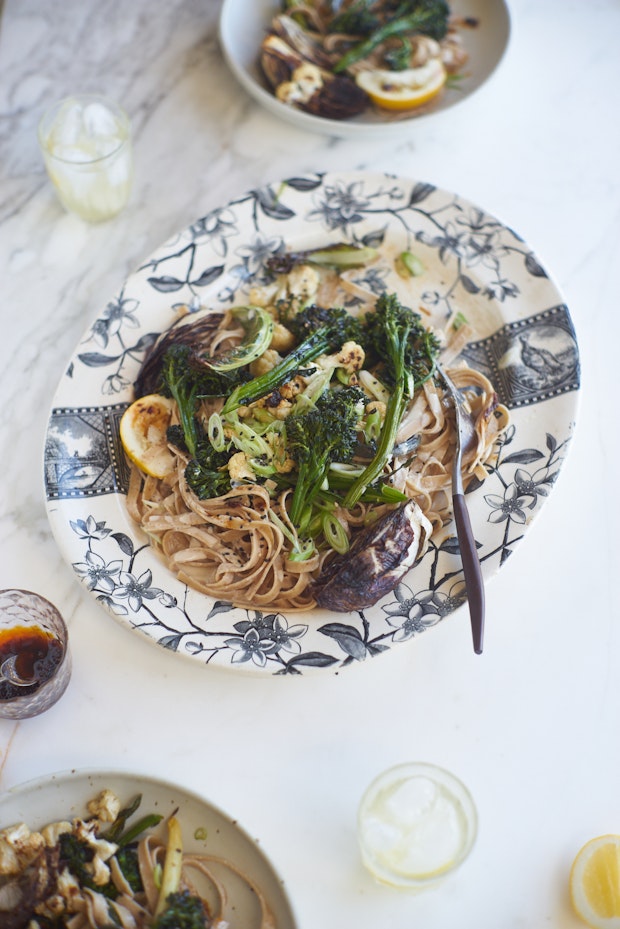
3. Spicy Tahini Noodles with Roasted Vegetables – A weeknight winner! Make a simple, thinned-out tahini sauce, roast some vegetables while your pasta water is coming to a boil, toss and serve on one platter. If you like those old-school Chinese restaurant spicy peanut noodles, these are sort-of their tahini slathered distant cousinsGet the recipe here.
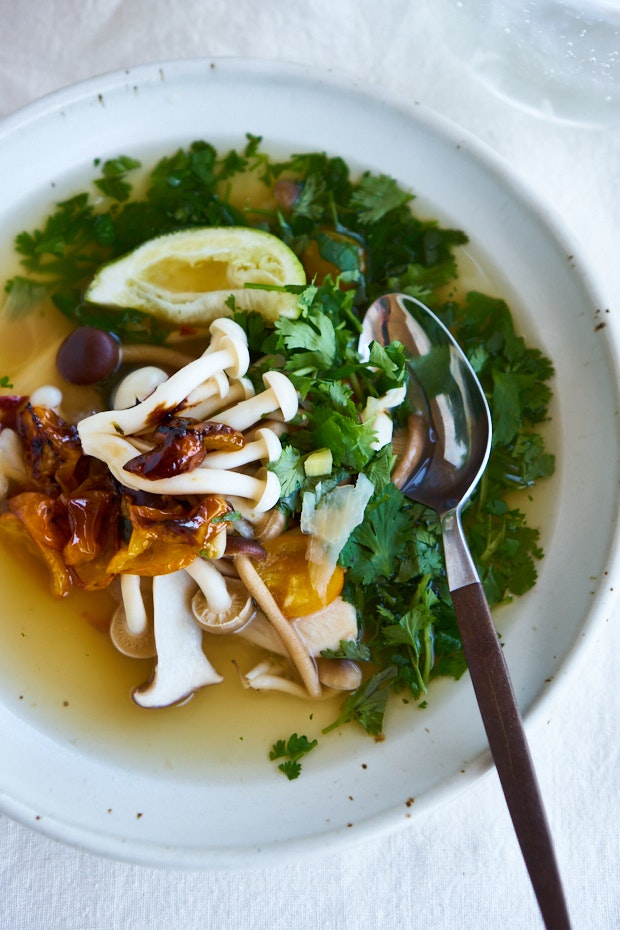
4. California Tom Yum Soup – The perfect antidote to holiday over-indulgence. This version is a distant relative of the vibrant, brothy tom yum soup you likely know and love. Get the recipe here.
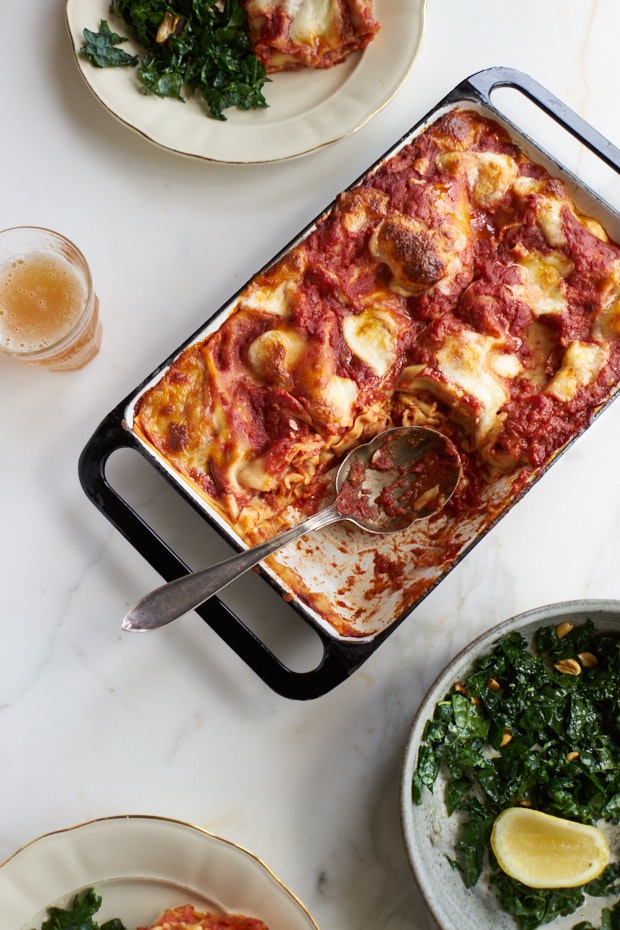
5. Last Minute Red Lasagna – A true weeknight lasagna. No pre-cooking sauces, no pre-cooking noodles. You, literally, stir the first five ingredients together into a vibrant crushed tomato sauce, and start layering. Also, it isn’t a cheese bomb.Get the recipe here.
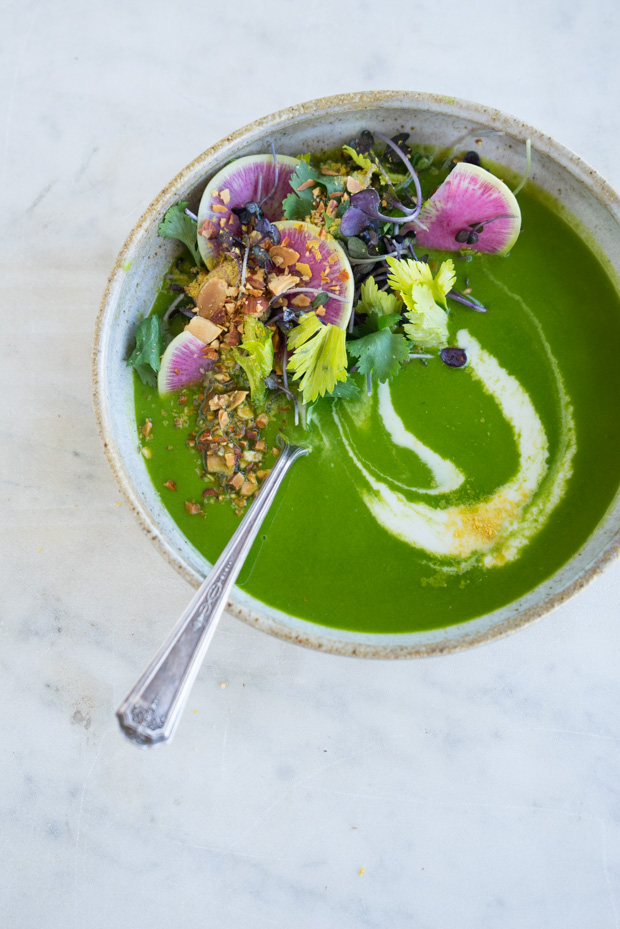
6. Ten Ingredient Alkalizing Green Soup – Ten ingredients in a blender and you’ve got a potent, alkalizing green soup – spinach, herbs, garlic, with silky coconut cream, and some green split peas for staying power. Get the recipe here.
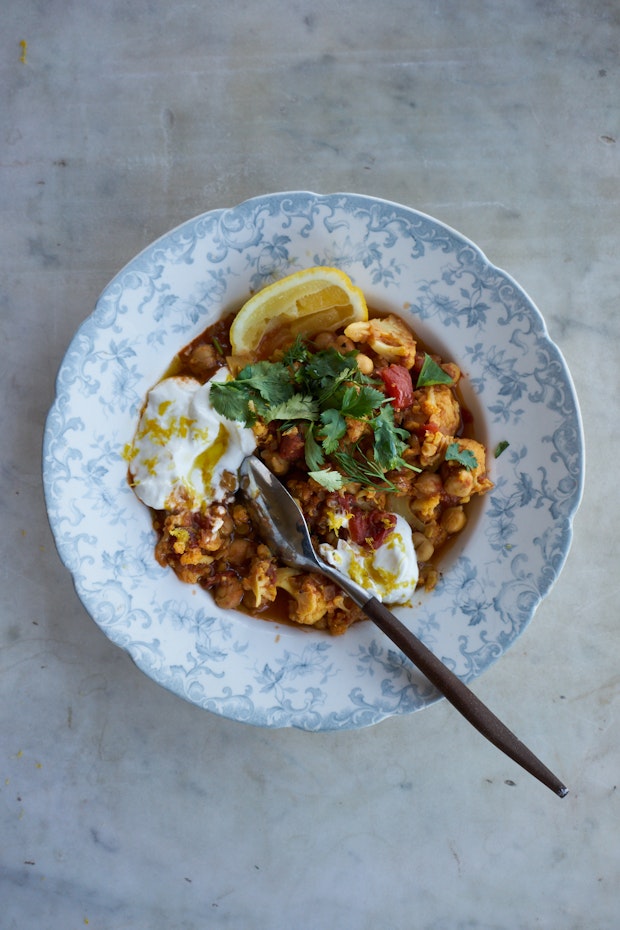
7. Chickpea Cauliflower Korma – A riff on the Chickpea Cauliflower Korma recipe in Jennifer Iserloh’s The Healing Slow Cooker – chickpeas, cauliflower, combined with a not-shy simmer sauce. (conventional / Instantpot versions) Get the recipe here.
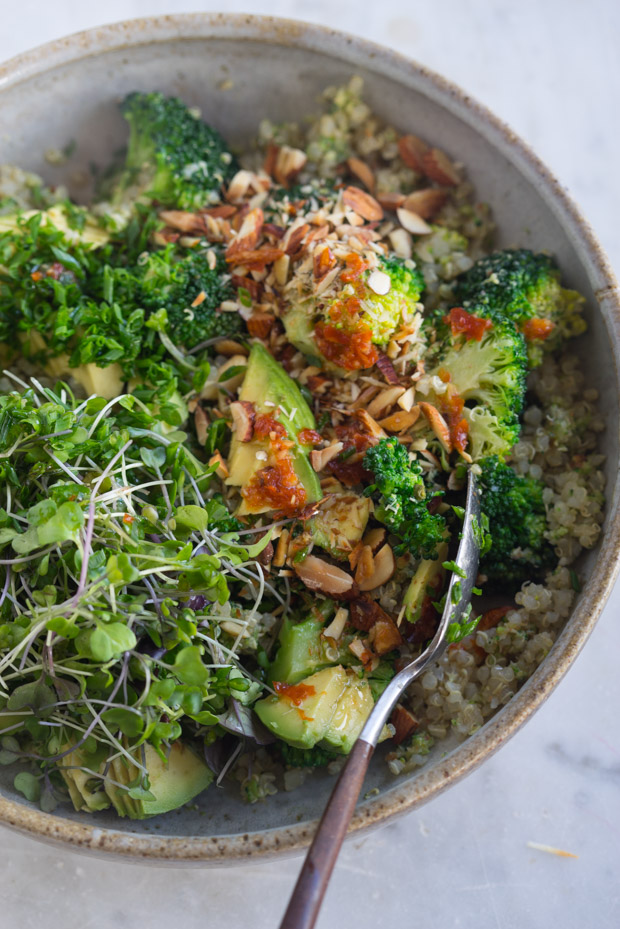
8. Vibrant, Vegan Double Broccoli Buddha Bowl – Made with seven ingredients on green overdrive. You double up on broccoli through a coconut green curry pesto and florets, then toss with a quinoa base. Get the recipe here.
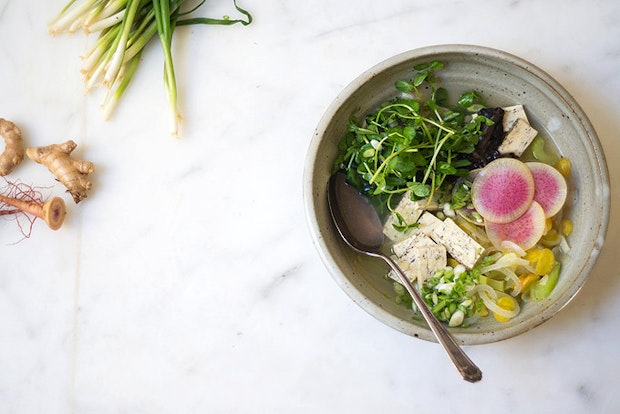
9. Immunity Soup – A soup built on a monster white pepper broth. White pepper with jolts of ginger, and stabs of garlic – clear and strong topped with tofu, mushrooms, watermelon radish, and lots of green onions. Get the recipe here.
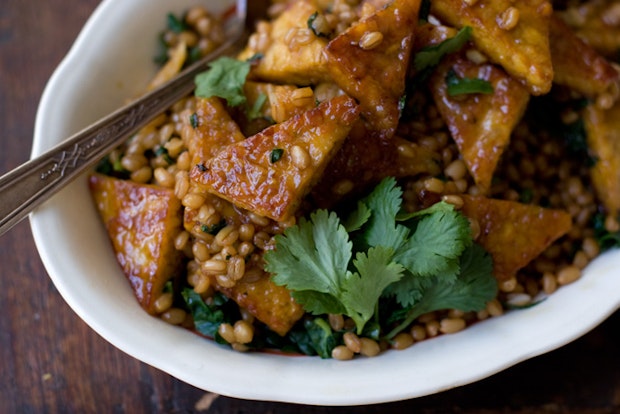
10. Orange Pan-glazed Tempeh – The best tempeh recipe I’ve highlighted to date – it features a simple ginger and garlic-spiked orange glaze that plays of the nutty earthiness of the pan-fried tempeh beautifully. Get the recipe here.
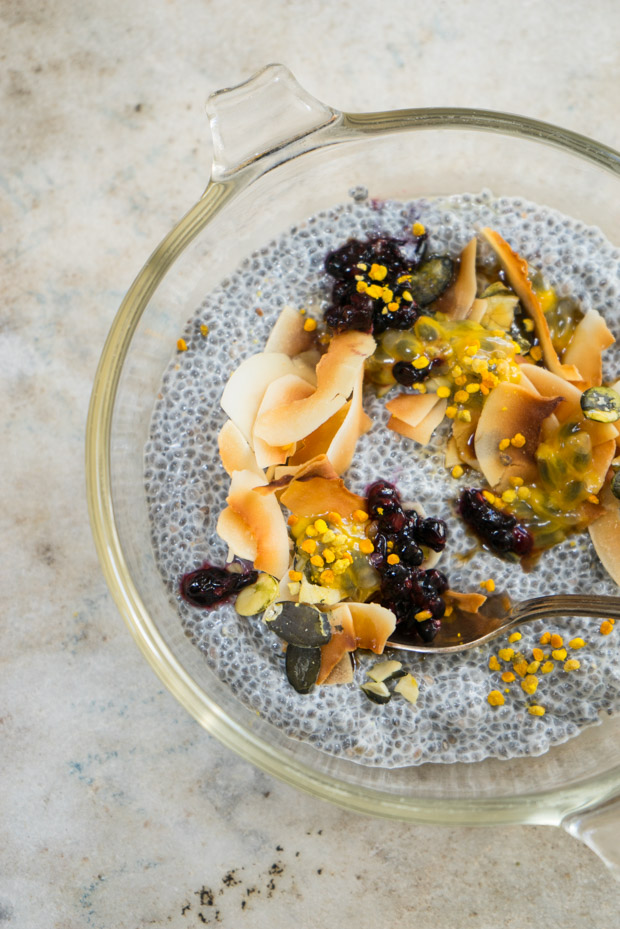
11. Chia Breakfast Bowl – So easy, so good! Soak the chia seeds in your favorite nut milk, top with smashed berries, fresh passionfruit juice, pepitas, and big flakes of toasted coconut. A bit of bee pollen adds a boost and some pretty. Get the recipe here.
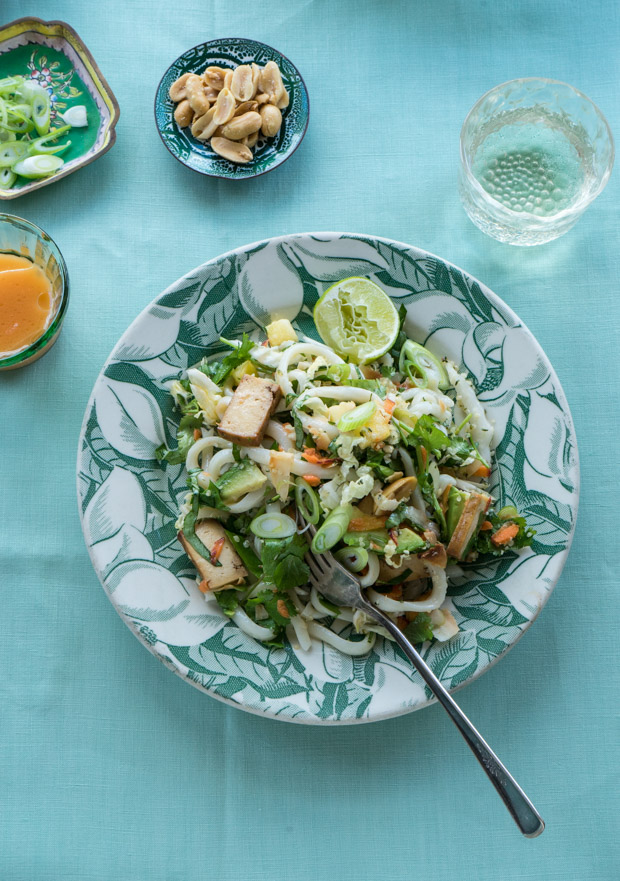
12. Sriracha Rainbow Noodle Salad – A radiant, color-flecked tangle of noodles, cabbage, shredded carrots, pickled sushi ginger, and an abundance of cilantro, basil, and scallions. It has tofu and peanuts, coconut, ginger, avocado, and hemp seeds. Get the recipe here.
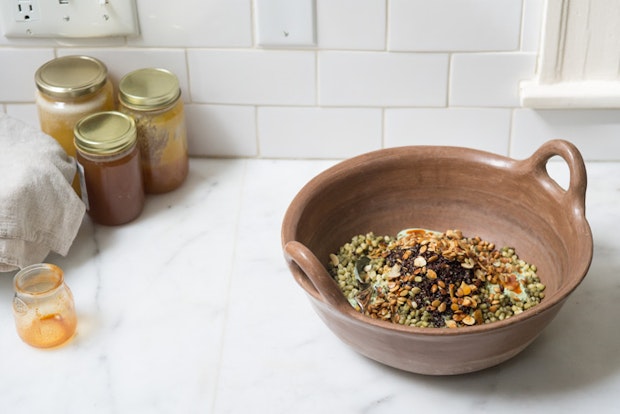
13. Mung Yoga Bowl – The kind of bowl that keeps you strong – herb-packed yogurt dolloped over a hearty bowl of mung beans and quinoa, finished with toasted nuts and a simple paprika oil. Get the recipe here.
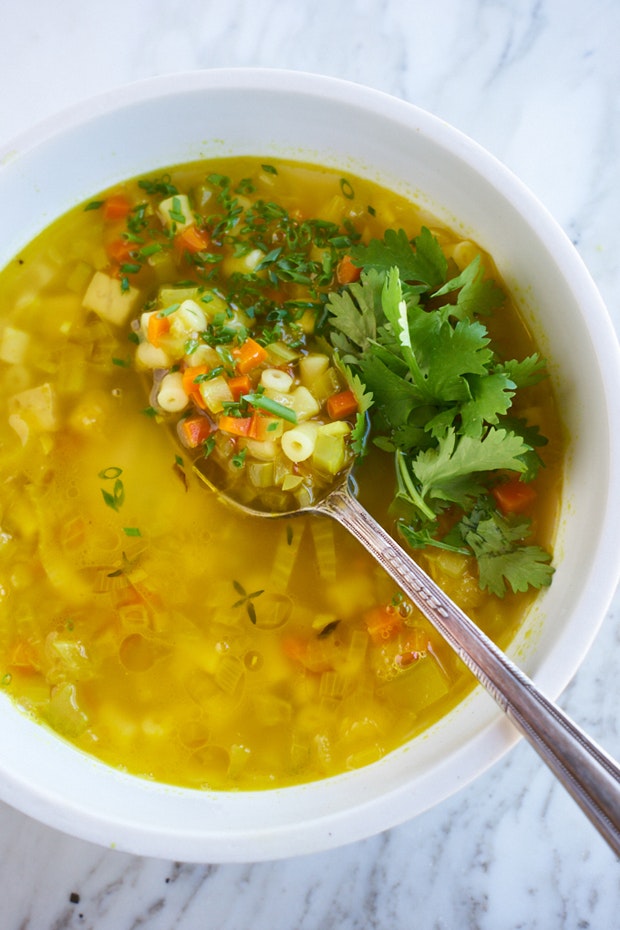
14. Vegetable Noodle Soup – This vegetable noodle soup is as simple, direct, and delicious as it gets. Vegetarian and vegans looking for an alternative to chicken noodle soup, try this! Get the recipe here.
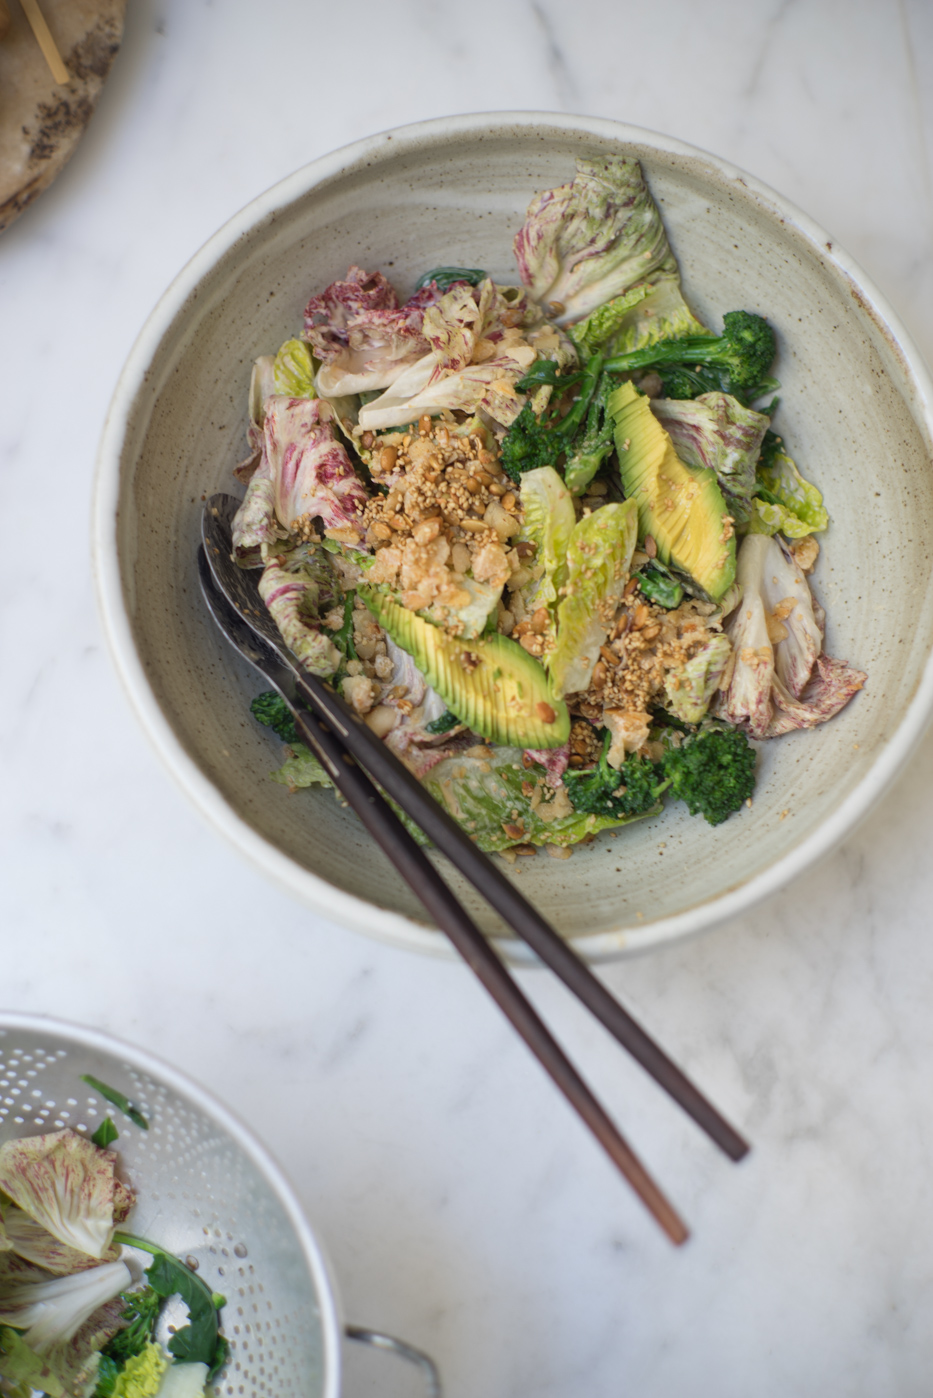
15. Anna’s California Miso Avocado Salad – So good! A California-inspired Miso, Avocado, & Bean Salad from A Modern Way to Eat, by Anna Jones. Seasonal greens and beans are tossed with an assertive, creamy miso dressing. There are crunchy seeds, and broccoli, and avocado – it all comes together into a brilliant, beautiful, feel-good salad.Get the recipe here.
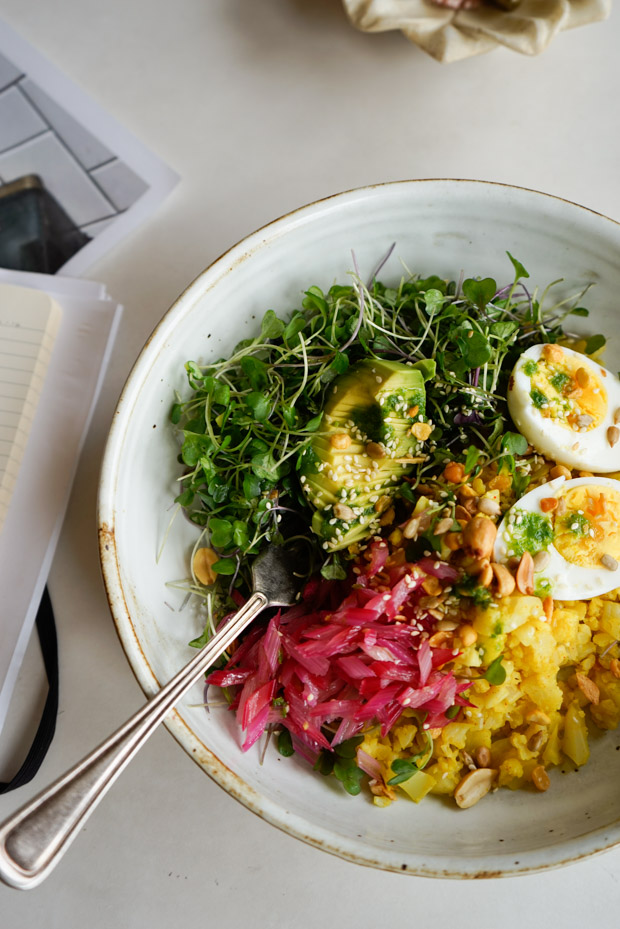
16. Rainbow Cauliflower Rice – Lightly cooked cauliflower is chopped, then tossed, with turmeric, cumin, cayenne, and a touch of ghee – add sliced avocado, hard-boiled eggs, toasted seeds, rainbow chard stems, lettuces. Get the recipe here.
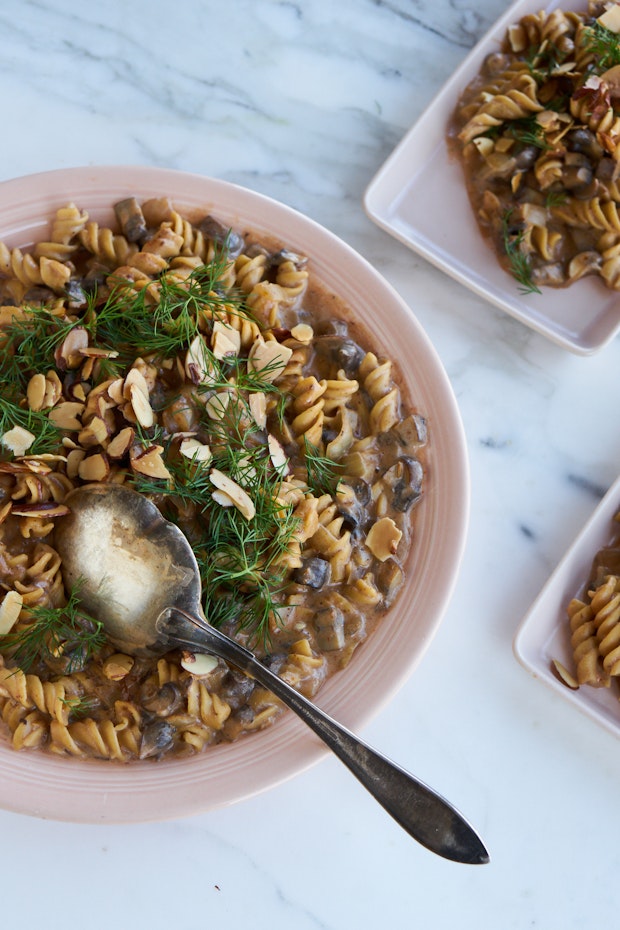
17. Mushroom Stroganoff – This fantastic vegan mushroom stroganoff is a total crowd-pleaser. You can make it in an Instant Pot, or stovetop. Made with caraway-spiked vodka, and a hearty mushroom base, you get all of what you love about mushroom stroganoff, without the all the butter and cream. Get the recipe here.
18. Winter Green Miso Paste – Keep this on hand for flash-quick, healthy meals. A herbaceous, green miso paste with some garlic bite, rounded out with lots of scallions, cilantro, ginger, and some rosemary. Plus ten simple ways to use it. Get the recipe here.
Continue reading 18 Recipes to Kick off your Post-Holiday Reset on 101 Cookbooks
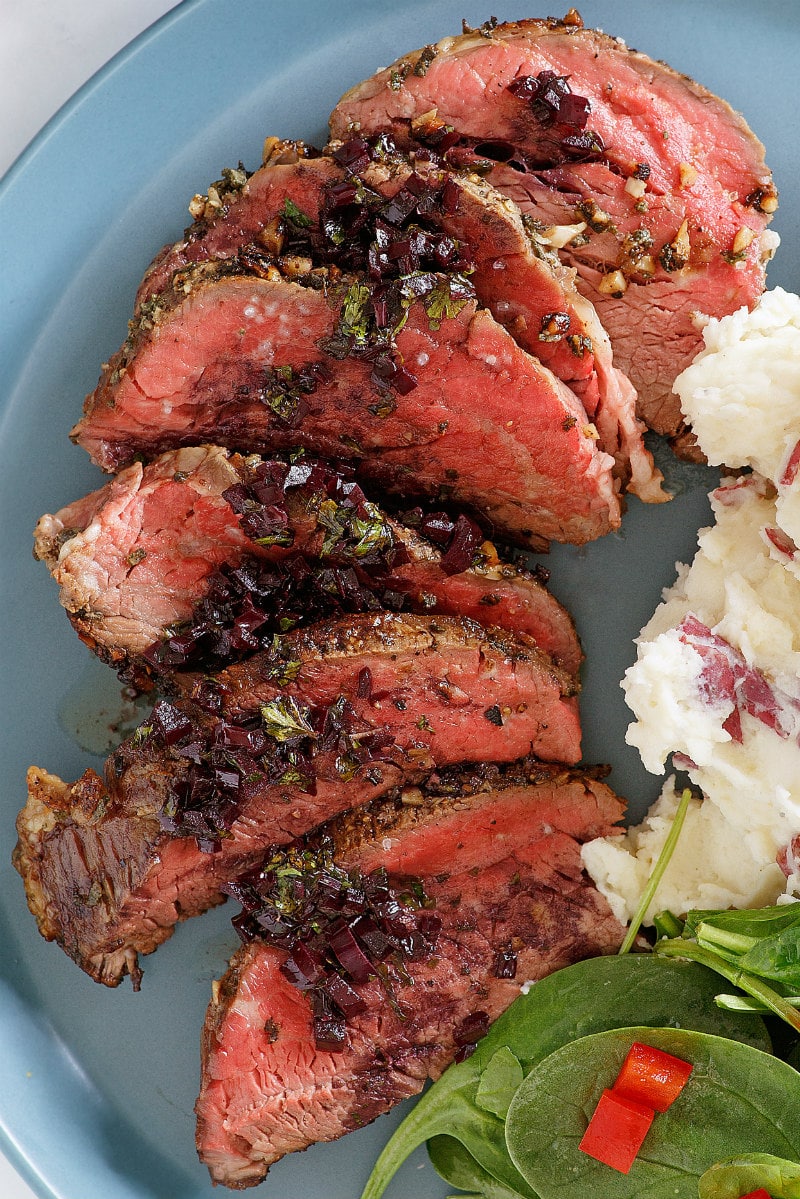
Roasted Beef Tenderloin is topped with a delicious Merlot Shallot Sauce.
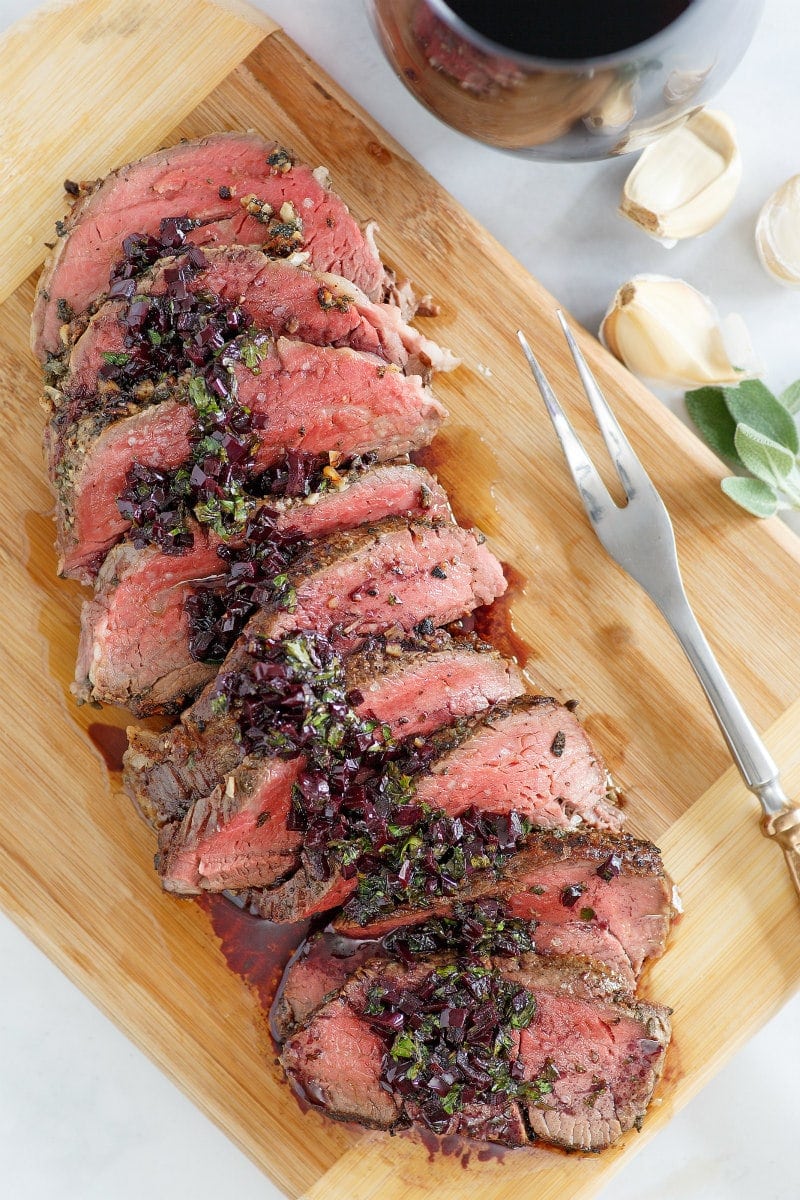
This Roasted Beef Tenderloin with Merlot- Shallot Sauce was the main dish at one of my Gourmet Club’s dinner parties when we lived in our old neighborhood in San Diego. That’s the first time I made it, and it has been made many times since. It’s very easy to make. It turns out oh-so-tender and delicious. Everyone enjoys this recipe.
Beef tenderloin is such a popular cut of meat because it’s incredibly tender and rich. It’s an expensive splurge, so plan to make it for a special meal. Look for the tenderloin on sale! Plan on 4 servings per pound of tenderloin.
Do you need a meat thermometer for this recipe?
Yes, you definitely should have a meat thermometer on hand for making Roasted Beef Tenderloin. It’s pretty impossible to know where the meat is in the cooking process unless you have something measuring the progress in the center of the tenderloin. I like to use this meat thermometer (or one that is similar) for making tenderloin and roasts. It’s great because the temperature monitor sits outside the oven, and a long cord allows you to keep the probe inside the center of the meat for the entire cooking process.
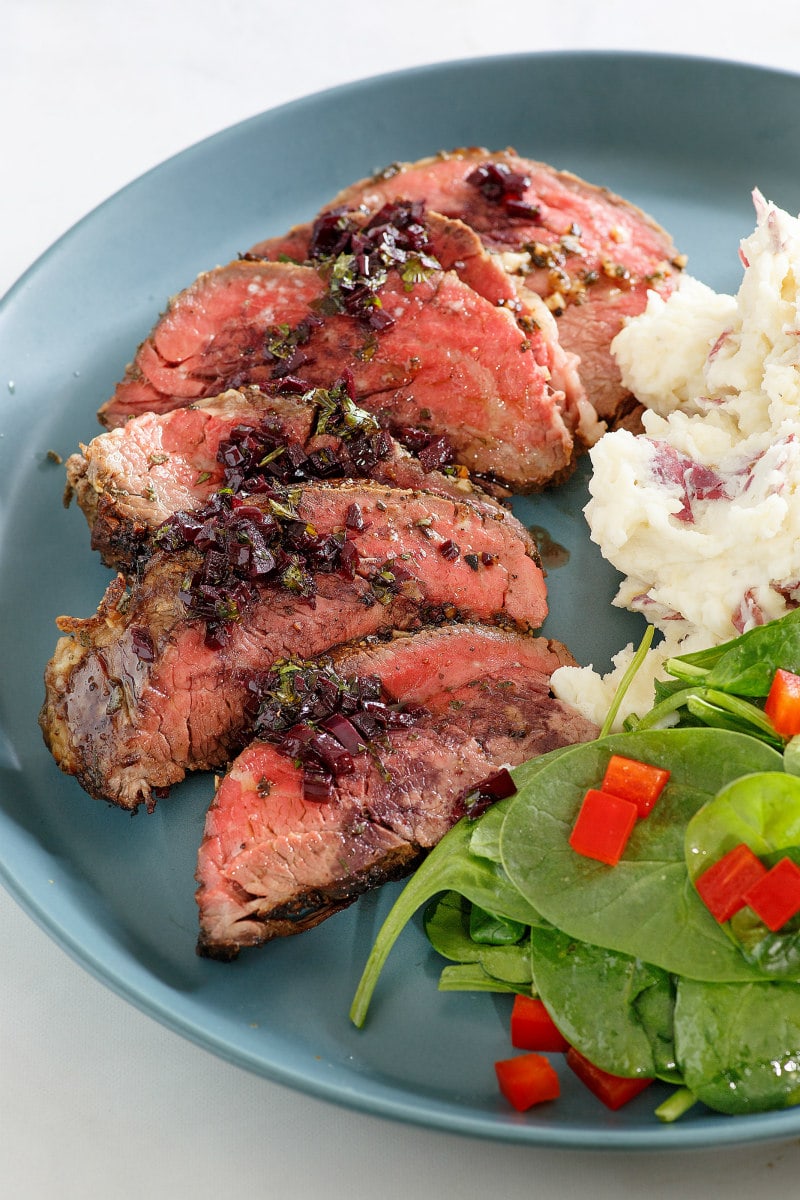
What’s the best temperature to cook beef tenderloin?
There’s a pretty simple guide for what temperatures are best for roasted beef tenderloin. 140°F is generally the most common temperature to pull it out of the oven. It will increase to 145°F (medium rare) after standing at room temperature. If you prefer it not-so-rare, pull it out at 155°F, and it will increase to 160°F (medium) after standing.
Merlot- Shallot Sauce
Roasted Beef Tenderloin is wonderful eaten on its own. It’s so incredibly tender and flavorful, and everyone will love it. Add a simple sauce on top though, and it becomes even more amazing! This Merlot-Shallot Sauce is made sauteeing shallots, adding in wine and cooking until it’s reduced by half. This means the wine will have a much richer flavor. Beef broth is added in, and it’s reduced a bit more. Butter and parsley are swirled in at the end. This is spooned over servings of the roasted beef tenderloin. Delicious!
What kind of red wine is best for this recipe?
The sauce recipe here calls for Merlot. If you have Merlot, use that. You don’t need to buy an expensive brand. If you don’t want to use Merlot, you can substitute another medium-bodied red like Pinot Noir, Sangiovese, or a lighter-style Cabernet.
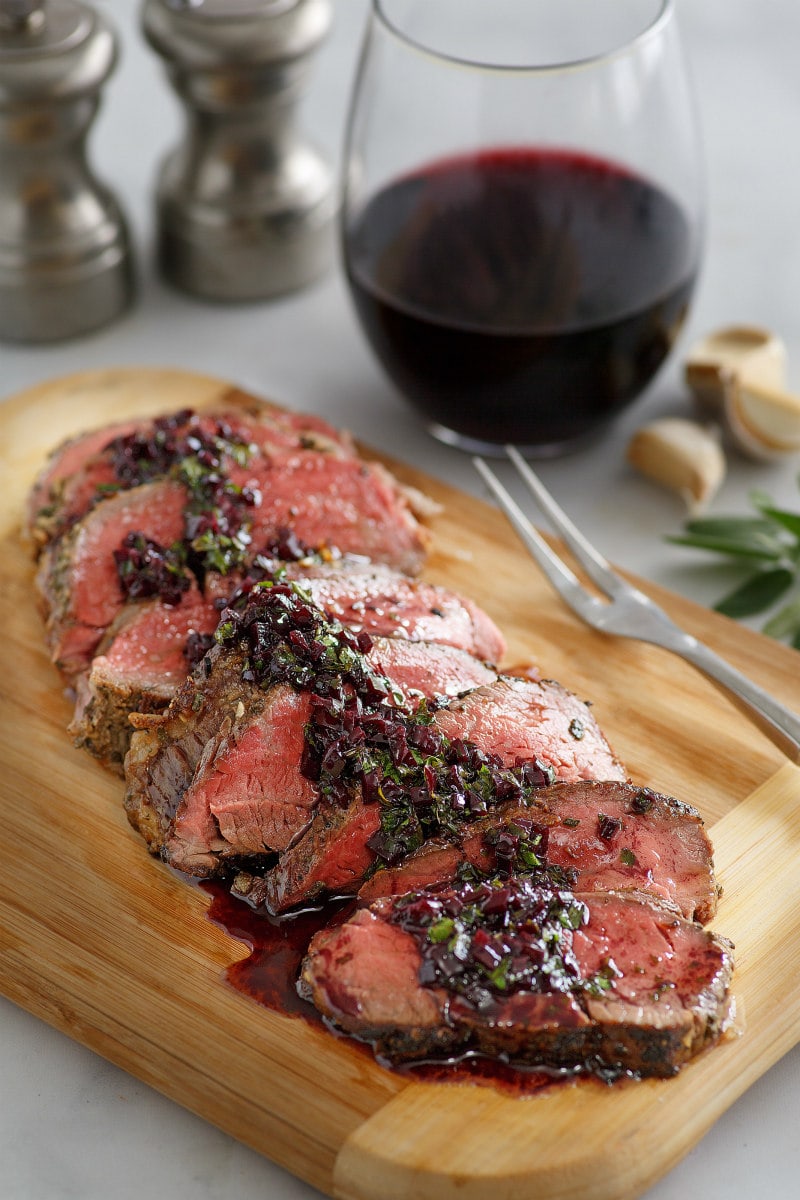
This recipe was originally published in Cooking Light sixteen years ago. It has been one of my favorite roasted beef tenderloin recipes since trying it for the first time from the magazine. Enjoy!
If you’re looking for recipes that would good sides to roasted beef tenderloin, here are a few I’d suggest:
- Brussels Sprouts with Bacon and Hazelnuts
- Mushroom and Potato Gratin
- Green Beans with Mushrooms and Shallots
- Easy Garlic Butter Roasted Mushrooms
- Caramelized Onion and Horseradish Mashed Potatoes
- Cauliflower Bacon Gratin
- Sauteed Asparagus with Butter and Parmesan
- Easy Creamed Spinach
Roasted Beef Tenderloin with Merlot- Shallot Sauce
This roasted beef tenderloin is topped with an amazing sauce!
BEEF TENDERLOIN:
- 1/3 cup finely chopped fresh sage
- 1 tablespoon freshly ground black pepper
- 3 tablespoons minced garlic
- 2 teaspoons Kosher salt
- 2 1/2 pounds center cut beef tenderloin
SAUCE:
- 1/3 cup finely minced chopped shallots
- 1 1/2 cups Merlot ((or another red wine))
- 1 1/2 cups low-sodium beef broth
- 1 teaspoon butter
- 3 tablespoons chopped fresh parsley
- 1/4 teaspoon Kosher salt
PREPARE THE BEEF TENDERLOIN:
-
Preheat the oven to 350°. Heat a large nonstick skillet coated with cooking spray over medium-high heat. In a small bowl, combine the sage, pepper, garlic, and salt; rub over the tenderloin. Add the tenderloin to the pan; cook 6 minutes, lightly browning on all sides.
-
Insert a meat thermometer into the thickest portion of the tenderloin. Cover the handle of the pan with foil. Bake at 350° for 25 minutes or until thermometer registers 135- 140° (medium-rare) or desired degree of doneness. Place the tenderloin on a cutting board; cover loosely with foil. Let stand 15 minutes. (Temperature of tenderloin will increase 5° upon standing.)
PREPARE THE SAUCE:
-
Heat a pan coated with cooking spray over medium-high heat. Add the shallots; sauté 3 minutes or until tender. Stir in the wine. Bring to a boil; cook until reduced to 3/4 cup (about 4 minutes). Stir in the broth; cook until reduced to 1 1/4 cups (about 6 minutes). Add the butter, stirring until melted. Stir in the parsley and 1/4 teaspoon salt. Serve spooned over slices of tenderloin.
- WEIGHT WATCHERS POINTS per serving: Freestyle SmartPoints: 4, Points Plus Program: 5, Old Points Program: 5
The post Roasted Beef Tenderloin with Merlot Shallot Sauce appeared first on Recipe Girl®.
A festive occasion calls for festive cupcakes – and it doesn’t get much more festive than these Prosecco Cupcakes! The tender cupcakes have a hint of vanilla and are made with a generous splash of prosecco, perfect for getting the party started. In fact, you can use the remaining prosecco to treat yourself to a glass while you bake!
Prosecco has a lighter and often slightly fruitier flavor than champagne, even when it is dry (meaning that the prosecco itself is not sweet). Champagne will often have notes of toast, bread dough and yeast, since part of the “methode champenoise” of creating bubbles is by adding yeast and a small amount of sugar to feed it. Prosecco, by contrast, typically undergoes secondary fermentation in pressurized tanks, which tends to result in sparkling wine without those yeasty flavors (or with much less of them). All this is just a bit of background to help distinguish the two wines – and it is a long way of saying that the fruit lightness of prosecco is a nice addition to these cupcakes.
The prosecco is added directly to the batter and it will fizz a bit as you mix it in. While I often recommend using room temperature ingredients (or close to it), I have used prosecco that is cold to make this recipe without a problem – so don’t worry if your sparkling wine is already chilled. The prosecco adds a subtle fruity flavor to the batter that works well with the hint of vanilla also in the mix. It isn’t overpowering, but you’ll be able to tell the difference between these cupcakes and plain vanilla when they’re side by side.
I finished the fluffy, tender cupcakes off with a buttercream that is also made with a splash of prosecco, which highlights the flavor of the prosecco in the batter. Of course, the cupcakes should be finished off with some fancy sprinkles to dress them up!
If you want to make a version of these cupcakes that doesn’t have any alcohol in them, you can substitute sparkling cider (e.g. Martinelli’s) for the prosecco. While it is slightly sweeter, cider works surprisingly well in this recipe and gives the cupcakes a hint of apple flavor that is delicious – although I still usually opt for the prosecco version myself. Either way, they’re perfect for a party.
Prosecco Cupcakes
1 1/4 cups all purpose flour
1 tsp baking powder
1/4 tsp salt
3/4 cup sugar
1/3 cup butter, room temperature
1 large egg
1 egg yolk
1/2 tsp vanilla extract
1/2 cup prosecco
Preheat oven to 350F. Line a 12-cup muffin pan with paper liners.
In a small bowl, whisk together flour, baking powder and salt.
In a large bowl, cream together butter and sugar until light and fluffy. Beat in egg and egg yolk, followed by vanilla extract. Stir in one third of the flour mixture, followed by half of the prosecco. Stir in another third of the flour mixture, followed by the remaining prosecco. Stir in the remaining flour mixture and mix just until no streaks of dry ingredients remain visible.
Divide batter evenly into prepared muffin cups
Bake for 16-18 minutes, or until a toothpick inserted into the center of the cupcakes comes out with only a few moist crumbs attached. Transfer cupcakes to a wire rack to cool completely before frosting.
Makes 12
Vanilla Prosecco Frosting
3/4 cup butter, room temperature
3 tbsp prosecco
1 tsp vanilla extract
pinch salt
3-4 cups confectioners’ sugar
In a large bowl, beat butter until smooth. Blend in prosecco, vanilla, salt and 2 cups confectioners’ sugar. Gradually blend in remaining confectioners’ sugar until a thick, smooth frosting forms. Pipe onto cooled cupcakes
Another year, come and gone.
Which means, it’s time to rehash and review the best recipes of 2018! (And if you want to take a trip down memory lane, you can check out the most popular posts from 2017, 2016, 2015, 2014, 2013, 2012, 2011, 2010 and 2009 (phew).
This post is always a fun one to make, as often times the most popular posts will surprise even me! It’s also interesting to see just how differently things perform on the blog versus on Instagram.
2018 was a year of growth… literally. I feel like my posts grew longer and my standards grew higher, which led to fewer published posts than any previous year. But what do they say, quality over quantity, right? I find myself testing and retesting recipes more, reshooting dishes more often because the first batch of photos just doesn’t meet my standards. Am I getting pickier with age? It sure seems so. And yet, I feel like this year’s batch of recipes include some of my best yet.
I’m excited for what 2019 has in store, including a brand new look for this little blog of mine (now you know how I spend my Christmas vacation, lol). I’m full of delicious ideas, in fact I’ve already shot a few recipes for January that I know you’ll just love! I’m also planning some non-food posts including a look back at our trip to Portugal this past fall (one of my favorite places I’ve ever traveled) as well as lots more free downloads and printables for your enjoyment! I’ve also made it a personal goal to me better about sending out my newsletter regularly (so if you’re not subscribed, definitely get on board as I plan to send out some exclusive content and recipes that only email subscribers will receive!)
Lofty goals, sure, but I’m ever so optimistic about the year to come!
(Also, because I don’t mention it here often enough, if you have’t yet joined our facebook group you’re really missing out! It’s becoming a tight-knit community, not to mention a valuable resource and for anyone looking for cooking tips and recipe inspiration. Join us, won’t you?)
2018 by the numbers:
Without further adieu, here are most popular posts from 2018 (be sure to click through to see all of them, including your favorites from this year, from all time, and the most popular images from Instagram!)
Your Favorites From This Year
These are the most popular posts published in 2018, based on total pageviews. I limited this group to only posts published this year, since total views across all posts is usually quite different (see the next category if you’re curious about that!)
1. Ultimate Chocolate Cake with Fudge Frosting / 2. Blue Moon Milk / 3. Out of This World Cocoa Brownies / 4. Soft Amaretti Cookies / 5. Blueberry Mousse Cakes with Mirror Glaze / 6. Homemade Elderberry Syrup / 7. Crunchy Peanut Butter and Chocolate Tart / 8. Cheesy Chicken Parmesan Pasta Bake / 9. Puff Pancakes
Most Viewed This Year
If we’re tracking pageviews on ALL posts, the lineup looks a wee bit different. In fact, only 2 of the 9 most popular posts were published this year. Go figure! A lot of these posts are regular features down in the Popular Posts section of the site if you visit with any regularity, you’ll probably recognize them.
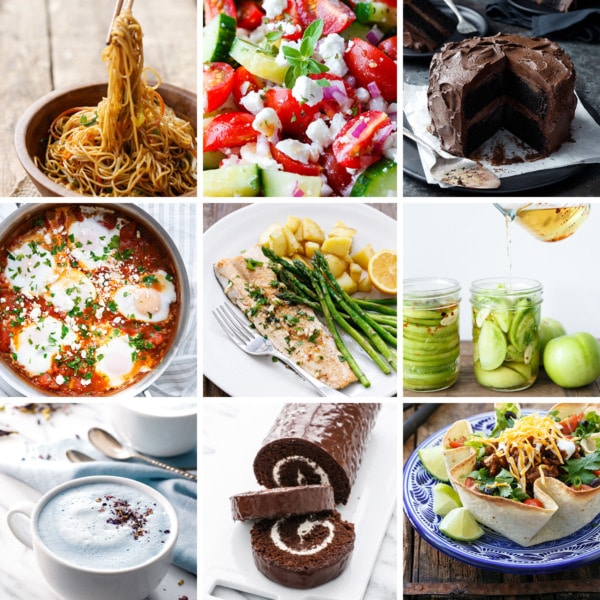
1. Soy Sauce Noodles / 2. Tomato Cucumber Salad / 3. Ultimate Chocolate Cake with Fudge Frosting / 4. Shakshouka / 6. Pan-Fried Trout with Garlic, Lemon & Parsley / 6. Pickled Green Tomatoes / 7. Blue Moon Milk / 8. Giant Swiss Cake Roll / 9. Beef Taco Salad
Instafavorites
It was a big year on instagram for me, finally finding my groove and figuring out what resonates with my audience there (hint: it’s 3’oclock chocolate). While savory recipes tend to have more long-term success on the blog, on Instagram, it’s all about the chocolate (and the amaretti, this year at least!)
1. Nutella Brownie Mousse Cake / 2. Nutella Brownie Mousse Cake (yes, this one nabbed both the #1 and #2 spots / 3. Salted Chocolate and Dulce de Leche Tart / 4. Raspberry Amaretti Cookies / 5. Ultimate Chocolate Cake with Fudge Frosting / 6. Chocolate Salt & Pepper Sable Cookies / 7. Soft Amaretti Cookies / 8. Pumpkin Cake Roll / 9. Triple Chocolate Cheesecake
****
Tell me, what was YOUR favorite recipe this year?
Here’s to a fabulous (and delicious!) 2019!
We are a participant in the Amazon Services LLC Associates Program, an affiliate advertising program designed to provide a means for us to earn fees by linking to Amazon.com and affiliated sites.
Decadent, no-bake, and so-easy chocolate truffle tart that you can enjoy into the New Year! It is grain-free, sugar-free, vegan, Paleo-friendly and keto-friendly--perfect for celebrating and sharing with friends!

Over the past few months, I've been sharing off-the-cuff recipes on instagram (which I save in highlights). This has primarily been because at the heart of cooking, I don't measure anything. Exact recipes aren't my thing (which may come as a surprise, given I've run this site for 10+ years). While I'm more than happy to help people out with a solid recipe, my passion for cooking is rooted in using my knowledge and senses to make a delicious meal.
This also comes in handy when I'm trying to use up odds and ends of what I might have left. And so, I created a series on instagram stories where I cook through a recipe I'm making up on the spot. And after the fact, I'll occasionally post the more successful ones on the site. That's where this red kuri squash comes into view.
Red Kuri Squash, not your pumpkin
In the realm of winter squash, those that do not need peeled reign supreme in my kitchen. Delicata, acorn (in some instances), and red kuri squash are my go-to varieties. This thin-skinned variety looks similar to a pumpkin with it’s orange outer shell. However, it’s better than pumpkin (and yes, those are fightin’ words).
Red kuri squash has a slightly sweeter flavor that is often compared to chestnut. I find the flavor to be a bit more robust. This, paired with the thin skin, make it a great ‘star of the show’ squash.
Can’t find red kuri squash? Go for delicata or peeled butternut squash. This roasted squash would also be delicious with sweet potatoes (you don’t have to peel those either!)
The heat: Chipotle
You can pick up chipotles in adobo sauce in most aisles that house all the good Mexican ingredients. However, if you can’t find those, a sprinkle of chipotle powder will work. You will need to add a bit extra oil (about ½ tablespoon or so) to accommodate for the wetness of the canned peppers.
An unexpected bean
Most of the time with these flavors you’ll find pinto beans or a softer bean. I love this meal because the chickpeas add texture and soak up all the flavors. You could swap in white beans or pinto beans, but the texture won’t be quite the same.
Add some grains
If you’re looking to bulk up this dish a bit more, add 1 to 1 ½ cups cooked grains. I’d prefer to go with a grain that has texture. Spelt, einkorn, or sorghum would be up there as top choices. All of these grains would pair well with the sweet flavor of the red kuri. Of course, you could always go with quinoa for quick cooking.
Go green
Finally, I love leftovers of this red kuri in salads. Simply toss with your favorite greens and a bit of lemon vinaigrette for an easy next-day/transform leftovers dish.
[tasty-recipe id="37586"] continue reading
The post Chipotle Red Kuri Squash with Chickpeas appeared first on Naturally..

I’ve been reading a lot of Pema Chodron’s writings about tonglen practice lately. One quotation of hers keeps sticking with me:
Tonglen practice (and all meditation practice) is not about later, when you get it all together and you’re this person you really respect. You may be the most violent person in the world—that’s a fine place to start. That’s a very rich place to start—juicy, smelly. You might be the most depressed person in the world, the most addicted person in the world, the most jealous person in the world. You might think that there are no others on the planet who hate themselves as much as you do. All of that is a good place to start. Just where you are—that’s the place to start.
It seems appropriate to digest those wise words right on the cusp of a new year, when even those of us who don’t do much to commemorate NYE get to thinking about endings and beginnings and starting new things.
Actually, though, the quote resonates retrospectively more than prospectively. Starting where I am—treating each new moment as an opportunity to approach life with a fresh perspective—is at the heart of the resilience I’ve been feeling in the last few weeks, as my hospital rotation wrapped up and I entered the holiday season.
When I was interviewing for DI programs, I was repeatedly told that the most crucial quality in a strong dietetic intern was resilience. It confused me at the time: I was expecting to hear about other traits, like critical thinking, clinical judgment, or empathy.
Now that my first 15 weeks of the DI program are behind me, I know why resilience kept coming up. The year demands constant change. A lot goes into doing the job well while one is at work, but what happens outside of the clinical workday itself—adjusting to new commutes and new communities of patients, being willing to work around each preceptor’s schedule, processing information quickly but thoroughly—is equally important. And it’s a test of flexibility more than anything else.
Flexibility, of course, is as far from being one of my inborn strengths as anything could be. It’s a deficit, actually, but I think the DI is helping me to build it up, little by little. A therapist told me long ago that I’d responded to a lot of stuff in my past by clinging to control, and that this would always be complicated for me, because control had (for better or for worse) become one of my strengths. It was true, and I’ve spent the last few years of my life working hard to release my grip, soften up, and move with the flow of things. It’s good for me, but I do feel robbed of a strength, not to mention frequently disoriented (“thrown out of the nest,” to use another Chodron expression).
Like anything else, it’s a work in progress. Sometimes I flow without trying to. Sometimes I can’t lighten up or loosen up at all, and the opportunity to tread lightly is in having a sense of humor about a clingy/grasping/reactive day. What feels really good is when I can move between these states quickly—in other words, when a craggy morning doesn’t necessarily become a proverbial “bad day.”
This was, I remember, such a huge struggle for me in ED recovery: flipping my experience around quickly, rather than writing a narrative about how it was going to be a bad day or a bad week because something ugly had happened with food. It took me a while, but I did get to the point where I could struggle midday but feel grounded, balanced, and sane by dinnertime. And, as with so many other things, the skills I learned in ED recovery are now being cultivated in other areas of my life.
The last few weeks of my hospital rotation where chaotic and messy. I felt powerful and competent sometimes, totally overwhelmed at others. In the past, each moment of mess would have gotten drawn out and intensified by my tendency to judge and agonize about struggle as its happening. With the DI in full swing, I didn’t have the time to get sucked into that kind of a vortex. I had to bounce back quickly from feeling tripped up, caught off-guard, or overwhelmed.
So I did. When things felt chaotic or messy or rough, I took a few minutes to breathe, to get into my body, to feel sensations. I invited myself to start over. And I invited myself to believe that resilience was possible. Sometimes it felt a little forced. It almost always felt like some version of “fake-it-till-you-make-it.”
But there’s a lot of wisdom in “fake-it-till-you-make-it”—or at least in having faith that repeated, small behaviors and actions can sometimes bring about inner change (rather than the other way around). I wasn’t always sure that I could shake off a heavy or anxious mood when I invited myself to take a deep breath and move forward as if I could. Most of the time, though, it worked.
I’m now inviting myself to believe that this experience of resilience can stay with me outside of the DI—through early January, and then moving beyond next summer. I’ll proceed as if it can, and it will. And as a new year gets underway, what I wish for myself—what I wish for any person who needs it—is faith that each new moment, each new breath, is a chance to begin again. New beginnings don’t have to look any particular way, and they don’t require preparatory self-improvement. They’re an evergreen possibility, and they can take all sorts of tiny, everyday shapes.
As 2019 begins, I’m celebrating any and all opportunities to see and do things differently. And I’m giving thanks for all of the goodness in my life that abides—friends, family, food, and especially my body. I wish you all light, joy, and continual moments of starting anew—on New Year’s Eve, and always.
And now, some recipes and reads!
Recipes
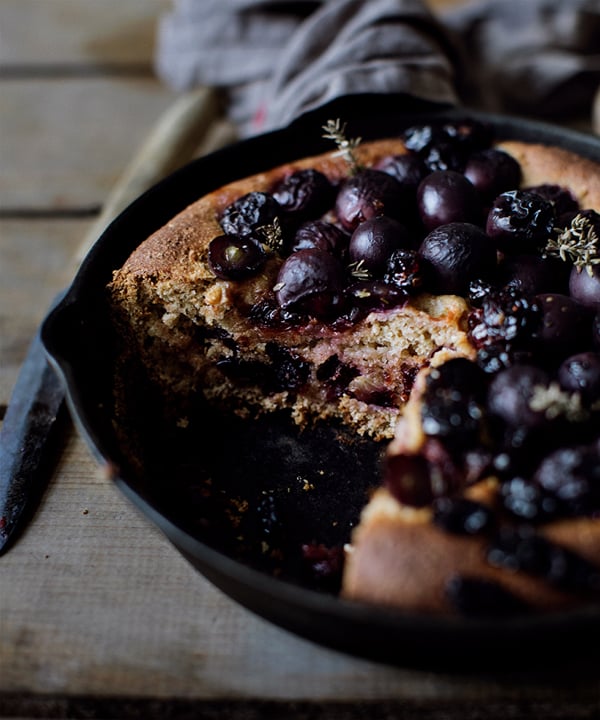
What a beautiful concord grape bread, perfectly veganizable with non-dairy milk.
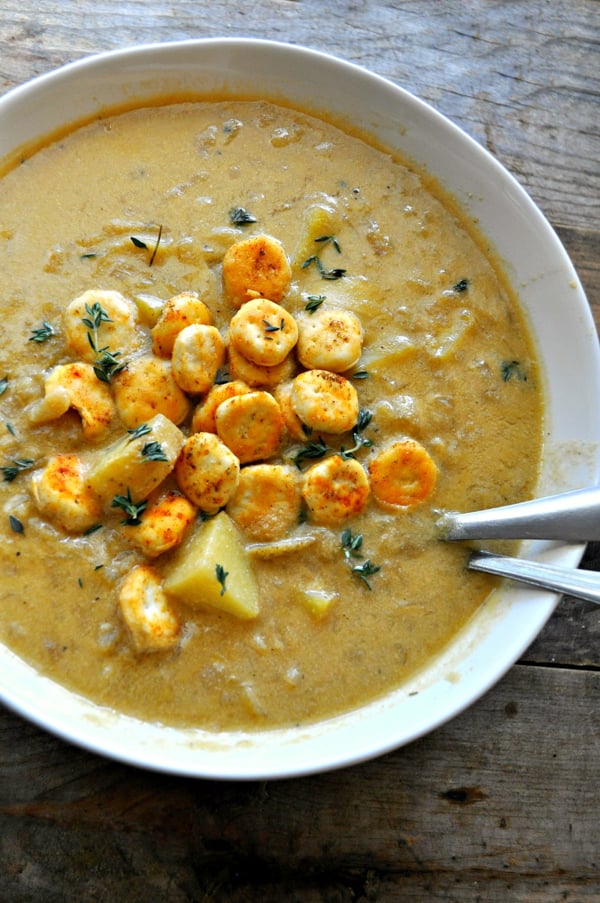
I’m all about cozy winter recipes like this right now: an old-fashioned vegan French onion chowder.
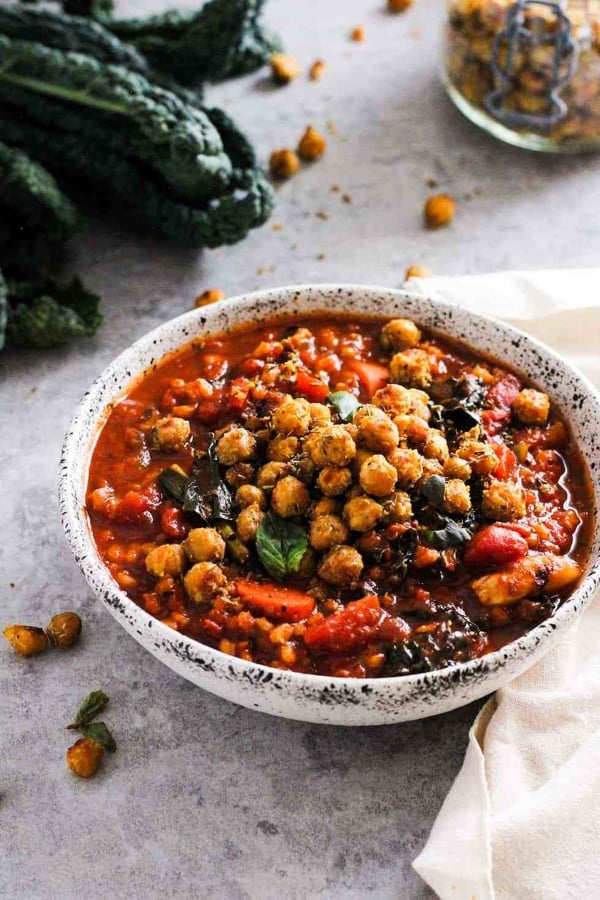
More soup! Tomato barley with all of the cheesy roasted chickpeas.
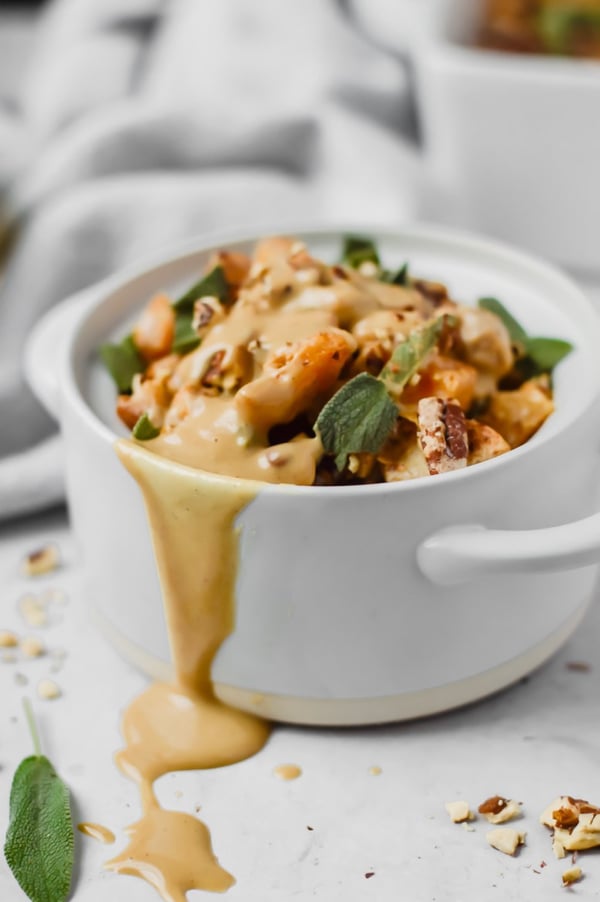
And now, for some baked goodness, starting with this cozy and creative maple dijon butternut sage & apple bake.
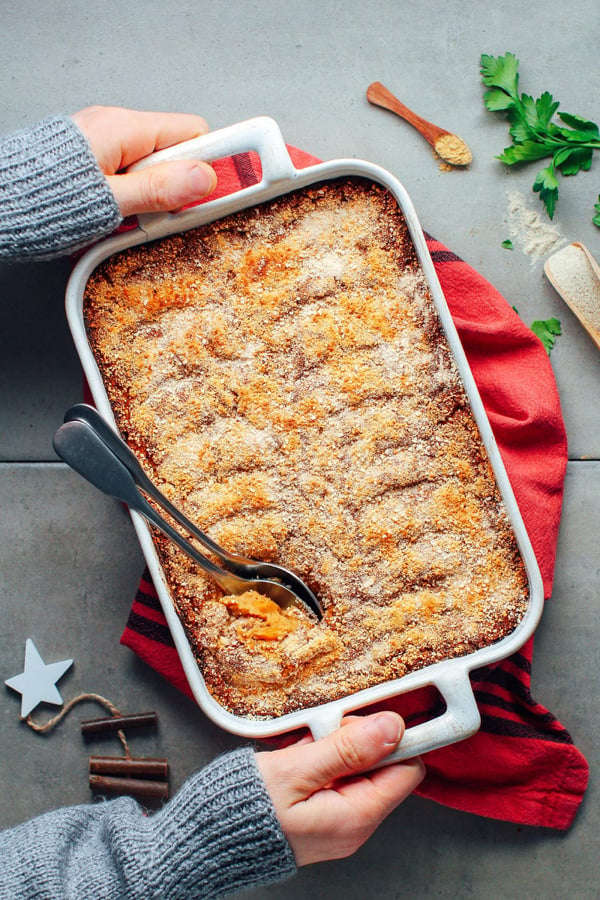
Finally, a lovely vegan winter centerpiece from the talented Thomas: Finnish rutabaga gratin.
Reads
1. HDL cholesterol is regarded as the “good” cholesterol, and a strong body of evidence shows that very low levels HDL are actually associated with an increased risk of heart disease. A new study, though, suggests that very high levels of HDL might also be problematic, which means that the relationship between HDL and cardiovascular disease risk is what’s known as a “U-shaped” pattern. This Scientific American blog discusses the interesting findings!
2. One of the most painful, yet often under-discussed consequences of having childhood cancer and cancer treatment is that fertility can be permanently altered. A new cryopreservation procedure—freezing whole parts of an ovary, rather than individual eggs—may give childhood cancer patients hope. The Guardian shares details.
3. On the topic of cancer and other chronic illnesses, The Boston Globe profiles doctors who are working on earlier, more precise detection methods for disease diagnosis.
4. This fall, I witnessed firsthand how important palliative care is for those who need it. As this Washington Post article makes clear, many people in this country can’t access palliative care because it’s unavailable or uncovered by insurance. The piece gives exposure to a really important healthcare topic.
5. Also from the Washington Posta great perspective on how people can better prepare themselves for the challenges of behavior change. I love the author’s differentiation between adopting a habit vs. building a life skill—I tend to think that most changes with food and nutrition fall into the latter category, which is why robust support and patience is so necessary for them to happen!
Happy New Year’s, a little early, friends. Sending love. And may all beings living be happy and free.
xo
The post Weekend Reading, 12.30.18 appeared first on The Full Helping.

 </a
</a