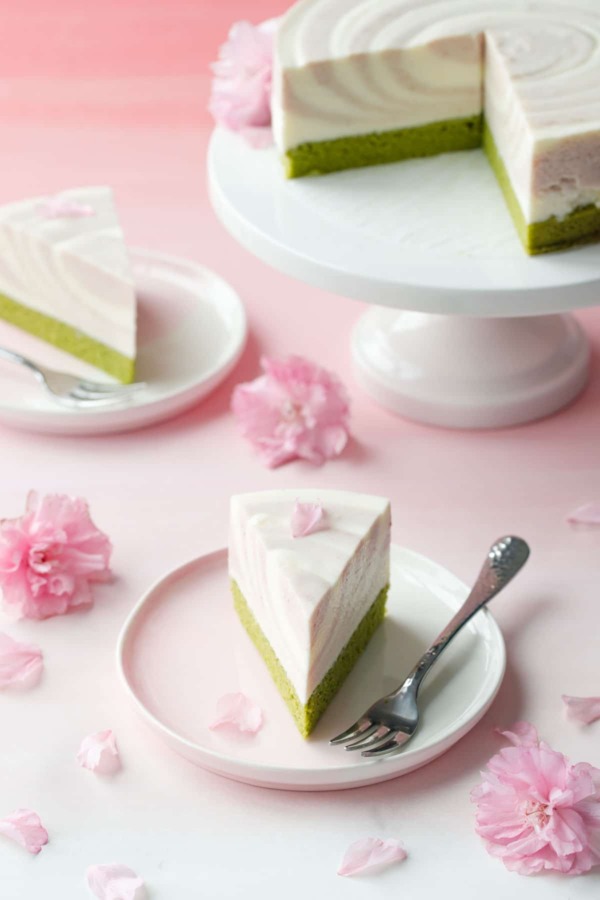
The sweet embodiment of spring, this sakura matcha mousse cake features a delicate cherry blossom and matcha-scented sponge cake topped with a cloud-like mascarpone mousse. It’s an impressive cake to behold, but surprisingly easy to prepare, making it the perfect recipe for easy entertaining.
Trying to describe the flavor of sakura or cherry blossom is like trying to catch a pale pink petal drifting in the spring breeze. It’s not overly perfumed like rose or orange blossom, rather more sensuous, almond and apricot and a subtle hint of holiday spice. However you describe it, it’s a flavor that pairs beautifully with the grassy notes of matcha green tea, which is exactly what I’ve done here.
The first time I tried to make this cake I envisioned a transparent pink layer of gelatin on top of the cake with preserved cherry blossom flowers suspended within like dragonflies in amber. Something like this gorgeous cherry blossom cheesecake but with a sponge cake base and mousse filling more like this (can you tell I’ve been down the rabbit hole of Japanese desserts on YouTube?)
Cool idea, right?
Well, sometimes ideas are better off in the abstract.
Because when I actually went to pour on the gelatin, it A. did not stay clear, stirring up the top of the mousse and becoming cloudy as a result; and B. didn’t stay on top of the cake. Instead, it somehow ended up on the bottom, underneath the sponge cake layer (how, I still can’t quite fathom). Granted, when I cut into it it was actually quite pretty, but the top looked a hot mess and as it turns out, the gelatin layer was weirdly salty anyway and the cake tasted better without it.
So I opted to simplify, using only the sponge and mousse layers and cutting out the gelatin layer entirely.
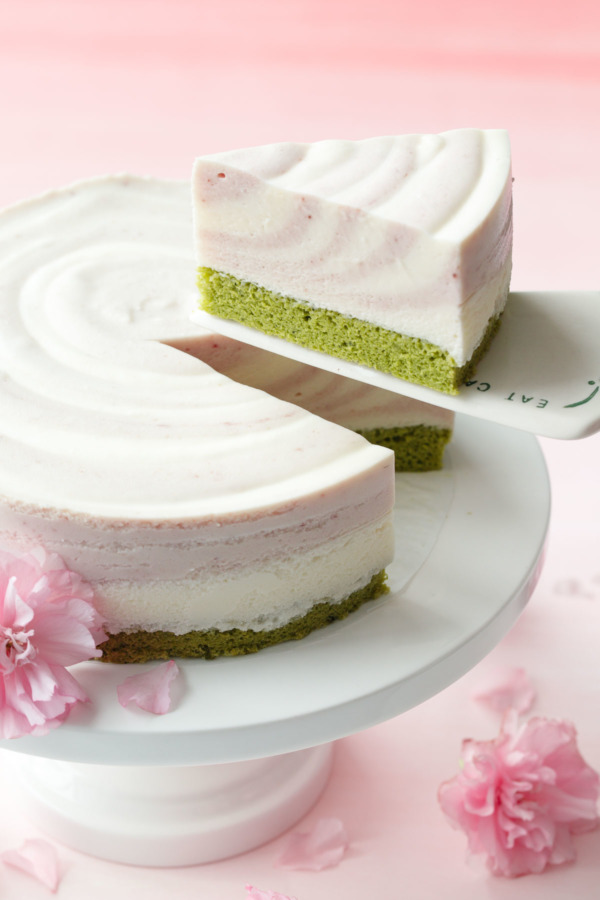
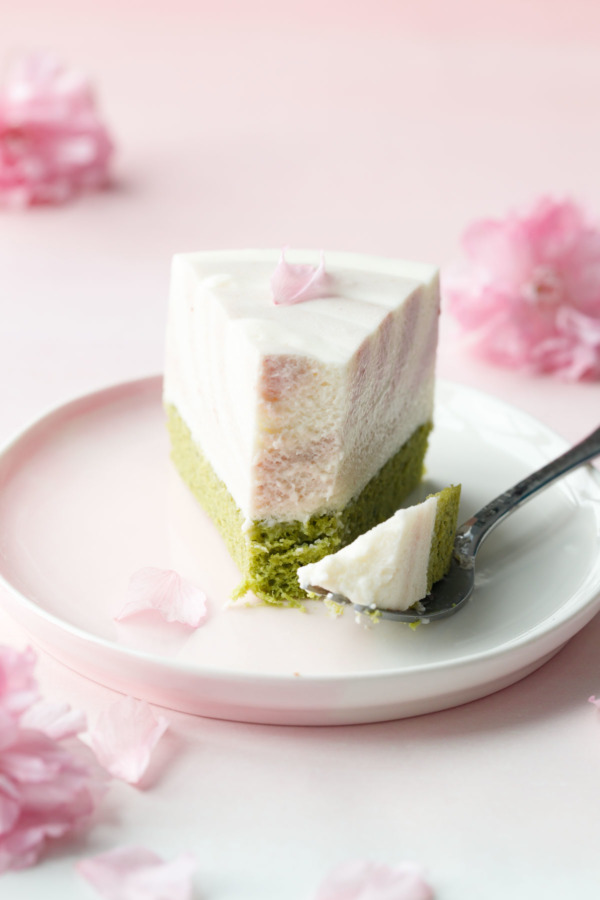
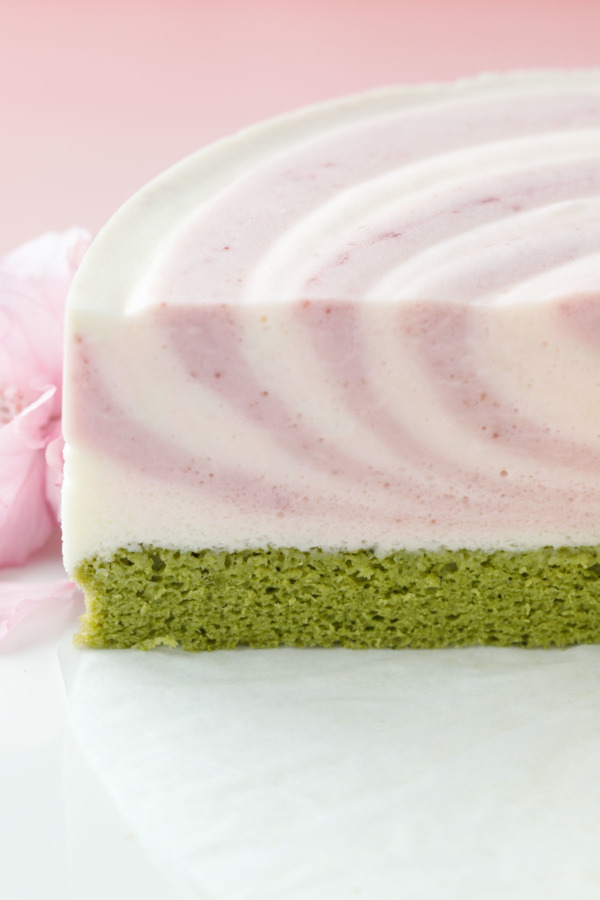
The result is simple and yet stunning, something you can easily throw together ahead of time and serve at your next gathering for show-stopping results. The zebra stripe effect is achieved by coloring half of the mousse with cherry puree and spooning it into the cake mold in alternating concentric circles.
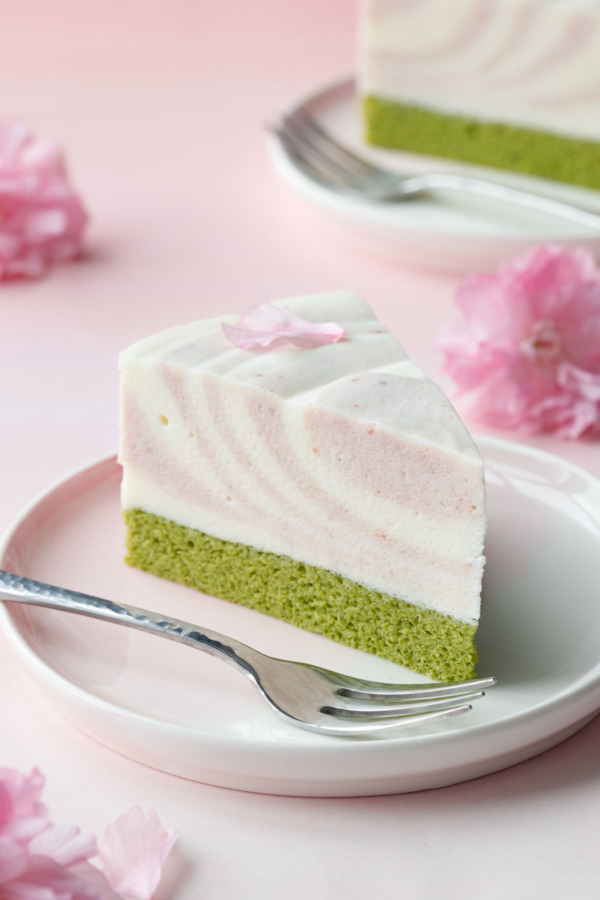
Most of the flavor is concentrated in the cake. Infused with matcha and sakura leaf powder (the leaf of the cherry tree is the most flavorful part, moreso than the blossoms, if you can believe it!) it is a feast for the senses. I’m really in love with this cake, so don’t be surprised if you see it again (I’m thinking… matcha cake roll, perhaps?)
The mousse is a cloud of subtle sweetness. The mascarpone adds a hint of tang to offset the sweetness, without overpowering (this doesn’t taste like cheesecake). I opted not to add any additional flavorings or extracts to the mousse beyond a hint of vanilla to ensure the flavors in the cake layer sat confidently in the front row of the flavor theater.
I did add a tablespoon or two of fresh cherry purée for color, you really can’t taste any cherry in the final product. The color is very subtle, reviewing these photos I find myself wishing I would have added a drop of two of pink food coloring to enhance the striped effect. But it’s still pretty nonetheless.
This was my first time using sheet gelatin, which, according to most professional pastry chefs, is far superior to powdered gelatin (that said, you can use powdered here as well, 1 sheet = about 1 teaspoon powdered gelatin). Sheet gelatin needs to be softened first, which I did by cutting it into strips and soaking in cool water for 5 minutes. Then pick up the gelatin with your hands and squeeze out all the excess water. Add the softened gelatin to the warm milk and whisk until it’s completely dissolved.
I assembled my cake in a 6″ cake ring with an acetate cake collar around the edge for easier removal. A springform pan or a cake pan with a removable bottom works as well, though I still recommend using the acetate so the outside of your cake retains picture perfect layers.
=
Double the recipe to adapt this for an 8″ cake and bake your sponge cake in a jelly roll pan; a 9″ springform pan would technically work too, you’ll just end up with a proportionally thinner layer of mousse.
While it seems logical, I don’t recommend baking the cake itself in the same cake or springform pan you’ll use for assembly, as the spongecake does have a tendency to shrink around the edges, which will affect the appearance of the cake on the outside. By baking the sponge cake in a larger square pan, you can cut out a round of cooled cake to the exact dimensions of the pan, ensuring the layers are perfectly sized and flush with the edges.
The leftover scraps? Well, let’s just say they make a great snack after all that hard work.
Sakura Matcha Mousse Cake
Yield: 1 6-inch cake (about 8-10 servings)
Cook Time: 30 minutes
Total Time: 12 hours
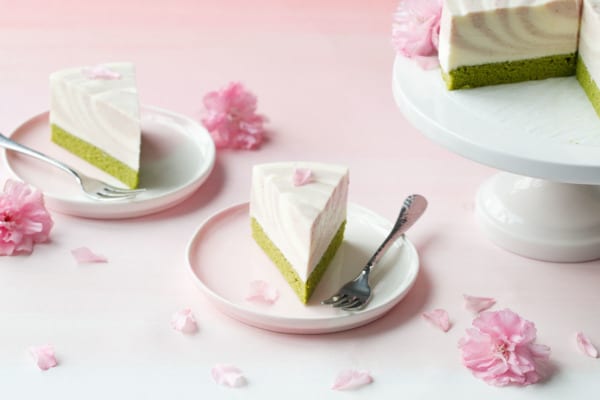
The perfect springtime dessert, this sakura matcha mousse cake features a delicate cherry blossom and matcha-scented sponge cake topped with a cloud-like mascarpone mousse.
Ingredients:
For Matcha Cake:
- 2 large eggs, separated
- 3 tablespoons granulated sugar
- 1 tablespoon vegetable oil
- 2 teaspoons matcha powder
- 1 teaspoon sakura leaf powder
- 3 tablespoons whole milk
- 3/8 cup (1.5oz/40grams) cake flour, sifted
- 1/4 teaspoon fine sea salt
For Mousse:
- 2 1/2 sheets gelatin (substitute 1 packet powdered gelatin)
- 1/4 cup whole milk
- 1/2 cup mascarpone cheese, at room temperature
- 1/3 cup granulated sugar
- 3/4 cup heavy whipping cream
- 1 teaspoon vanilla extract
- 2-3 tablespoons strained cherry purée (you can also use food coloring if you prefer)
Directions:
- Preheat oven to 350 degrees F. Lightly oil an 8-by-8-inch square baking pan; line with with parchment paper (leaving a parchment overhang on two of the edges) and lightly oil parchment.
- Whisk egg yolks with half of granulated sugar until smooth and barely lightened in color. While whisking, slowly drizzle in oil until evenly incorporated.
- Combine matcha and sakura powders in a small bowl. Drizzle in about 1 tablespoon milk and whisk to dissolve powder. Slowly add more milk, slowly whisking until smooth. Add to egg yolk mixture and mix until smooth. Sift over cake flour and salt and fold until completely incorporated.
- In a mixing bowl, whip egg whites using an electric mixer until frothy. Add remaining granulated sugar and continue to beat until whites hold very soft peaks.
- Spoon about 1/3 of whipped egg whites into batter and stir to lighten. Add batter to bowl with the remaining egg whites and fold until incorporated, scraping the bottom and sides of the bowl with a large rubber spatula to ensure there are no stray streaks of egg white.
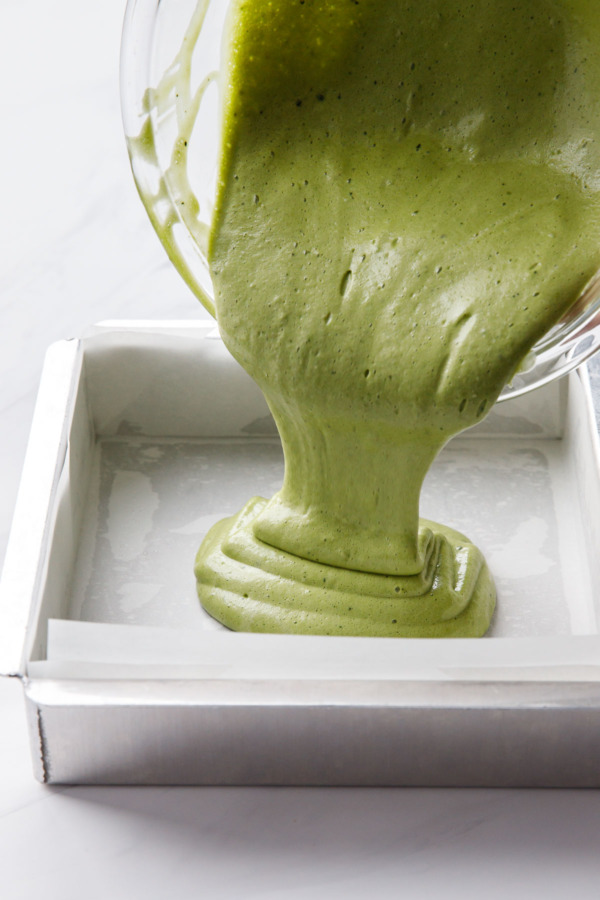
- Pour batter into prepared baking pan, spreading into an even layer. Drop the pan a few times a few inches from the counter to get rid of any large air bubbles and to level out the top.
- Bake for 13 to 15 minutes or until a toothpick inserted near the center comes out clean. Remove from oven, then use the parchment overhang as handles to lift the entire cake out of the baking pan and place on a wire rack. Peel back parchment from edges and let cool completely.
- Cut out a 6-inch round of cake to fit your cake ring (you can also use the cake ring basically as a giant cookie cutter). With cake nestled inside cake ring, line the inside of the ring with acetate. If your cake ring is at least 3″ tall you can technically skip the acetate, although it does make removing the cake much easier.
- To make the mousse layer, cut gelatin into strips and place in cool water to soften. If using powdered gelatin, sprinkle over 1 tablespoon cool water and allow to bloom.
- Heat milk in the microwave until steaming. Grab the softened gelatin with your hands and wring out any excess water. Add to hot milk and whisk until completely dissolved. For powdered gelatin, add bloomed gelatin to hot milk and whisk until melted.
- Place room temperature mascarpone in a mixing bowl. Add warm milk-gelatin mixture and sugar and whisk until smooth and no chunks are visible and sugar is dissolved. Mix in vanilla.
- In a mixing bowl, whip cream with an electric mixer until the top shows texture, but it doesn’t yet hold soft peaks. Add about 1/3 of whipped cream to mascarpone mixture and stir to lighten, then add back to bowl with remaining whipped cream. Just like you did for the cake, fold to fully incorporate the whipped cream, scraping the bottom and sides of bowl as needed.
- Transfer half of the whipped cream mixture to another bowl, and mix in cherry purée or food coloring as desired.
- To achieve the striped effect, scoop about 1/3 cup (I used two large cookie scoops worth) of white mousse onto the center of the cake in the cake ring. Then drop 1/3 cup of the pink mousse into the center of the white batter. Repeat, dropping scoops of alternating colored batters onto the center of the previous scoop, essentially making a bullseye of concentric circles. After 4 or 5 scoops, reduce the quantity of batter per scoop to about 3 tablespoons or half of a third cup, one large cookie scoop (the stripes towards the center of the cake require less better per stripe).
- Refrigerate cake until set, at least 3 hours or overnight.
- Prior to serving, place cake on a serving plate and remove cake ring and acetate (if you skip the acetate, it might help to warm the outside of the cake ring with a hair dryer to help release the mousse). Slice using a hot knife for perfect, clean slices. Keep refrigerated for up to 3 days.
Did you make this recipe?
Let us know what you think!
Leave a Comment or share a photo on Instagram with the hashtag #loveandoliveoil.
We are a participant in the Amazon Services LLC Associates Program, an affiliate advertising program designed to provide a means for us to earn fees by linking to Amazon.com and affiliated sites.

0 comments